How to draw a carrot was one of those simple little drawing ideas that completely surprised me.
I remember sitting at my desk one afternoon, sketchbook open, coffee slowly getting cold next to me, wondering what I should draw that felt easy but still fun. I didn’t want anything complicated. I just wanted that calm, creative flow where your pencil glides across the page and you forget about everything else.

That’s when I decided to try a carrot drawing.
And honestly? It made me smile more than I expected.
If you’ve ever felt stuck thinking, “I want to draw something cute, but I don’t know what,” this tutorial is for you. I know how frustrating creative block can feel. I’ve been there. But learning how to draw a carrot is a perfect small win. It’s simple, playful, and surprisingly satisfying.
Let me show you exactly how I approach it.
Why Start With A Carrot Drawing?
You might be thinking… a carrot? Really?
Yes. Really.
Here’s why I love starting with a carrot drawing when I want something:
- Quick to sketch
- Easy shapes
- Perfect for beginners
- Great for kids and adults
- Super cute when finished
The base is just a soft oval shape. The leaves are rounded and forgiving. The texture lines are loose and organic. There’s no pressure to be perfect.
And if you’re learning how to draw a carrot, you’re also practicing:
- Basic shape construction
- Overlapping forms
- Simple line details
- Light shading
It’s small, but it builds confidence.
Step 1: Draw The Carrot Base Shape
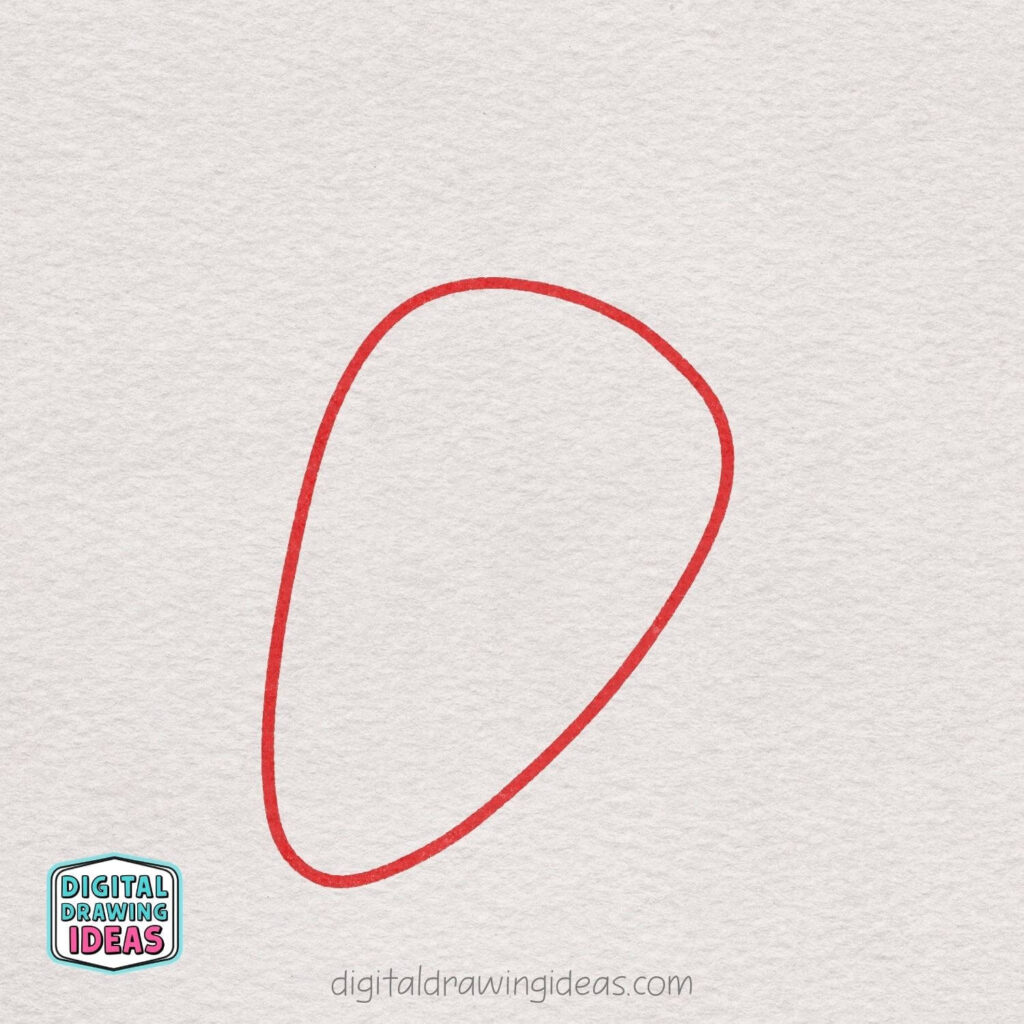
Start by drawing a slightly tilted oval shape — think of it like a soft, stretched egg.
Make the top a little wider and round, and gently narrow it as you go down. Don’t worry about making it perfectly symmetrical! A slightly uneven shape will actually make your carrot look more natural and cute.
Keep your lines smooth and light, and remember — this is just the base. We’ll add all the fun details in the next steps!
Step 2: Add The First Leaf
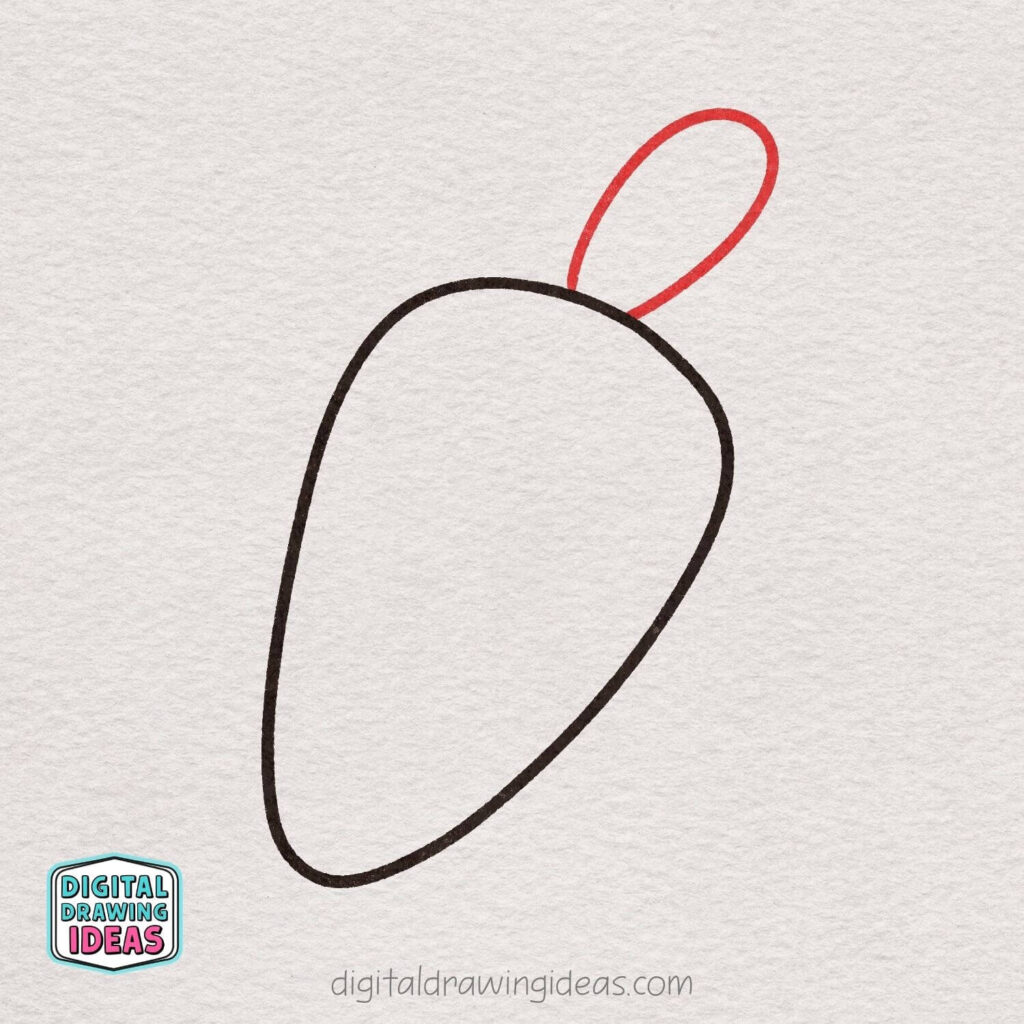
Now let’s give your carrot its very first leafy top!
Draw a small oval shape coming out from the top of the carrot. Let it tilt slightly to one side to make it look more playful and natural.
Keep the shape smooth and rounded. This will be the first little leaf, and we’ll add more soon to make it nice and full!
Step 3: Draw The Second Leaf
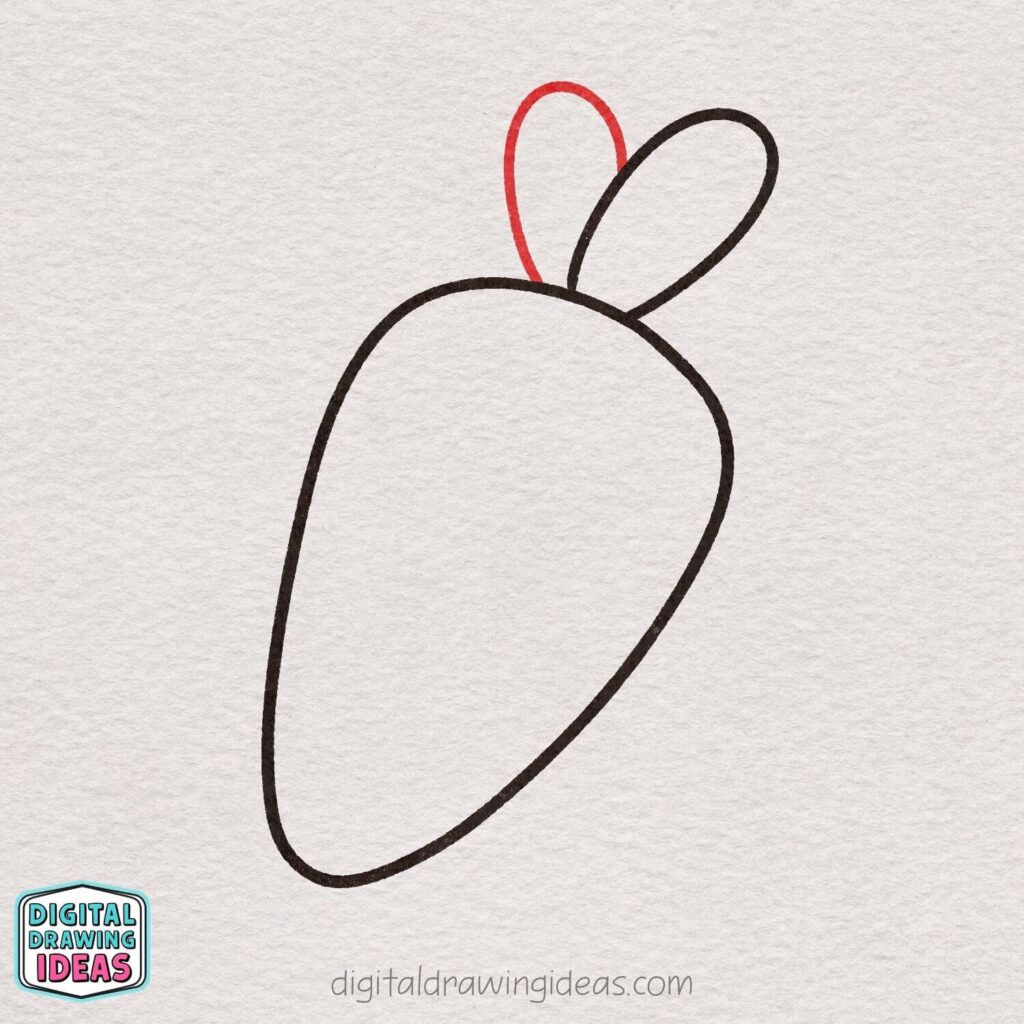
Let’s make the top a little fuller!
Right next to the first leaf, draw another rounded oval shape. This one can lean slightly in a different direction so the leaves don’t look identical. Overlapping them a little will make the carrot top feel more natural and layered.
Great job — your carrot is already starting to look lively! We’ll keep adding more leaves next.
Step 4: Add The Third Leaf
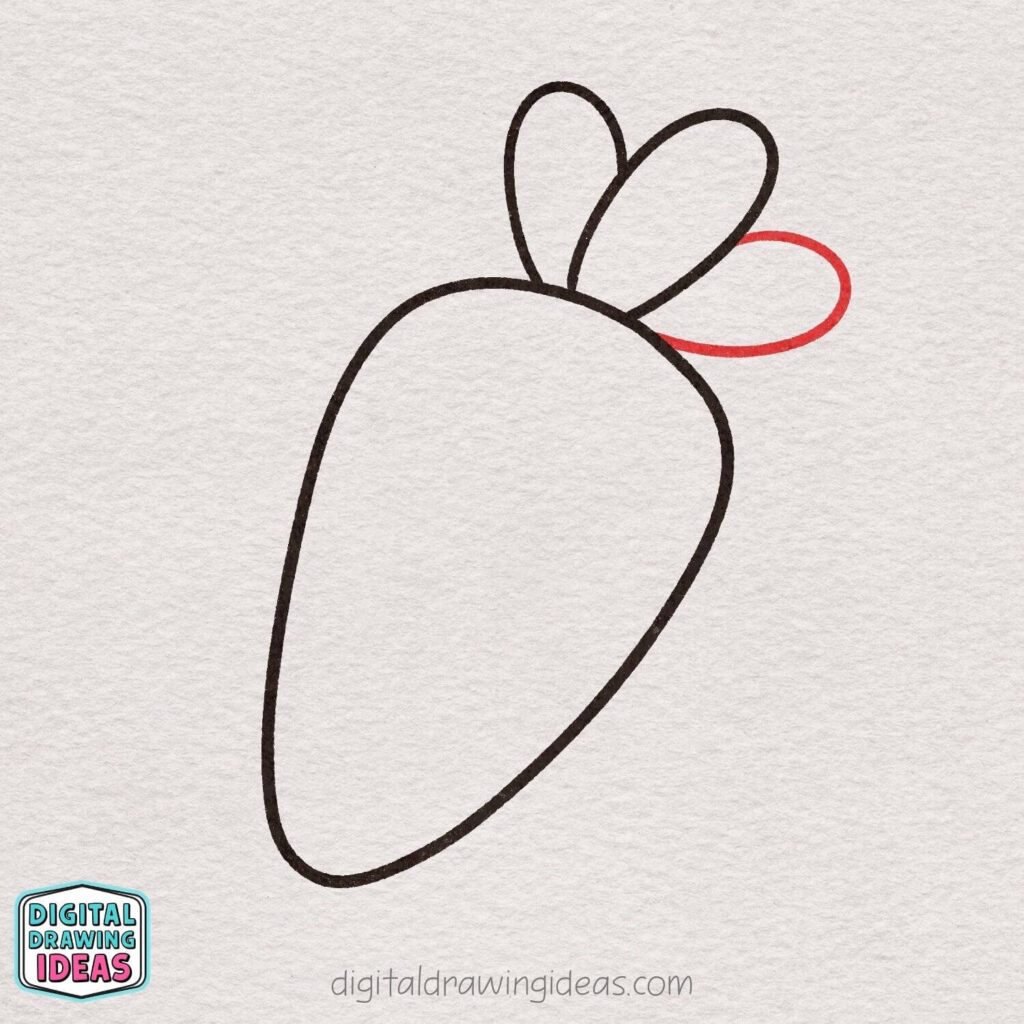
Your carrot top is growing nicely!
Now draw another rounded leaf shape on the other side. Let it spread outward a bit so the top looks balanced and full. Don’t worry if it overlaps slightly — that actually makes it look more natural.
You’re doing great! Just one more leaf and the carrot top will be complete.
Step 5: Draw The Final Leaf
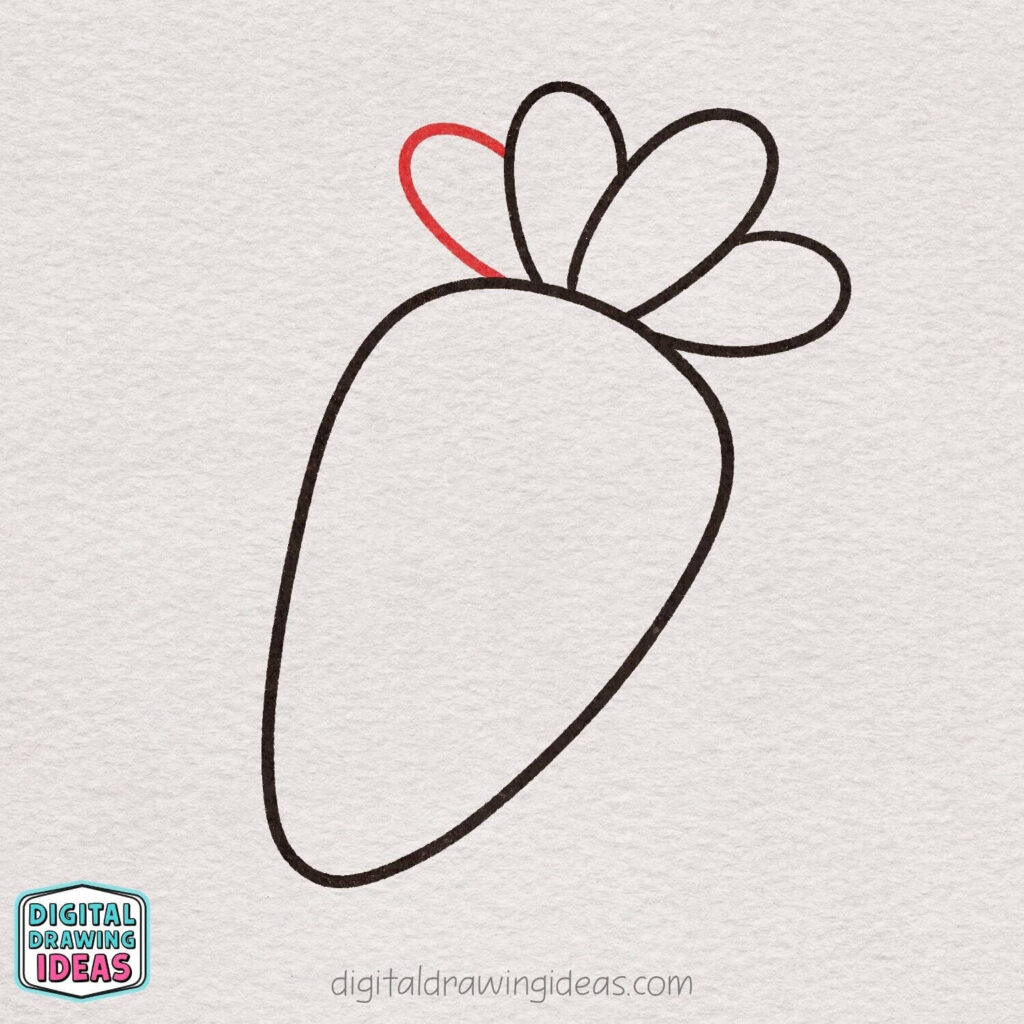
Time to complete the leafy top!
Add one more rounded leaf shape behind the others. Let it peek out from the back so the carrot looks full and fluffy on top. Vary the angle slightly so each leaf feels unique and natural.
Awesome work! Your carrot now has a beautiful, full set of leaves. Next, we’ll start adding the fun little details to the carrot body.
Step 6: Add The Leaf Details
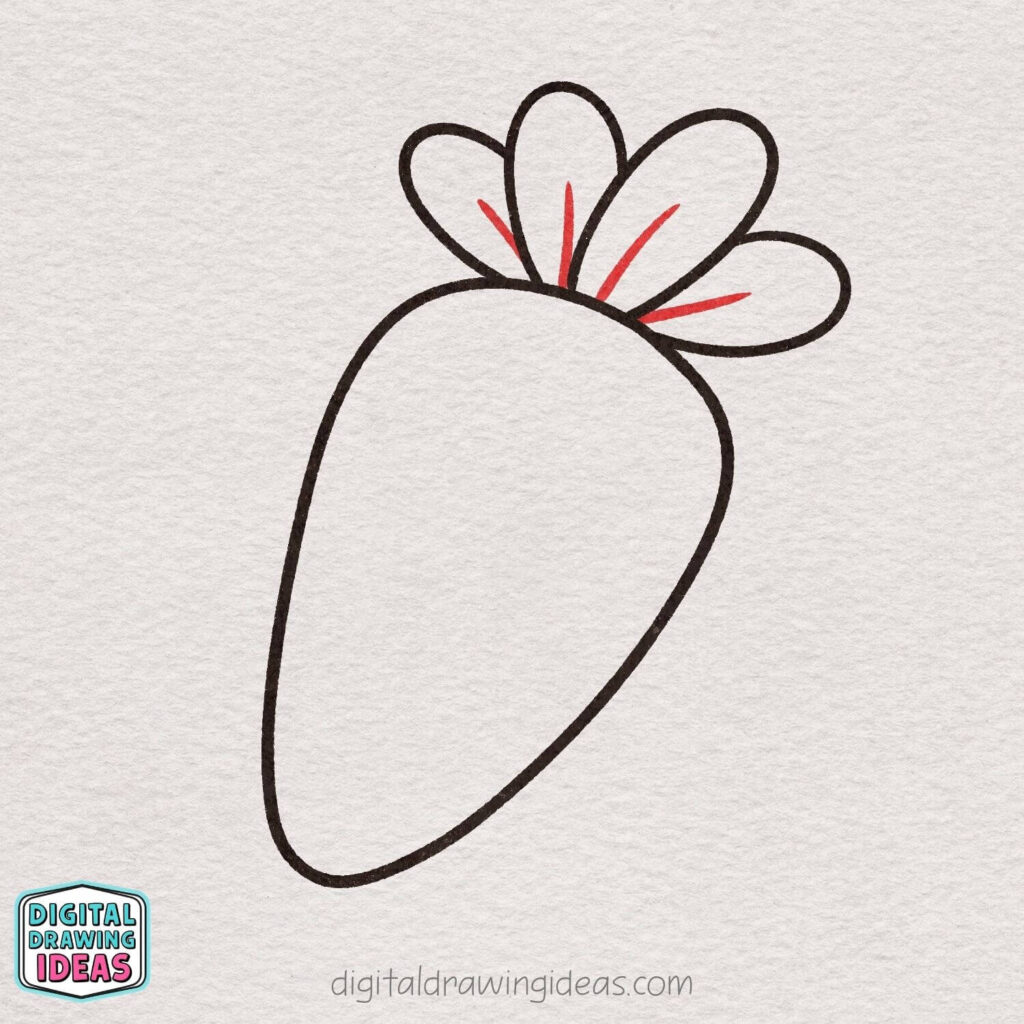
Now let’s give the leaves a little texture!
Draw a few simple lines inside each leaf, starting from the bottom where they connect to the carrot and going outward. These lines should be slightly curved and spread out like tiny veins.
Keep them light and simple — just a few strokes are enough to make the leaves look more lively and detailed.
Beautiful! Your carrot top is starting to look extra cute and realistic.
Step 7: Add Texture To The Carrot
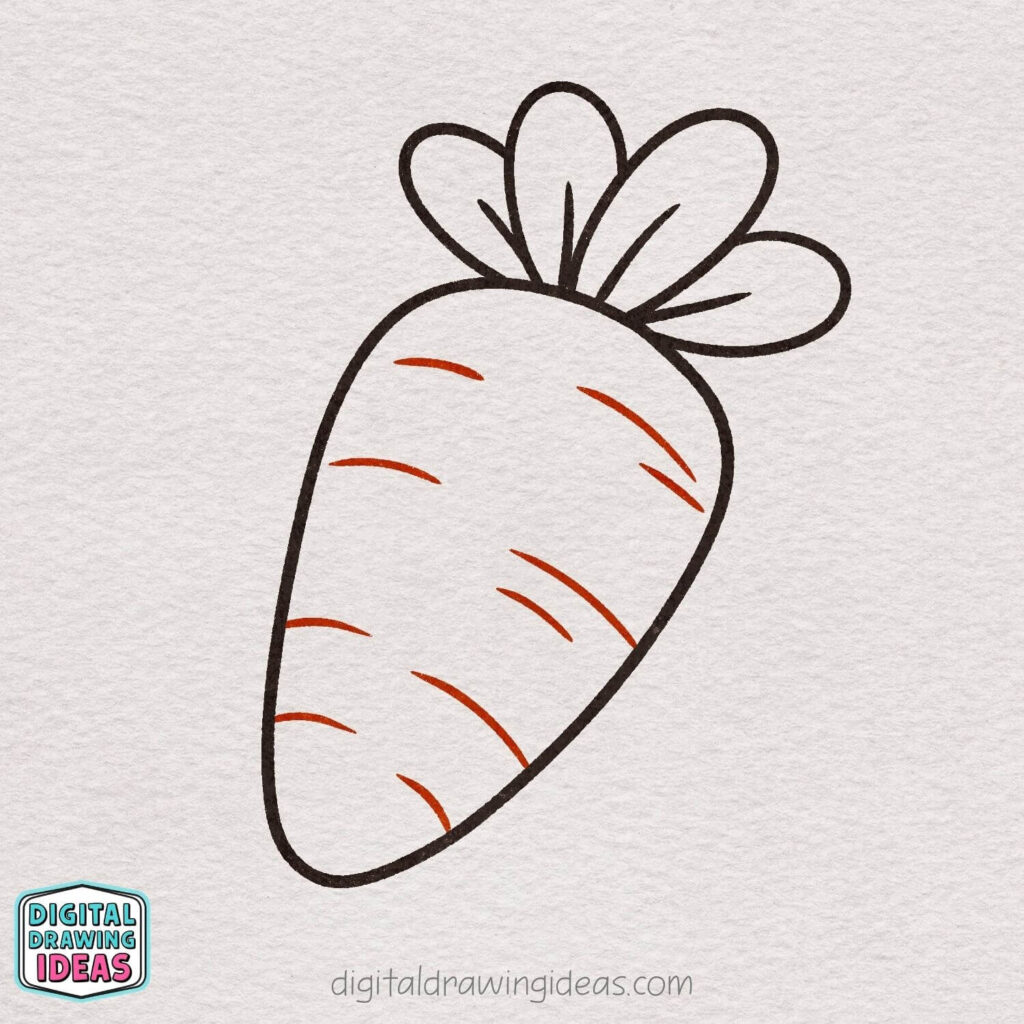
Now let’s give the carrot some character!
Draw a few short, slightly curved lines across the carrot body. Space them out and vary their length so they don’t look too uniform. These little lines represent the natural texture of a carrot.
Keep them soft and simple — just enough to make the carrot look detailed without overcrowding it.
Amazing! Your carrot is almost finished. In the final step, we’ll bring it to life with color.
Step 8: Color Your Cute Carrot
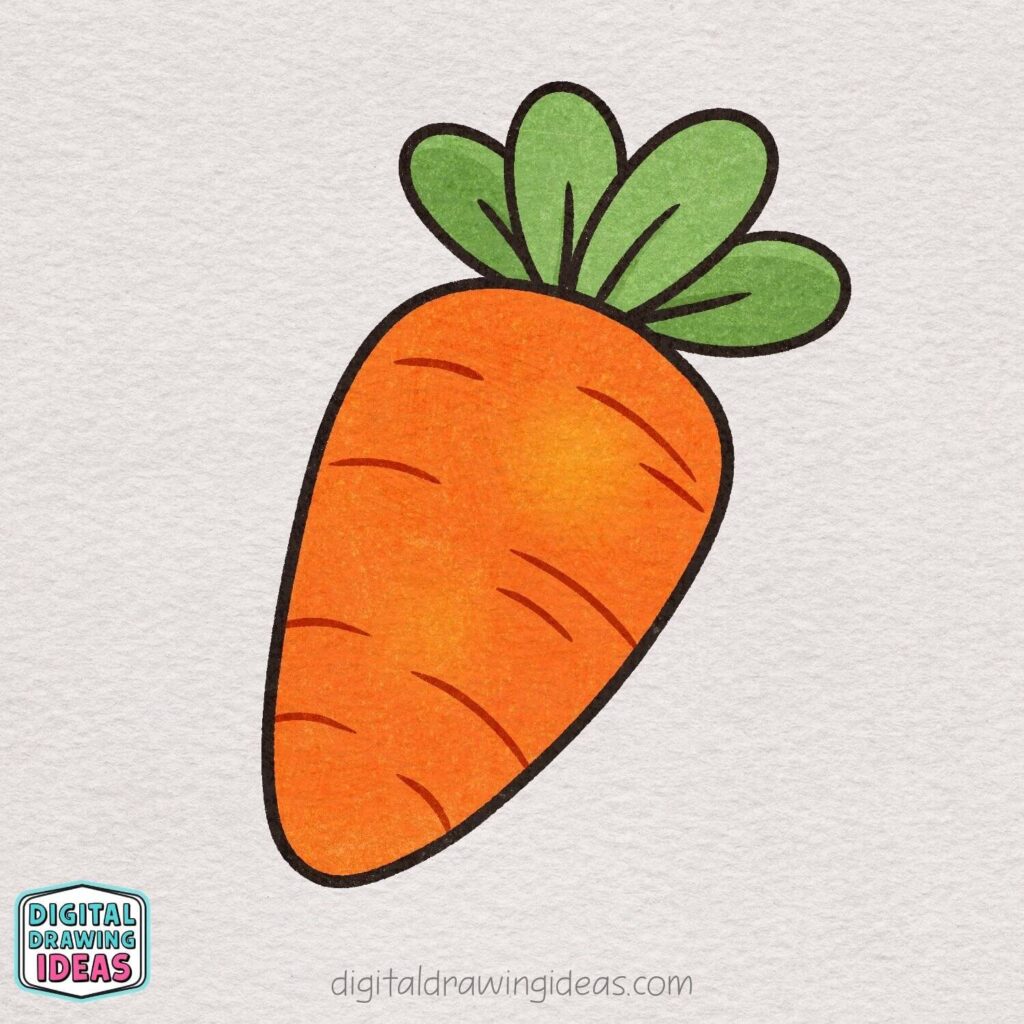
Time to bring your carrot to life with color!
Fill in the carrot body with a bright orange. You can add a slightly darker shade along the edges and a lighter tone in the center to create a soft, blended look. This will make your carrot feel more round and vibrant.
Color the leaves with a fresh green. Just like the carrot, you can add a little darker green near the base and lighter green toward the tips for extra depth.
And that’s it — you’ve drawn an adorable carrot! Great job following all the steps. Keep practicing and have fun creating more cute drawings!
Common Beginner Struggles (And How To Fix Them)
When people tell me they struggle with carrot drawing, it’s usually one of these:
“My carrot looks too stiff.”
Try tilting the base shape slightly. A little angle makes everything more dynamic.
“My leaves look identical.”
That’s okay. But if you want more natural movement, vary the direction and overlap them slightly.
“My texture lines look messy.”
Keep them short and curved. Space them out. Less is more.
I’ve made all of these mistakes myself. My early carrot sketches were… let’s just say, very enthusiastic but not very elegant. And that’s part of learning.
The more you practice how to draw a carrot, the more natural your lines become.
If You Loved This, Try These Next
If you enjoyed this carrot drawing, I think you’ll love these tutorials too:
- How to draw a chicken: Cute Chicken Drawing Tutorial
- How to draw a pig: Cute Pig Drawing Tutorial
- How to draw a flower: Easy Tulip Drawing Guide
Each one uses the same beginner-friendly approach.
Simple shapes first.
Details second.
Color last.
And suddenly you have something adorable.
Watch The Full Drawing Process
If you prefer seeing the process in action, I share full tutorials and short drawing videos on my YouTube channel:
Visit my channel here: Digital Drawing Ideas on YouTube
Sometimes watching the lines form in real time makes learning how to draw a carrot feel even easier.
Let’s Stay Inspired Together
I share daily drawing ideas and step-by-step tutorials over on Pinterest too:
Follow here: Digital Drawing Ideas on Pinterest
I save inspiration, sketch prompts, and cute drawing ideas you can try anytime you feel stuck.
Final Thoughts: Small Drawings, Big Joy
Learning how to draw a carrot might sound tiny. But small creative habits add up.
Every simple carrot drawing you make strengthens your confidence. Every finished sketch reminds you that you can create something from nothing.
And I truly believe creativity grows through consistency, not perfection.
So here’s my little challenge for you:
Draw this carrot.
Then draw it again tomorrow.
Then turn it into a sticker.
Or add a tiny face.
Or create a whole vegetable collection.
And when you do, I would absolutely love to see it.
Tag me on Instagram @digitaldrawingideas
Share your version on Pinterest
Tell me in the comments what you want to draw next
I know this will be helpful for you because I’ve been exactly where you are — wanting something simple, calming, and cute to draw.
Now you know how to draw a carrot.
And you’re just getting started.

