How to draw a cupcake was one of those ideas that kept popping into my sketchbook every time I wanted to draw something cozy, simple, and guaranteed to make me smile.
There’s just something about cupcakes: soft frosting, playful sprinkles, and that little cherry on top that instantly puts you in a creative mood.
I know how frustrating it can feel when you want to draw something cute, but your lines don’t look “right,” or the drawing gets complicated way too fast. I’ve been there too.
That’s exactly why I love breaking drawings down into small, friendly steps that feel doable, even if you’re just starting out.

This how to draw a cupcake tutorial is designed to be relaxing, not stressful. No pressure, no perfect lines required. Just simple shapes, soft curves, and a drawing process you can actually enjoy.
And yes, this cupcake drawing is based on my own sketches. I drew it the same way I draw when I just want to unwind with a pencil and paper.
If you’ve ever thought:
- “I want to draw something cute, but I don’t know where to start”
- “My drawings never look as soft and playful as I imagine”
- “I wish drawing felt more fun and less intimidating”
Then you’re in the right place. Grab your pencil, and let’s draw together.
Step 1 – Draw the Cherry Stem
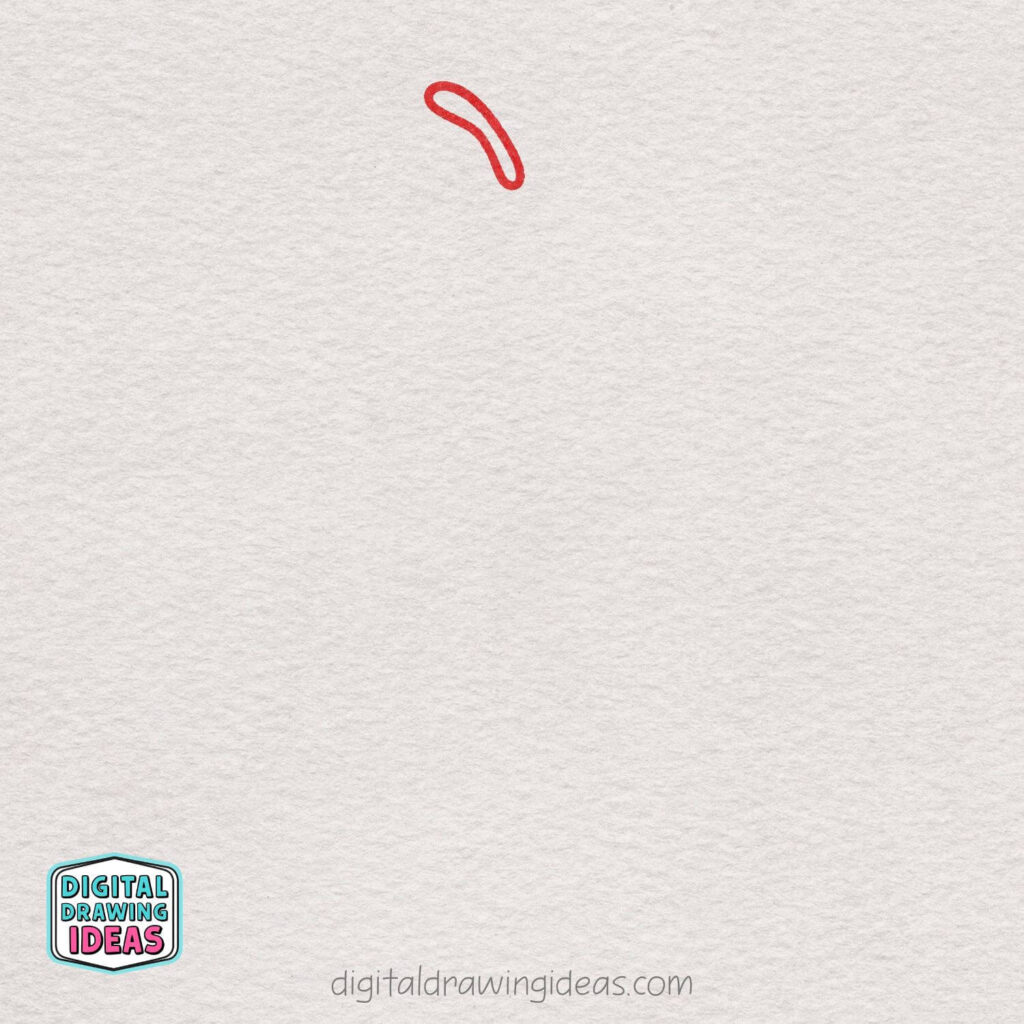
Start at the very top of your page and draw a small, curved shape like a soft hook or a bent line.
This will be the stem of the cherry, so keep it simple and slightly rounded at the ends.
Don’t worry about making it perfect — a little wobble makes it look cute and hand-drawn.
Place it gently leaning to one side to give the cupcake a playful look.
Step 2 – Add the Cherry Shape

Just below the stem, draw a simple round shape to form the cherry. Keep the circle slightly imperfect — a soft, hand-drawn look makes it extra cute.
Make sure the stem connects naturally to the top of the circle.
This round shape will be the main body of the cherry sitting on top of the cupcake.
Step 3 – Start the Frosting Curve
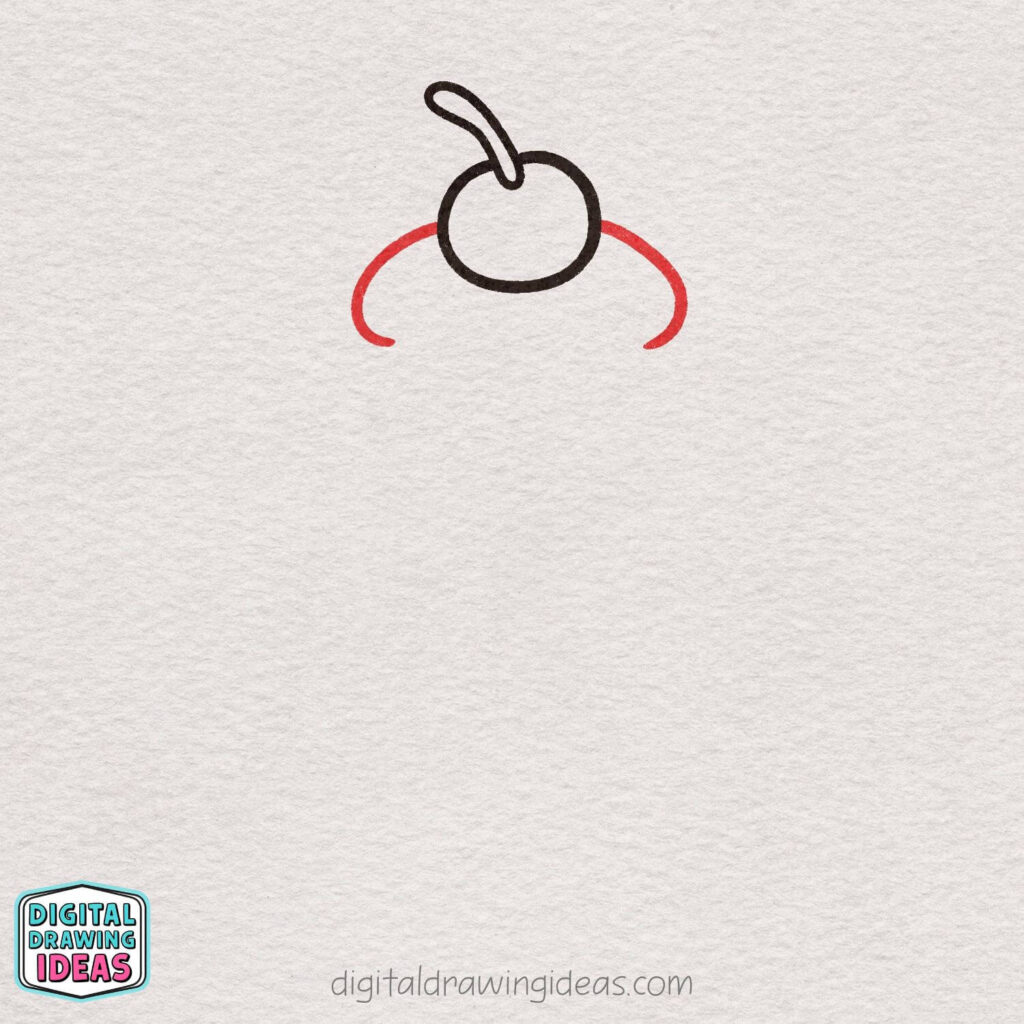
On both sides of the cherry, draw two wide, curved lines that gently bend downward. These curves should feel soft and rounded, like the beginning of fluffy frosting.
Keep the ends open and don’t connect them yet — we’ll build the frosting step by step.
Try to keep both sides balanced, but they don’t need to be perfectly symmetrical.
Step 4 – Build the Second Frosting Layer

Below the first frosting curves, draw two larger rounded lines on each side. These curves should sit a bit wider than the ones above, helping the frosting look full and fluffy.
Let the lines gently dip down before curving back up, like soft icing folds.
Keep everything smooth and rounded — sharp corners aren’t needed here.
Step 5 – Shape the Bottom of the Frosting
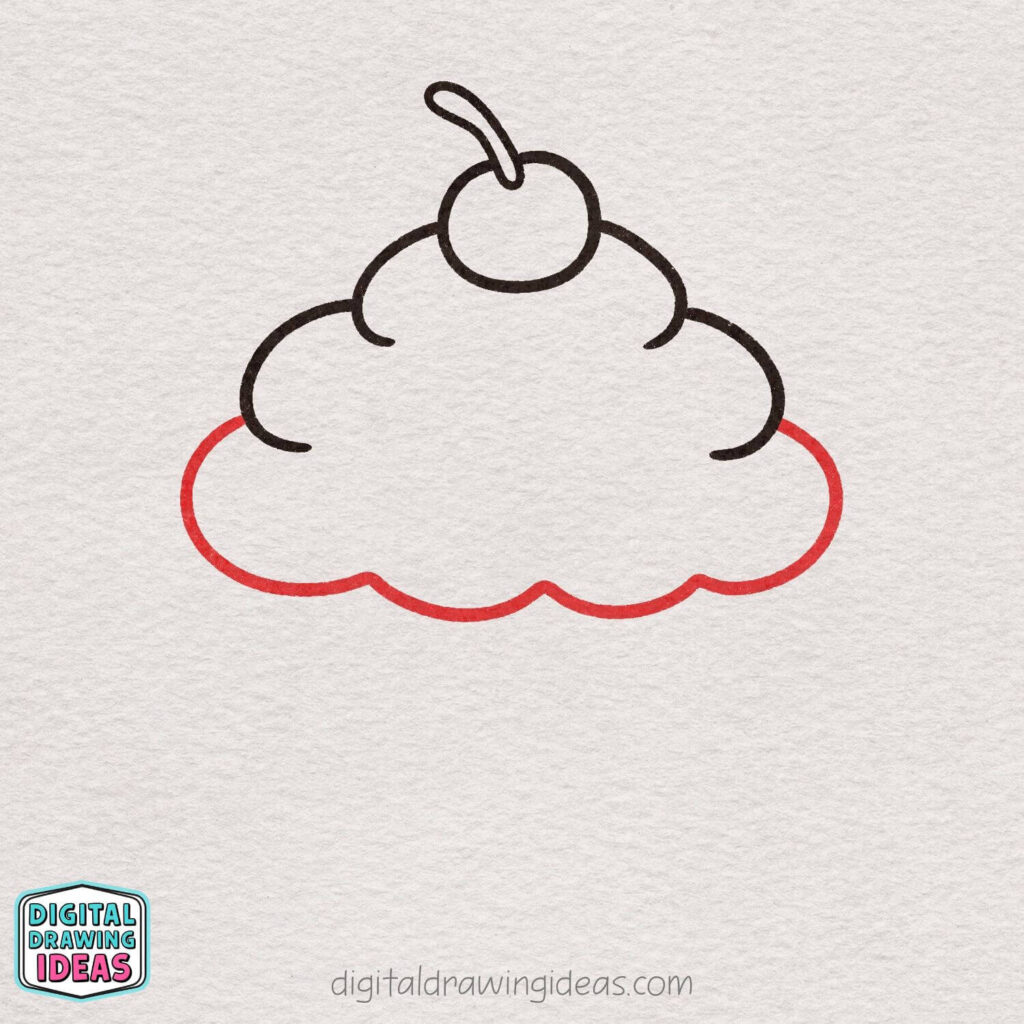
Now draw a long, wavy line underneath the frosting to create the bottom edge. Use soft bumps and gentle curves, like fluffy clouds sitting on top of the cupcake.
Let the line flow smoothly from one side to the other without sharp angles.
This wavy edge helps the frosting look thick, creamy, and delicious.
Step 6 – Add the Frosting Underside

Just below the frosting edge, draw another soft, wavy line that follows the same shape. Keep the curves gentle and rounded so it looks like a thick layer of frosting.
This line should sit close to the one above it, creating a layered, creamy effect.
Try to mirror the bumps loosely, but it’s okay if they’re not exactly the same.
Step 7 – Draw the Cupcake Wrapper
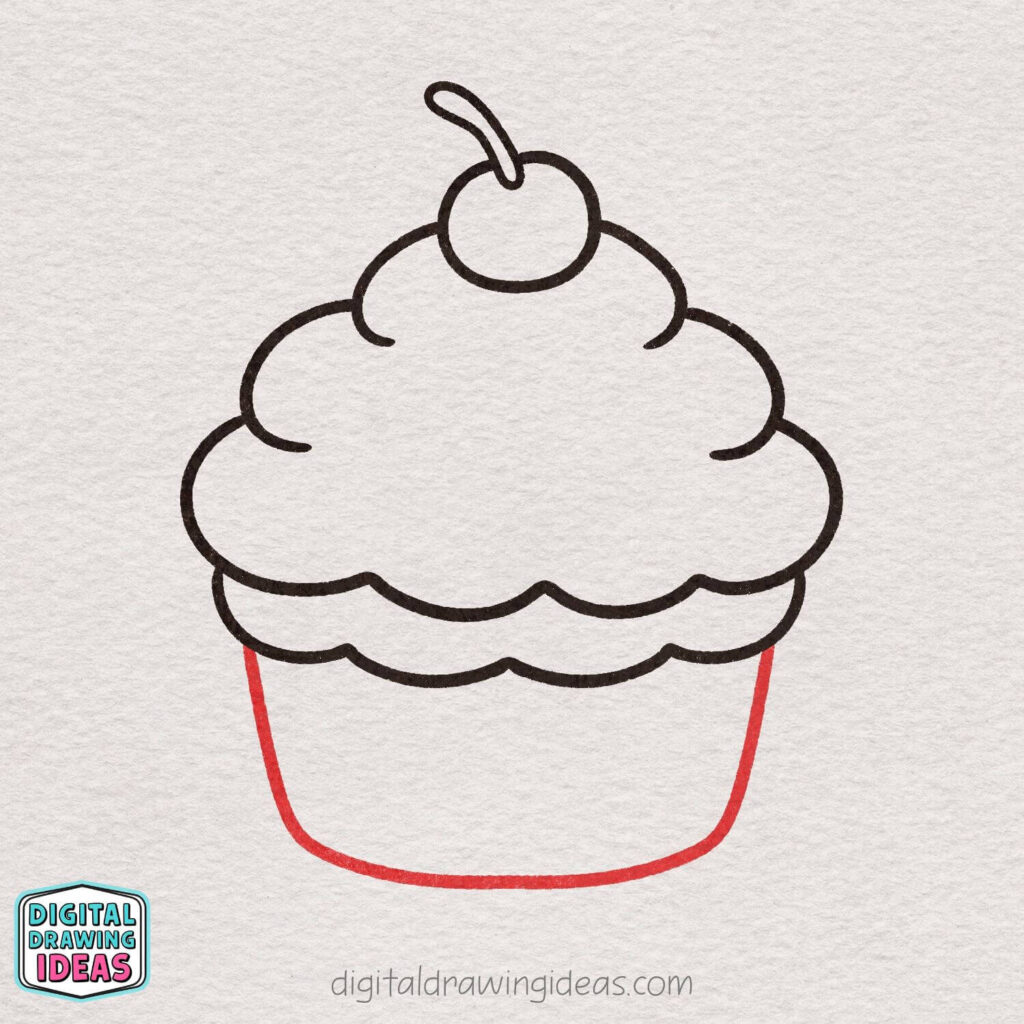
Under the frosting, draw two slightly slanted lines going downward to form the sides of the cupcake wrapper.
Connect them at the bottom with a soft, curved line.
Keep the shape wide and rounded rather than narrow or sharp.
This creates the base that holds the frosting and gives the cupcake its classic shape.
Step 8 – Add Wrapper Stripes
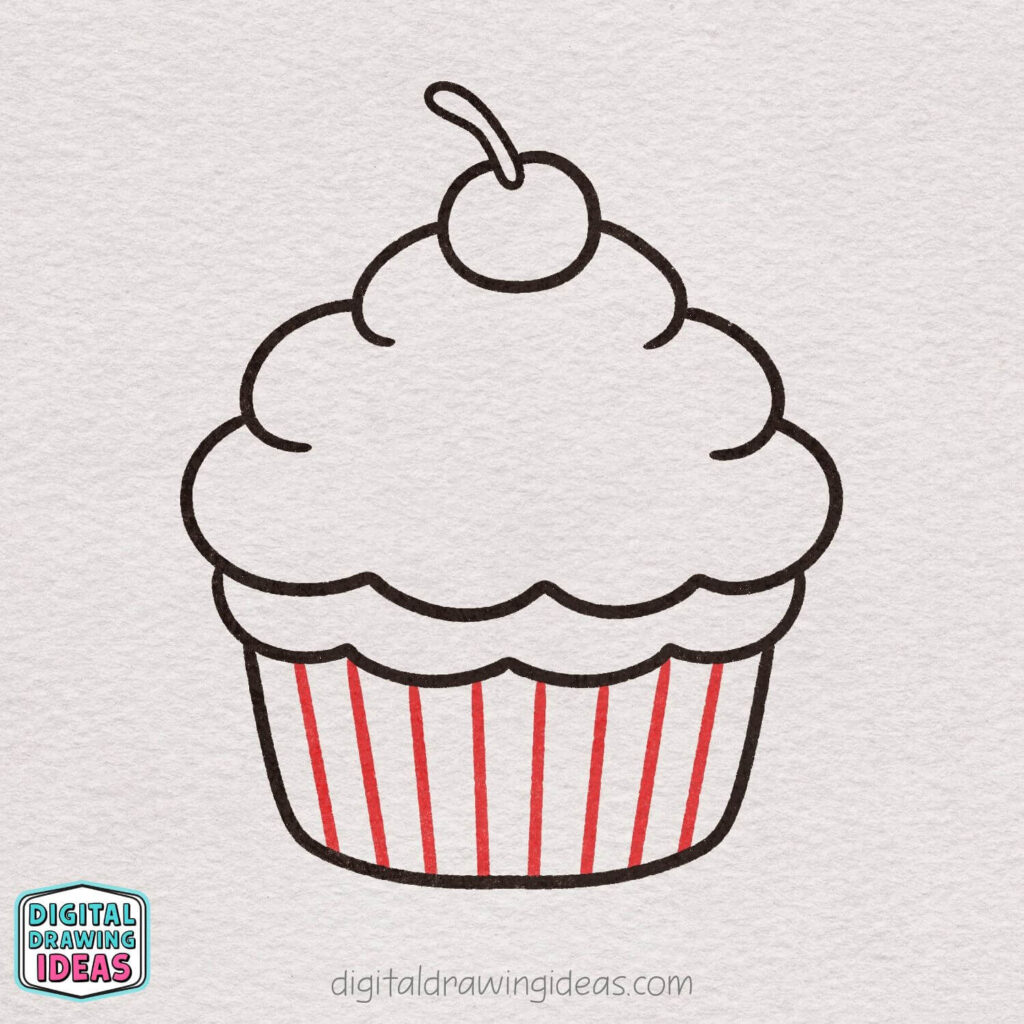
Inside the cupcake wrapper, draw several straight vertical lines from top to bottom.
Space them evenly to create simple stripes.
Keep the lines slightly relaxed rather than perfectly straight for a hand-drawn feel.
These stripes give the wrapper texture and make the cupcake look more fun.
Step 9 – Add Sprinkle Dots

Across the frosting, draw small round circles to create sprinkles.
Scatter them evenly, but not in a perfect pattern — randomness makes them look more natural.
Keep the circles simple and about the same size.
Try to spread them over all frosting layers for a balanced, playful look.
Step 10 – Trace and Clean Up the Lines
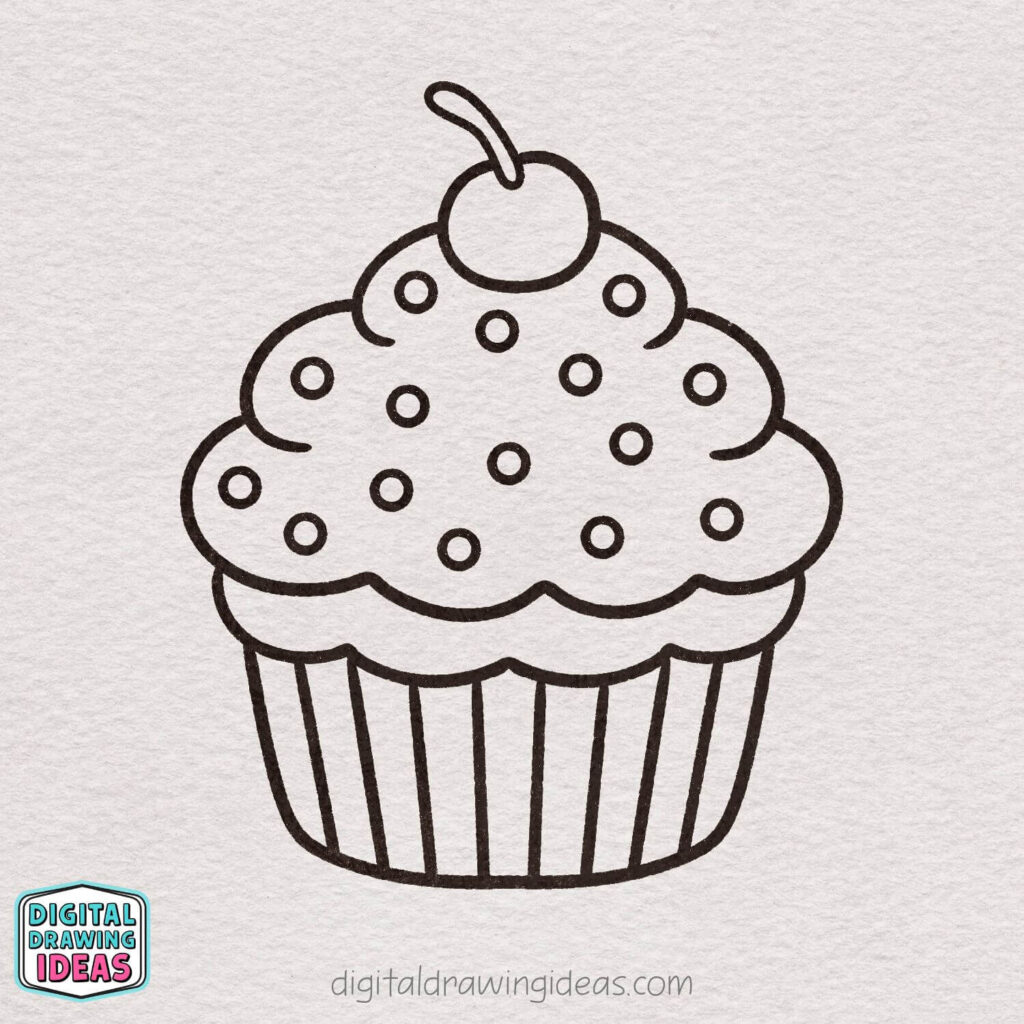
Go over your entire cupcake drawing and carefully trace the final lines.
Make them a little darker and more confident, smoothing out any shaky parts as you go.
You can gently fix uneven curves or adjust small details to make everything look neat.
This step helps your cupcake look clean, polished, and ready for coloring.
Step 11 – Color Your Cupcake
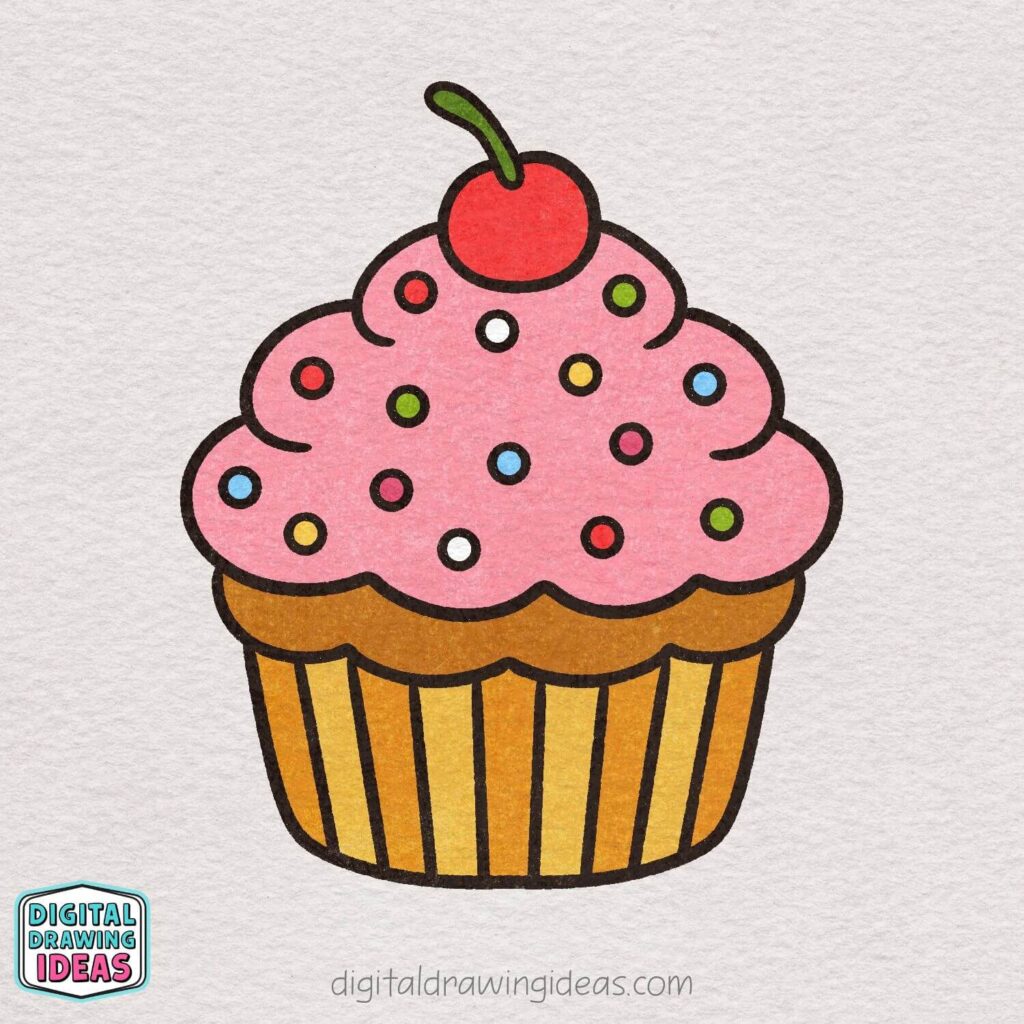
Now it’s time to bring your cupcake to life with color.
Fill in the frosting, cherry, and wrapper using soft, cheerful shades you love.
You can mix different sprinkle colors to make the cupcake extra fun and playful.
Take your time and enjoy the process — your cute cupcake drawing is finished!
Why I Love Simple Cupcake Drawings
Cupcake drawing is one of my favorite creative warm-up exercises.
When I sit down to sketch after a long day, I don’t want something complicated. I want rounded shapes, flowing lines, and a drawing that feels forgiving if my hand slips a little.
That’s why how to draw a cupcake is such a great practice piece:
- It helps you loosen up your lines
- It teaches you to build drawings layer by layer
- And it’s almost impossible to make it look “wrong”
Every cupcake ends up with its own personality, and honestly, that’s the best part.
Watch this Cupcake Drawing tutorial on Youtube

Want More Cute Drawing Tutorials?
If you enjoyed this how to draw a cupcake tutorial, you might love these other step-by-step drawings from my site.
They follow the same calm, beginner-friendly approach:
- 👉 How to Draw a Yeti – Cute Yeti Drawing
- 👉 How to Draw a Palm Tree – Easy Palm Tree Drawing
- 👉 How to Draw a Chicken – Cute Chicken Drawing
Each one focuses on simple shapes, gentle curves, and enjoying the process instead of chasing perfection.
Let’s Stay Creative Together
If you’d like even more drawing inspiration, behind-the-scenes sketches, and fresh ideas, you can find me here:
- 📌 Follow and save tutorials on my Pinterest page
- 🎥 Watch step-by-step drawing videos on my YouTube channel
I share new ideas regularly, and I love seeing how others interpret the same drawings in their own style.
Your Turn
Now I’m curious.
Did you follow this how to draw a cupcake tutorial step by step, or did you add your own twist with colors and sprinkles?
I’d love to see your cupcake drawing.
Share it on Pinterest, or tag me on Instagram @digitaldrawingideas so I can cheer you on and share your work.
And if this tutorial helped you relax, smile, or feel more confident with drawing, then it did exactly what it was meant to do.
Happy drawing, and I can’t wait to create with you again soon.

