How to draw a dinosaur in a way that’s actually cute and not scary? I’ve been there. For the longest time, every dinosaur I sketched looked either too realistic… or slightly terrifying. And all I wanted was a sweet, friendly little dinosaur that would make people smile.
So I created this step-by-step guide to show you exactly how to draw a dinosaur in a simple, approachable, and adorable style. This dinosaur drawing is one of my favorite designs because it proves that you don’t need complicated anatomy or advanced skills to create something charming.
If you’ve ever thought:
- “My dinosaur drawing always looks weird.”
- “I don’t know how to start the shape.”
- “I want something cute, not realistic.”
You’re in the right place.
All the drawings in this tutorial are my own original illustrations, and I designed each step to feel manageable and beginner-friendly. You can absolutely do this.

Why I Love Drawing Cute Dinosaurs
I still remember the first time I tried drawing dinosaurs as a kid. I’d press my pencil into the paper, trying to copy a giant T-Rex from a book, and it never looked right. Too many details. Too many angles. Too much pressure to be “accurate.”
Years later, I realized something: drawing is supposed to be fun.
When I started simplifying shapes into smooth curves and soft lines, everything changed. Instead of focusing on perfection, I focused on personality. That’s when my cute dinosaur drawing style was born.
This tutorial shows you exactly how to draw a dinosaur using:
- Simple curved lines
- Rounded shapes
- Balanced proportions
- Playful details
No stress. No complicated shading. Just creativity.
How to Draw a Dinosaur Step by Step
Below you’ll find the full dinosaur drawing tutorial.
Take your time with each step. If a line feels slightly wobbly, keep it. Those tiny imperfections make your drawing feel alive and personal.
Step 1: Draw the Top of the Head and Neck
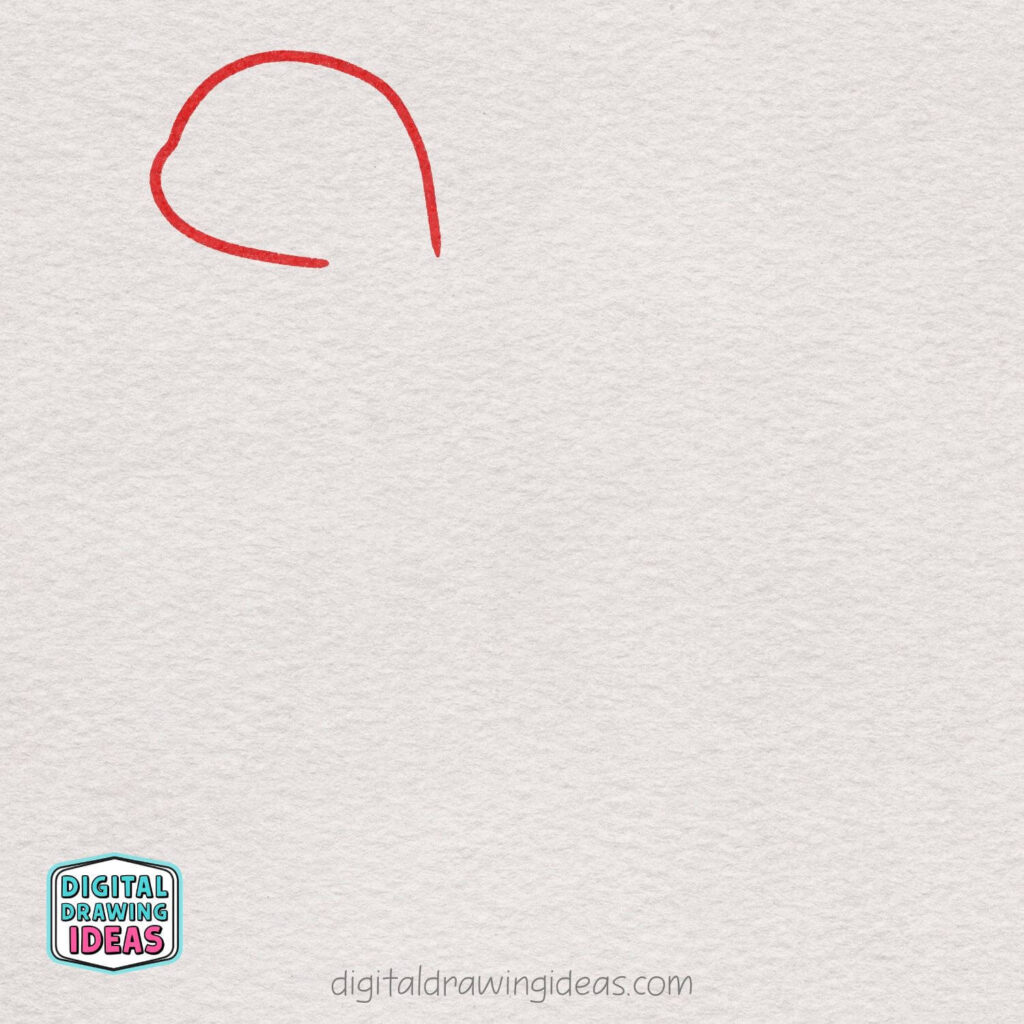
Start by drawing a smooth, curved line that looks a bit like a soft, upside-down “U” shape with a little bump in the front.
This line will form the top of your dinosaur’s head and flow down into the neck. Keep your stroke nice and rounded — we’re going for cute and friendly, not sharp and scary!
Take your time and don’t worry about making it perfect. A slightly wobbly line just adds character.
Step 2: Extend the Neck and Start the Back
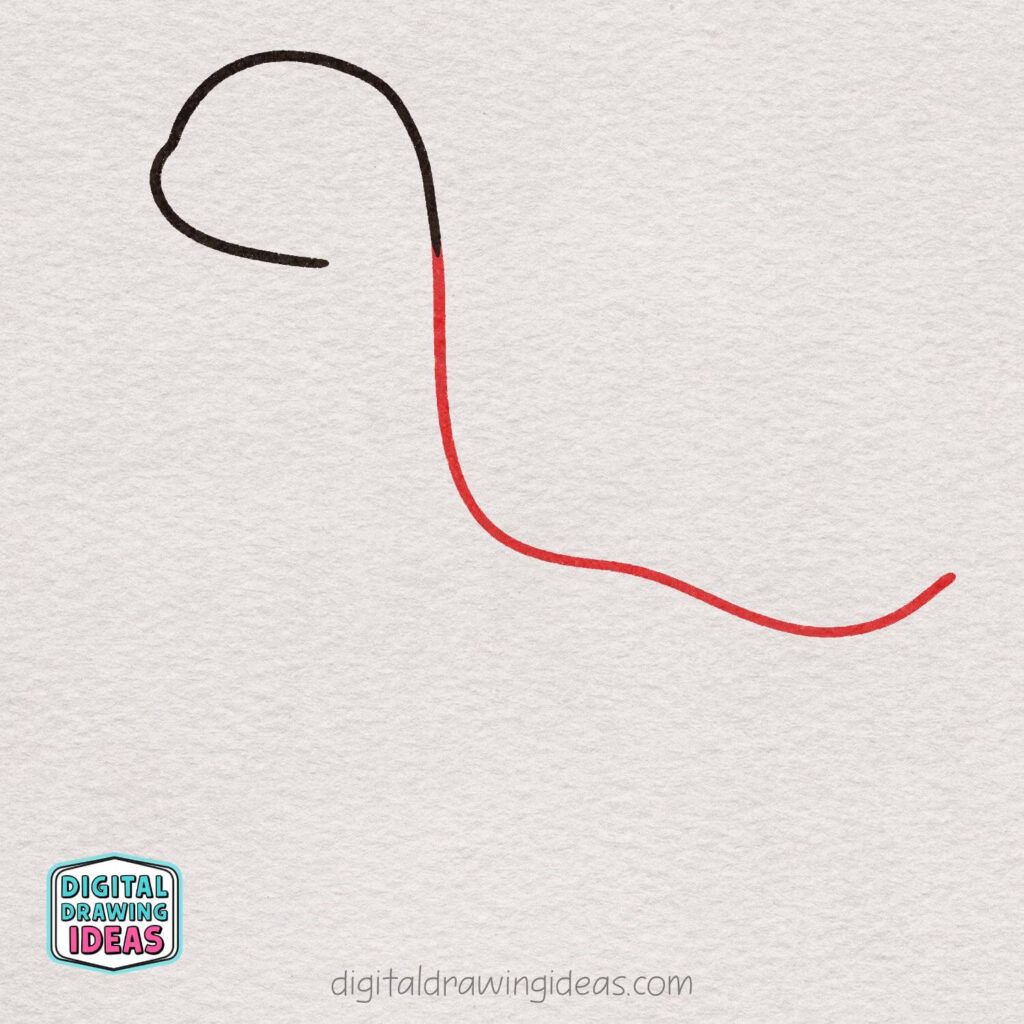
From the bottom of the neck, draw a long, smooth line going downward. Then gently curve it to the right to begin forming the dinosaur’s back and tail.
Keep the line nice and flowing — think of it like drawing a soft wave. This will give your dinosaur that tall, friendly look.
Don’t rush it! A smooth, steady curve will make your dino look extra cute.
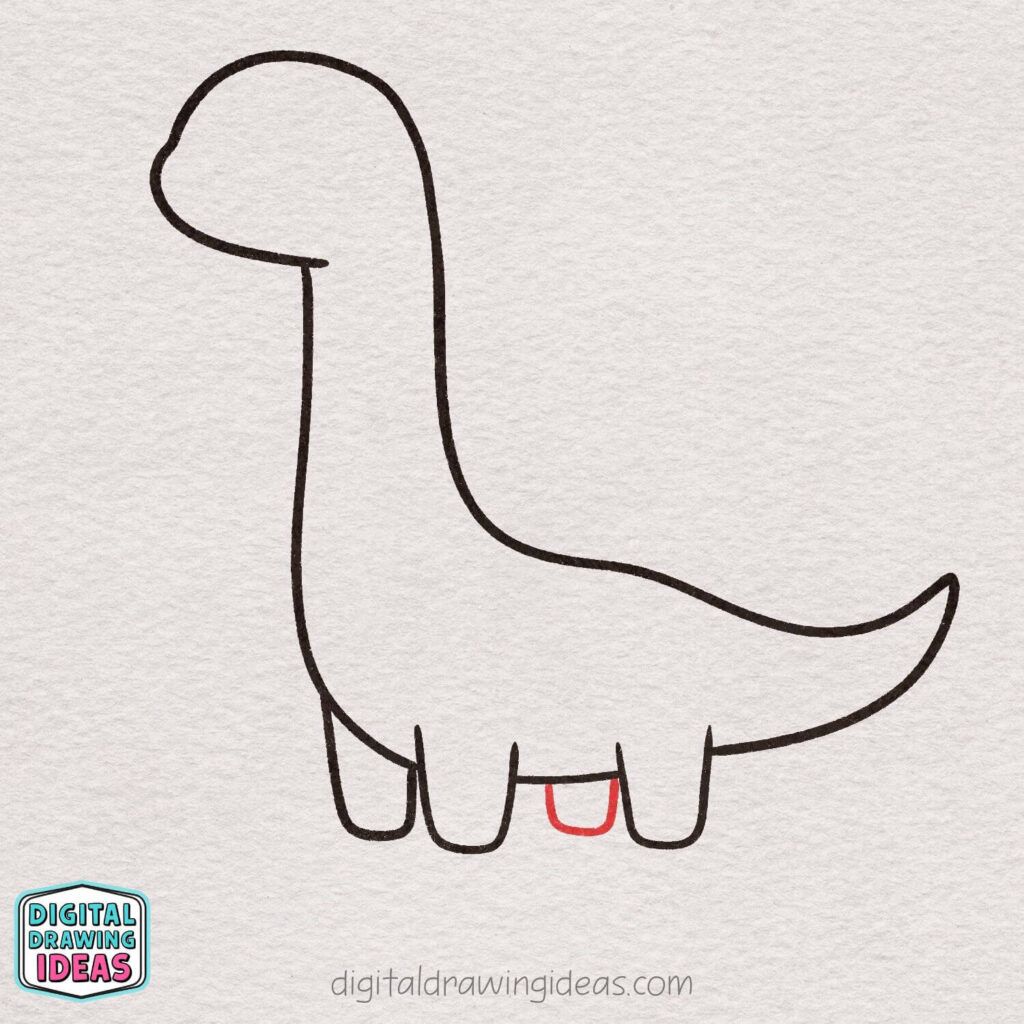
Step 3: Shape the Bottom of the Tail
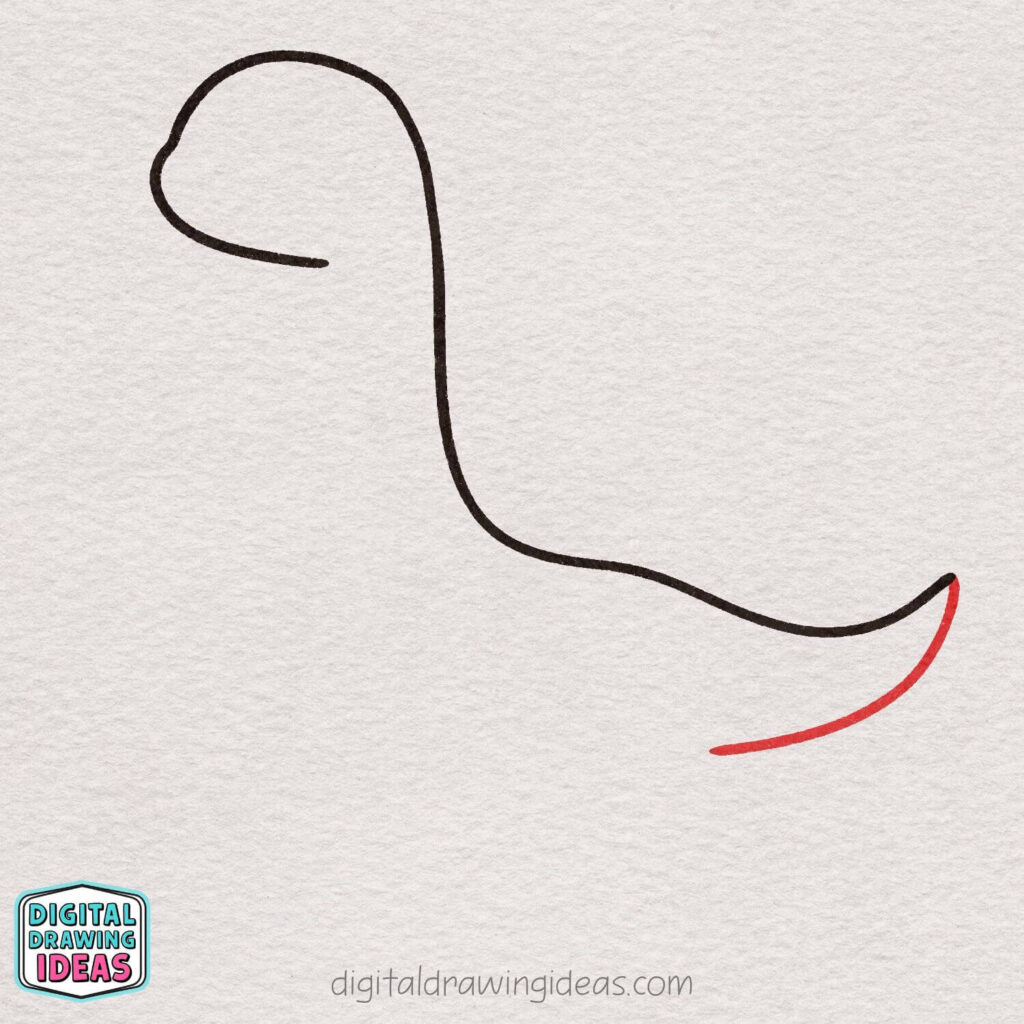
Now let’s finish the tail!
Starting near the tip, draw a curved line underneath that follows the shape of the top tail line. Let it gently curve back toward the body, leaving some space for the tummy later.
Keep the curve soft and rounded — no sharp points. A smooth tail makes your dinosaur look extra sweet and friendly. You’re doing great!
Step 4: Draw the Front of the Neck
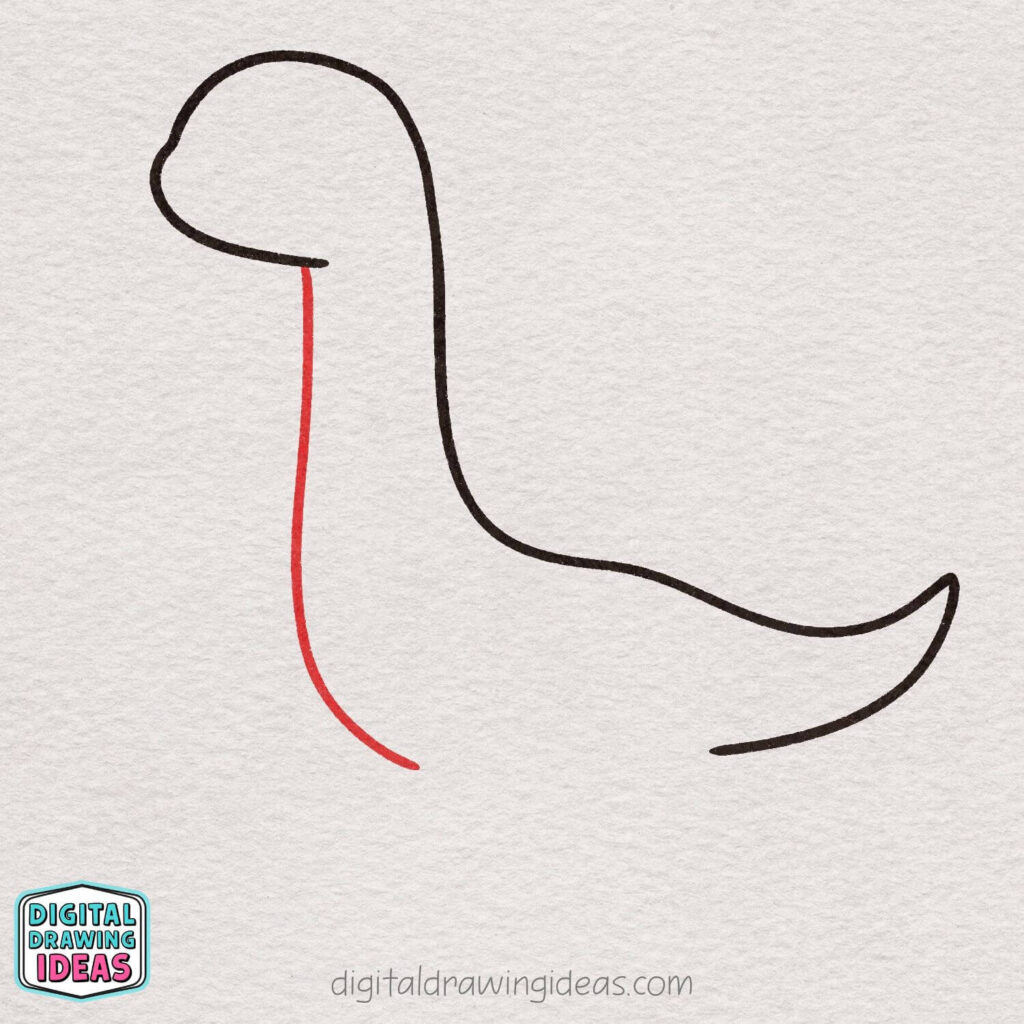
Now let’s define the front of the neck!
Starting just under the head, draw a long, slightly curved line going down. Let it gently curve outward near the bottom — this will help shape the chest area.
Keep the line smooth and relaxed. Imagine you’re drawing a soft ribbon flowing downward. Your dinosaur is really starting to take shape now!
Step 5: Add the First Front Leg
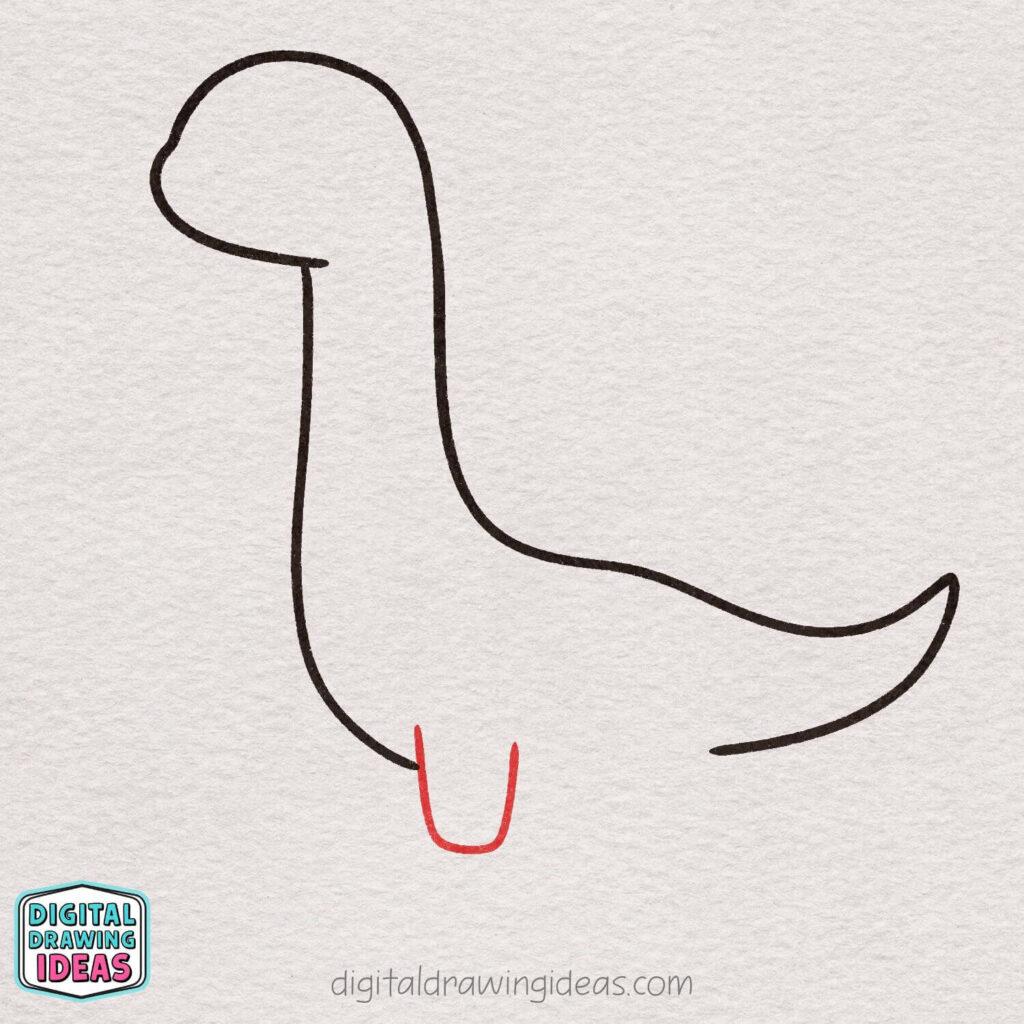
Let’s give your dinosaur a little leg!
Near the bottom of the neck, draw a small “U” shape that curves down and back up. Keep the edges rounded to make the leg look soft and cute.
Don’t make it too long — short and chunky legs make this dino extra adorable. Great job, your dinosaur can almost stand now!
Step 6: Add the First Back Leg
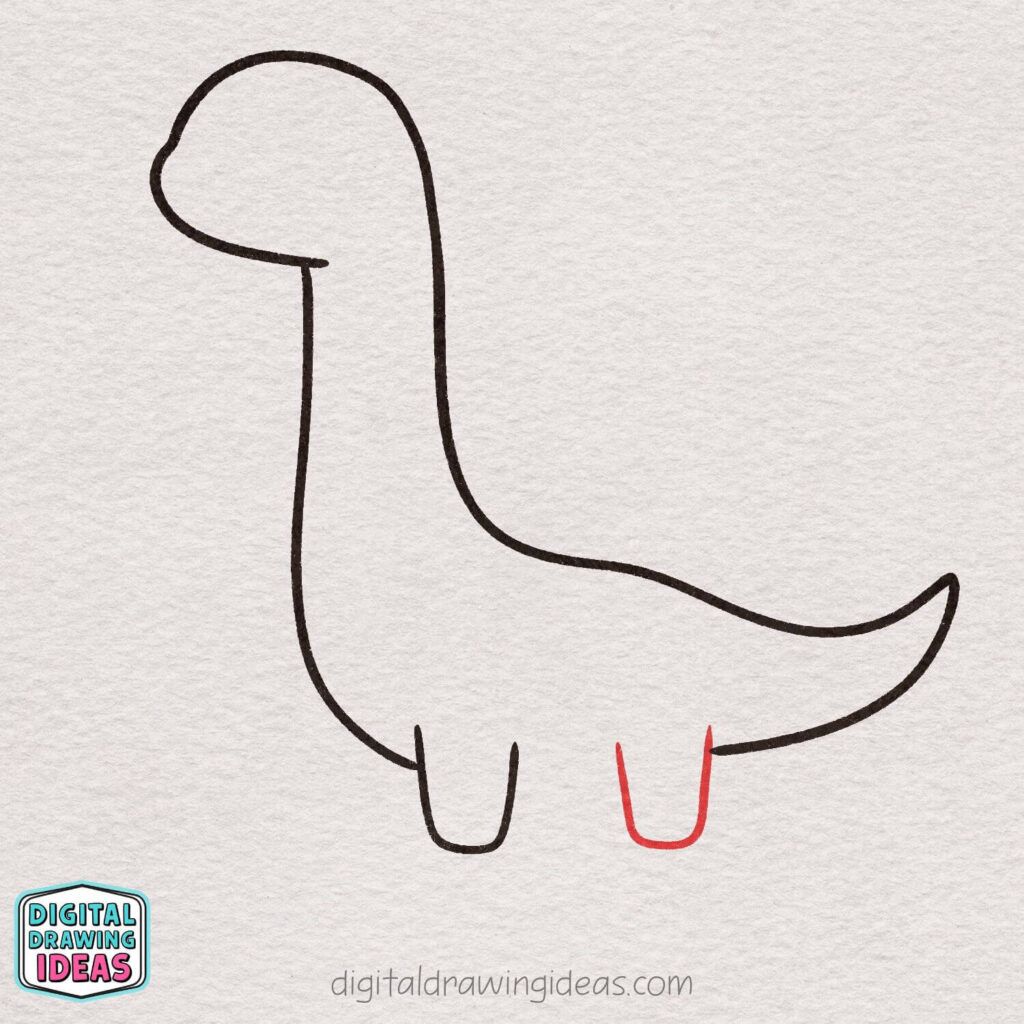
Now let’s give your dinosaur a back leg!
Under the body, closer to the tail, draw another small “U” shape. Try to make it about the same size as the front leg so your dino looks balanced.
Keep the bottom nice and rounded — we want soft, stubby little feet. Your dinosaur is standing on two legs now… how cute is that?
Step 7: Connect the Belly
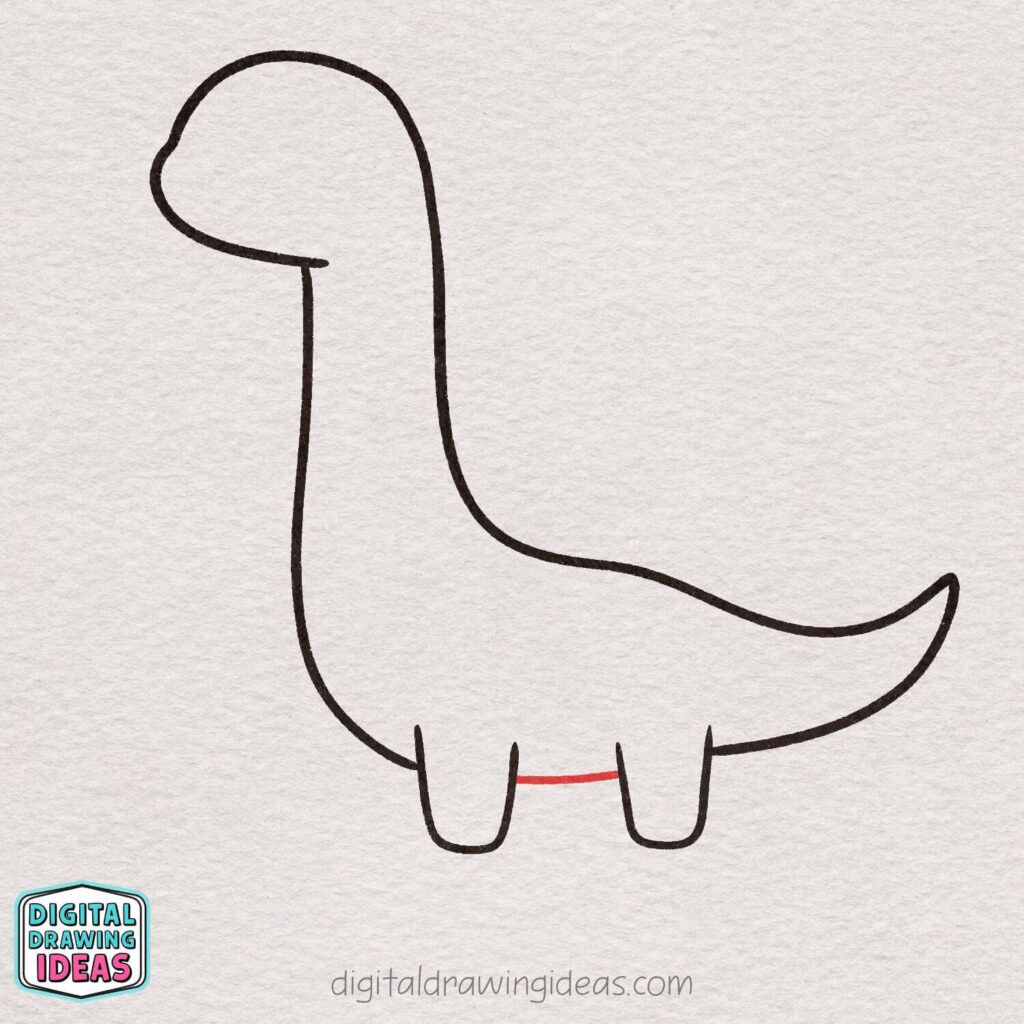
Now let’s give your dinosaur a tummy!
Draw a short, slightly curved line connecting the two legs. This will close the bottom of the body and make your dino look sturdy and complete.
Keep the line gentle and rounded — a soft belly makes your dinosaur look extra adorable. Look at that, your dino is really coming together now!
Step 8: Add the Second Front Leg
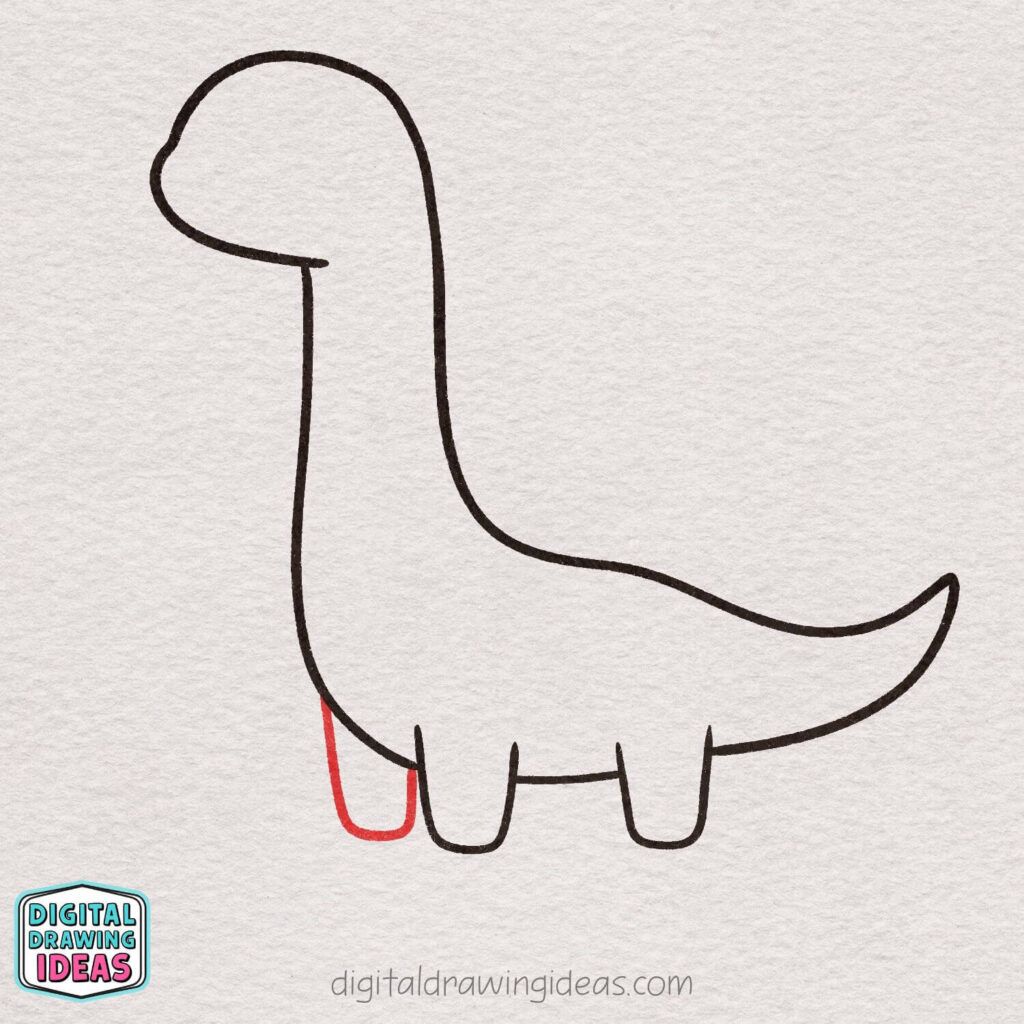
Let’s make your dinosaur even sturdier!
Right next to the first front leg, draw another small “U” shape. Keep it similar in size and shape so both legs match nicely.
Make the bottom rounded and soft, just like the others. Now your dino has two front legs and is standing strong — so cute and balanced!
Step 9: Add the Second Back Leg
Time to complete the legs!
Between the belly and the tail, draw another small “U” shape to create the second back leg. Keep it similar in size to the other legs so everything looks nice and even.
Round the bottom gently for that soft, adorable style. Now your dinosaur is standing on all four legs — great job!
Step 10: Draw the Cute Face
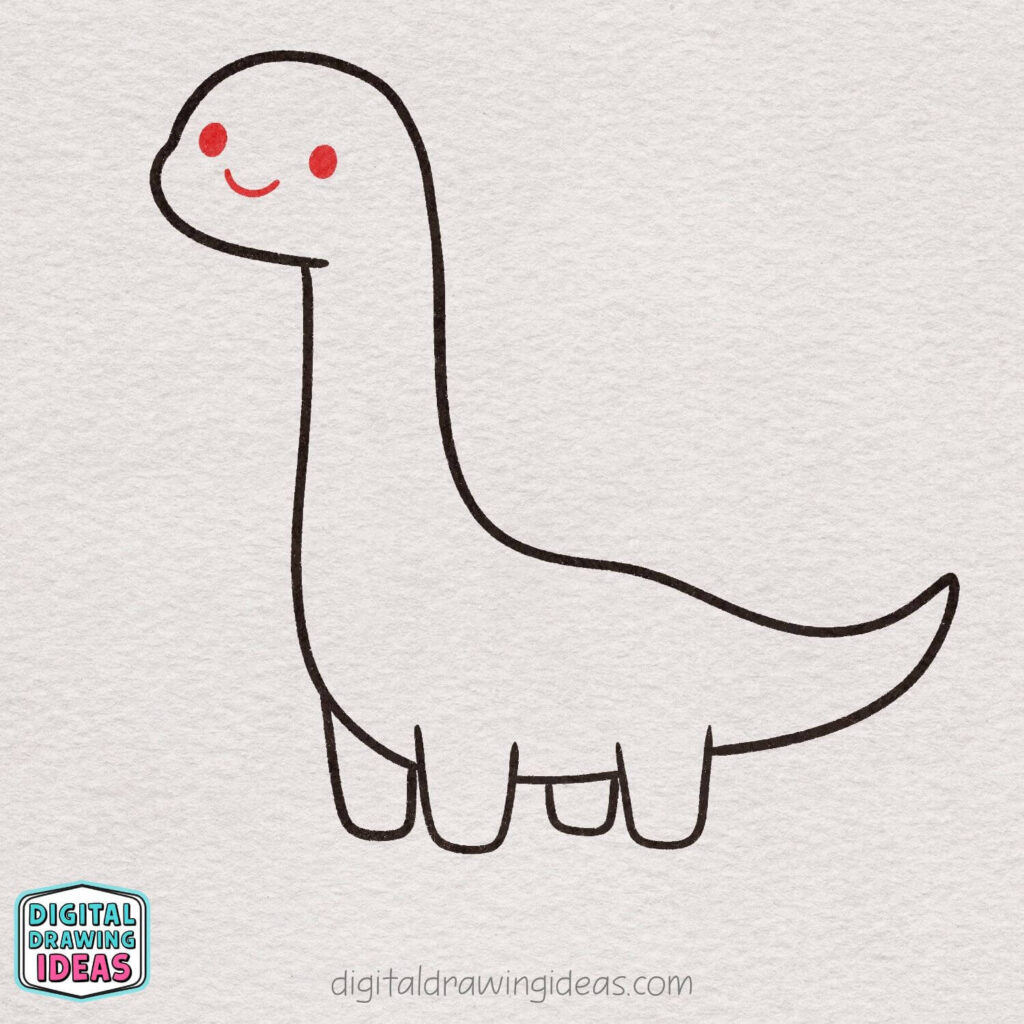
Now let’s bring your dinosaur to life!
Draw two small round circles for the eyes on the head. Then add a tiny curved line underneath for a sweet, smiling mouth.
Keep everything simple and soft — small eyes and a gentle smile make your dinosaur look extra friendly and adorable. Look at that happy little dino face!
Step 11: Add the Cute Back Spikes
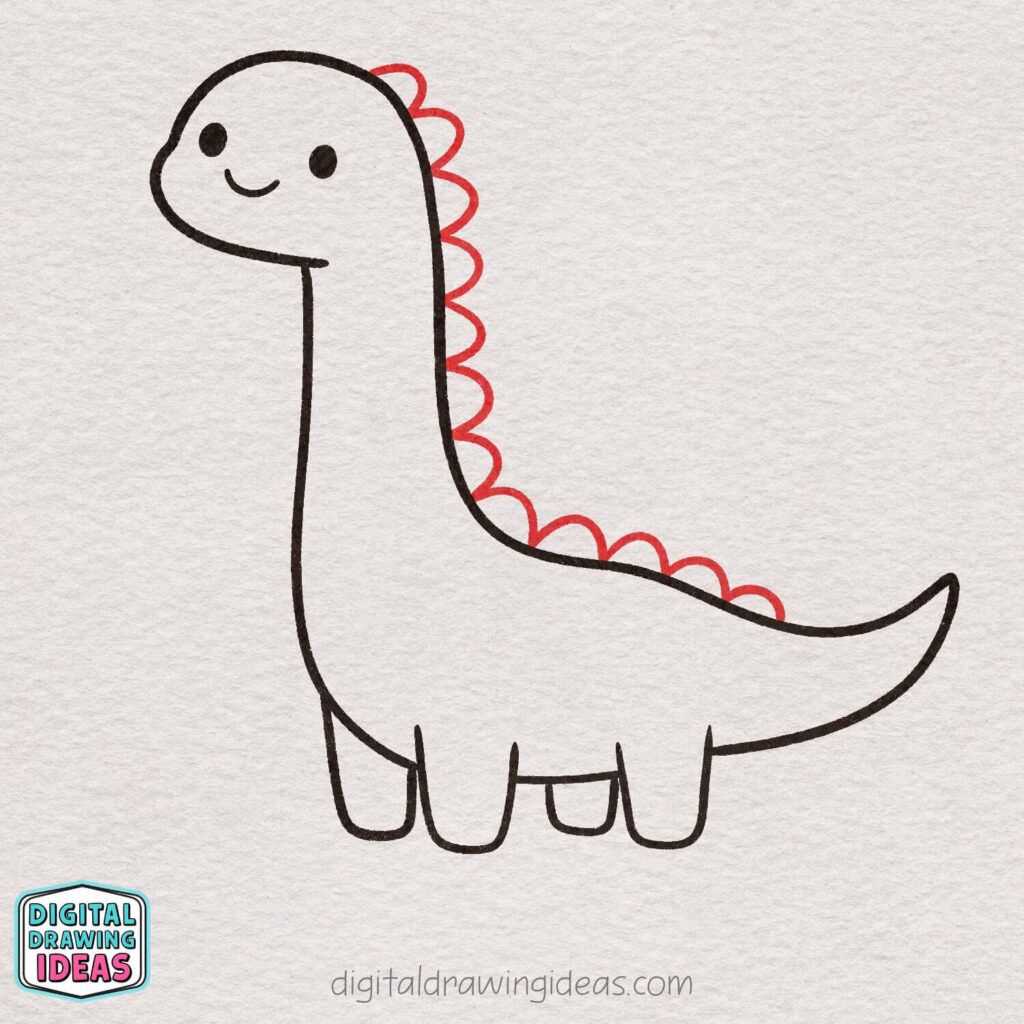
Let’s make your dinosaur extra special!
Starting at the back of the head, draw a series of small, rounded bumps going all the way down the neck and along the back. Think of them like soft little waves or tiny clouds.
Keep each bump curved and smooth — no sharp spikes here! These sweet little plates give your dinosaur personality and charm. So adorable!
Step 12: Add the Tiny Toes
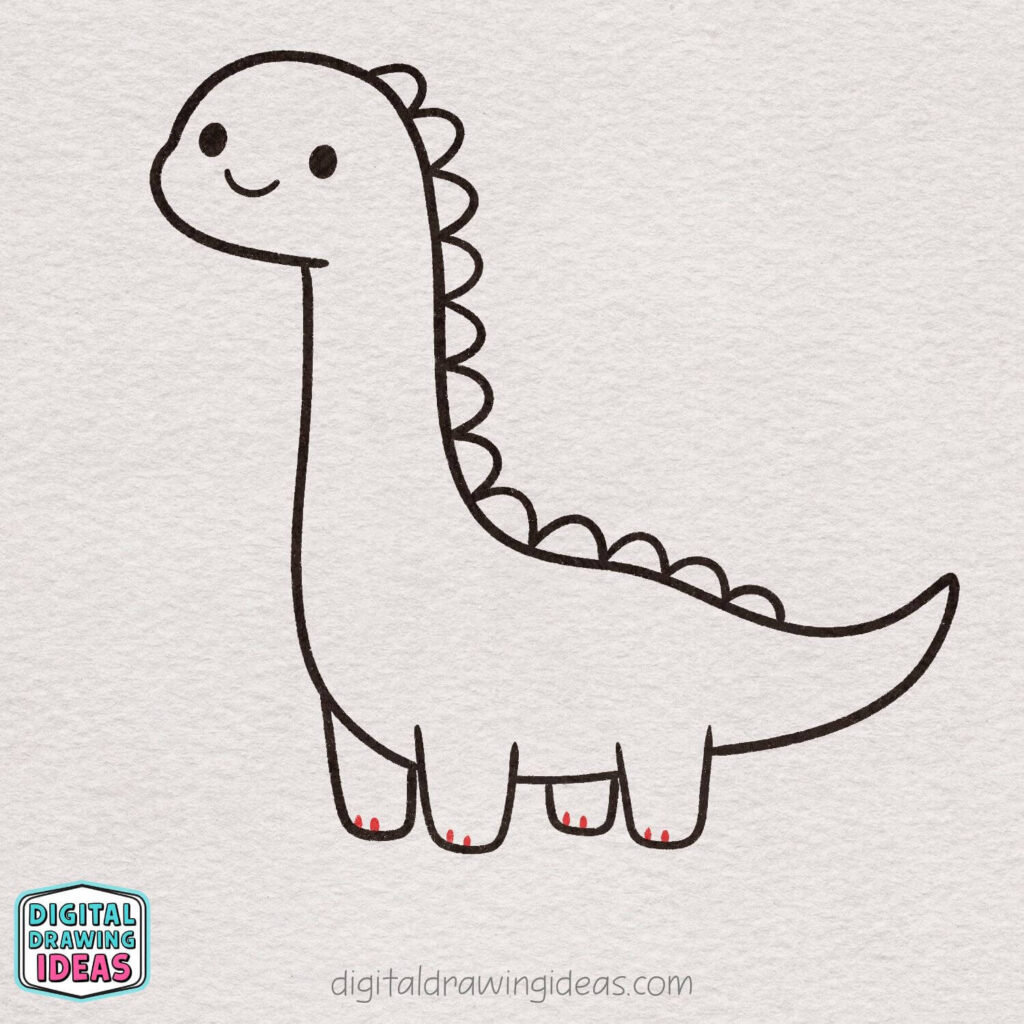
Let’s add some cute little details!
At the bottom of each foot, draw three tiny short lines to create little toes. Keep them small and simple — just tiny curved dashes will do.
These little touches make your dinosaur look extra polished and adorable. Look at those sweet tiny feet!
Step 13: Add Fun Background Details

Let’s make your drawing even more magical!
Around your dinosaur, draw a couple of simple stars. You can make them small and rounded to match the cute style. Then add a little dinosaur egg and some short, spiky grass shapes near the feet.
Keep everything simple and playful. These tiny background details make your dino scene feel lively and full of charm. Almost done!
Step 14: Color Your Cute Dinosaur

Now it’s time for the most fun part — coloring!
Color the body a bright, happy green. Fill the belly with a soft yellow, and make the back plates a warm orange. Add darker green spots on the body for extra detail.
Give the cheeks a rosy blush, color the stars yellow and orange, and make the egg match the cute style with fun dots. Finish with green grass underneath your dinosaur.
Take your time and enjoy it — your adorable dinosaur is complete! Amazing job!
Struggling With Your Dinosaur Drawing?
Let me talk to you for a second.
If your dinosaur doesn’t look exactly like mine on the first try, that’s completely normal. I redraw my own characters multiple times before I’m happy with them. Sometimes the neck is too long. Sometimes the legs feel off. Sometimes the tail just has a mind of its own.
Here are a few practical tips that help:
- Lightly sketch first, then go over your final lines.
- Keep everything rounded. Sharp angles make it look less cute.
- Make the legs slightly chunky for balance.
- Keep the eyes small and simple for that friendly look.
- Step back and look at the whole shape, not just one detail.
Learning how to draw a dinosaur is really about learning how to see shapes. Once you understand that the body is just curves and soft “U” shapes, everything becomes easier.
And honestly? Practice is magic.
Want to Draw More Cute Animals?
If you enjoyed this dinosaur drawing tutorial, I think you’ll love these too:
- How to draw a hamster: How to Draw a Hamster – Cute Hamster Drawing
- How to draw a horse: How to Draw a Horse – Cute Horse Drawing Tutorial
- How to draw a snake: How to Draw a Snake – Easy Snake Drawing
Each tutorial follows the same idea: simple shapes, friendly style, zero intimidation.
You can also follow me on Pinterest for daily drawing inspiration:
Digital Drawing Ideas on Pinterest
And if you prefer watching the process in motion, I share video tutorials on YouTube here:
Digital Drawing Ideas on YouTube
I love building a creative little corner of the internet where drawing feels relaxing instead of overwhelming.
Let’s Make This Interactive
Now I’m curious.
- What color did you choose for your dinosaur?
- Did you add extra spots or maybe tiny hearts instead of stars?
- Are you team green dino, or did you go wild with purple?
I would genuinely love to see your version.
Share your drawing on Pinterest and tag me, or post it on Instagram and mention @digitaldrawingideas so I can cheer you on. Seeing your creations honestly makes my day.
Final Thoughts: You Can Absolutely Do This
Learning how to draw a dinosaur doesn’t require talent. It requires curiosity and a willingness to try.
Every time you sit down with paper and pencil, you’re building a skill. Every slightly uneven line teaches you something. And every finished drawing, no matter how simple, is proof that you created something from nothing.
That’s powerful.
This cute dinosaur drawing is just the beginning. Keep experimenting. Keep playing with shapes. Keep making art that feels like you.
I know this will be useful for you because I was in the exact same place once — wanting to draw something adorable but not knowing how to simplify it. Now you do.
And I cannot wait to see what you create next.

