If you’ve ever wondered how to draw an octopus in a simple and cute way, you’re in the right place. I still remember the first time I tried drawing an octopus… it ended up looking more like a melted jellyfish with attitude. So if you’ve ever felt like “why is this so hard?”, trust me—you’re not alone.
Over time, I realized something important: drawing gets so much easier when you break it down into small, friendly steps. That’s exactly what I’m sharing with you here.
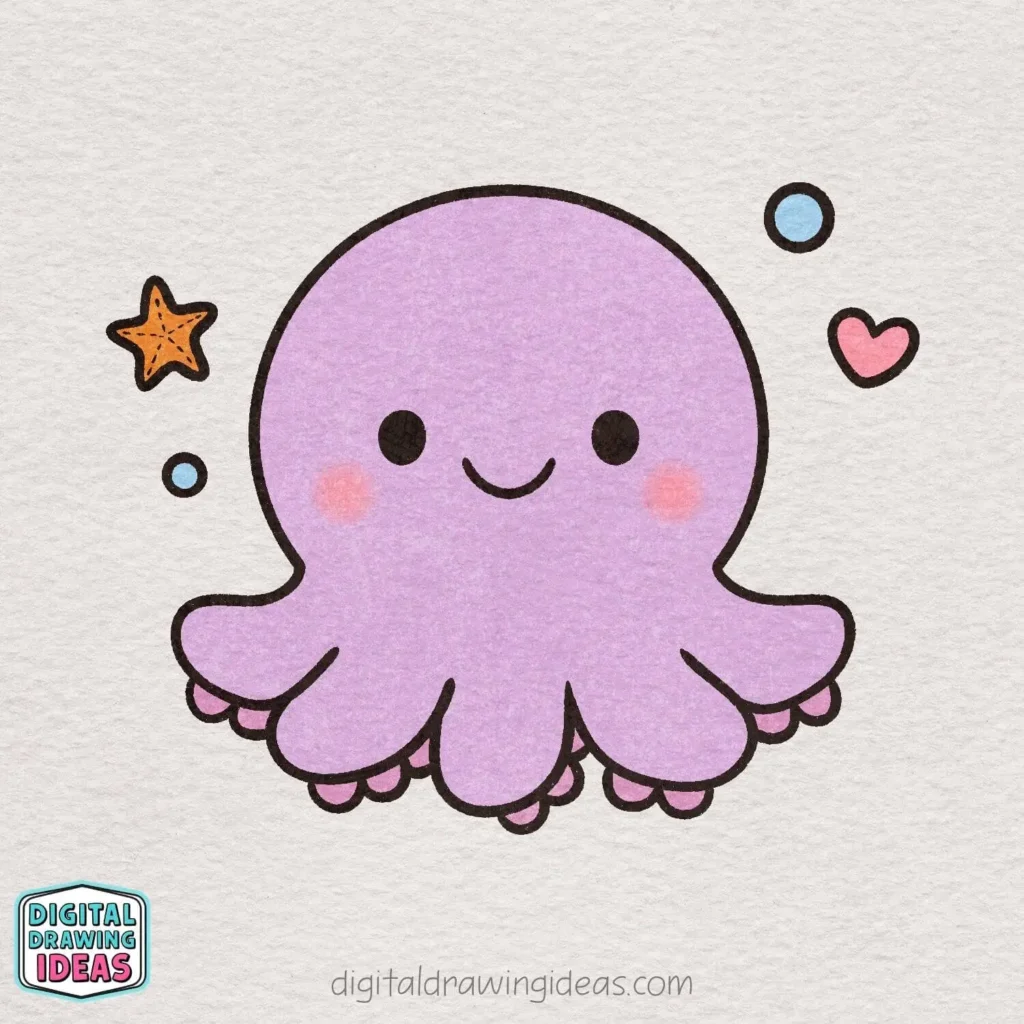
This octopus drawing is one of my favorite tutorials I’ve created. It’s soft, playful, and beginner-friendly—perfect if you want something relaxing to draw without overthinking every line.
So grab your pencil, take a deep breath, and let’s draw something cute together.
Why This Octopus Drawing Is Perfect for Beginners
Before we jump in, let me quickly help you avoid the most common struggle I see:
- “My drawing looks stiff”
- “I can’t get the shape right”
- “It doesn’t look cute”
I’ve been there too. The secret is not perfection—it’s soft, flowing lines.
In this how to draw an octopus tutorial, we focus on:
- simple curves instead of complicated shapes
- small, repeatable steps
- keeping everything round and soft
That’s what makes the final result feel cute and effortless.
Step 1: Draw the Top of the Head
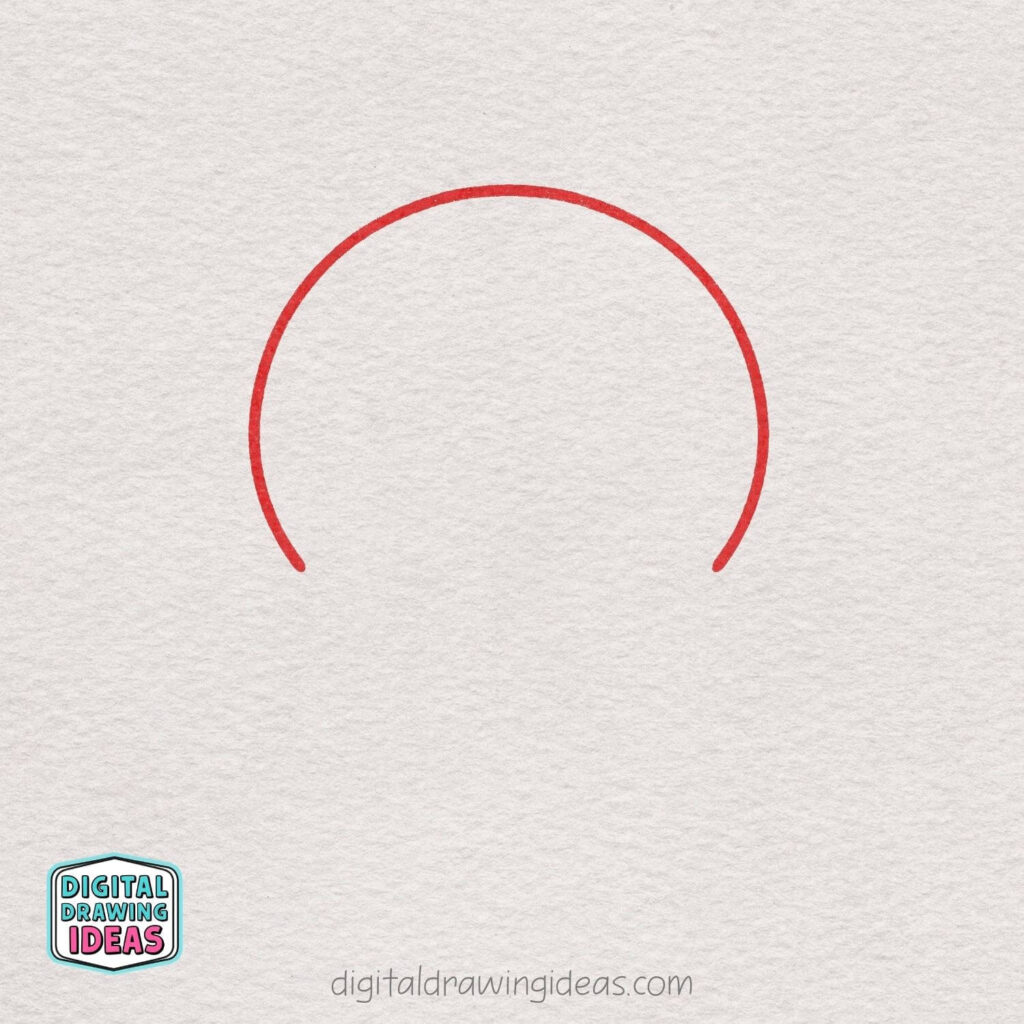
Start by drawing a wide, curved line like a soft upside-down “U” shape. This will be the top of your octopus’s head.
Keep your line smooth and round—don’t worry if it’s not perfect! This shape sets the base for the whole drawing, so make it nice and gentle.
Step 2: Add the First Cute Arm
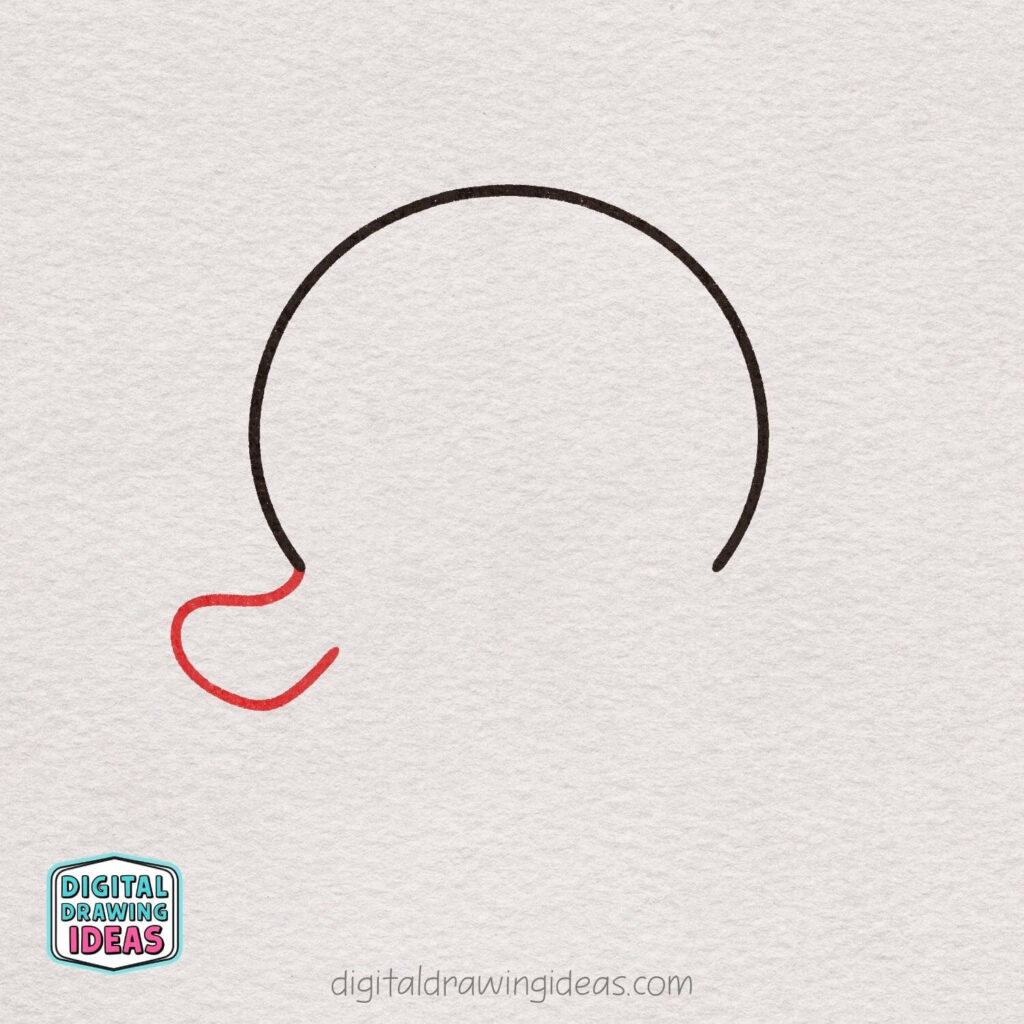
On the left side, draw a soft, wavy shape coming out from the head. This will be your octopus’s first little arm.
Keep the lines round and bouncy—think of a small, squishy “S” shape. Don’t worry about making it perfect, just keep it cute and smooth!
Step 3: Draw the Bottom Curve
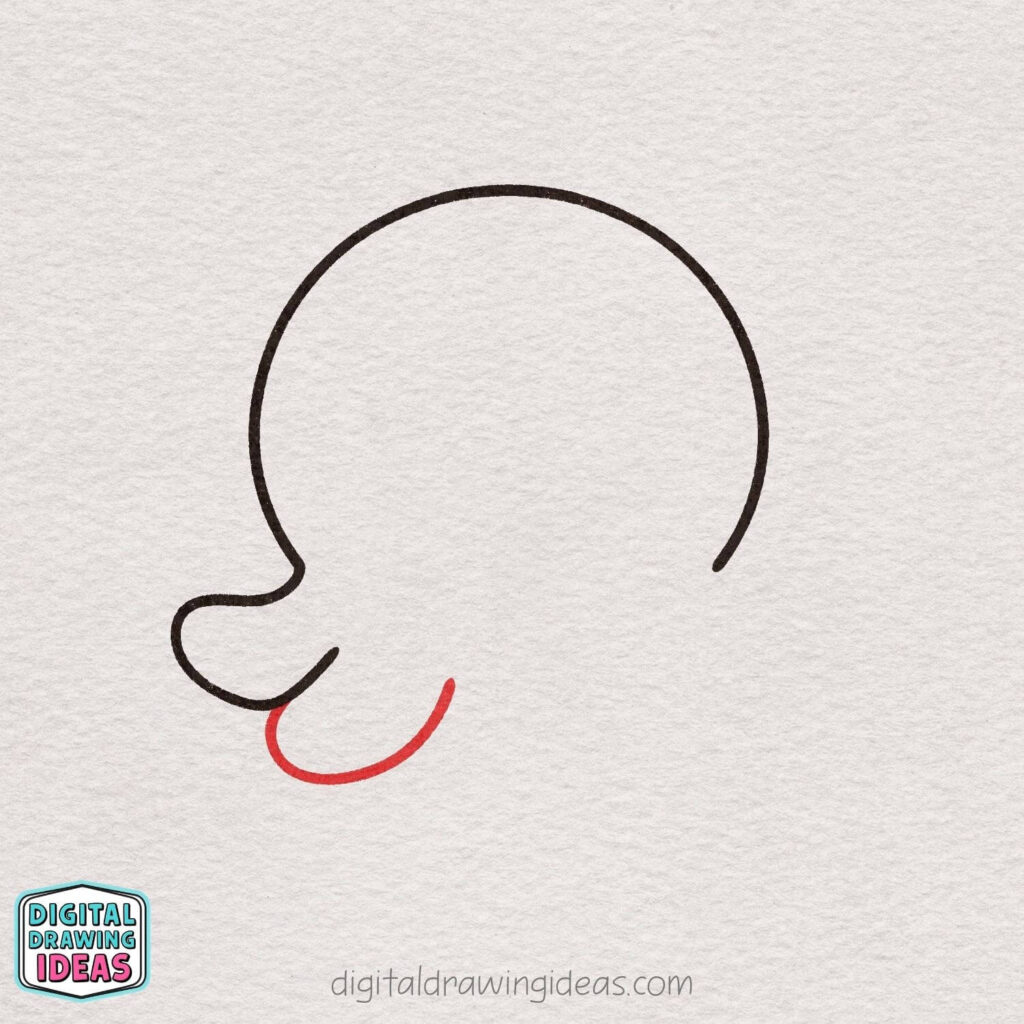
Now add a curved line underneath to start forming the bottom of the octopus.
Make it a smooth, gentle “U” shape that connects nicely near the first arm. This helps give your octopus that soft, round body look—keep it light and flowy!
Step 4: Add Another Wavy Arm
Now draw another small “U” shape right next to the first bottom curve. This creates a second cute little arm.
Try to keep the spacing even and the curves soft and rounded. It should look like gentle bumps along the bottom—super simple and adorable!
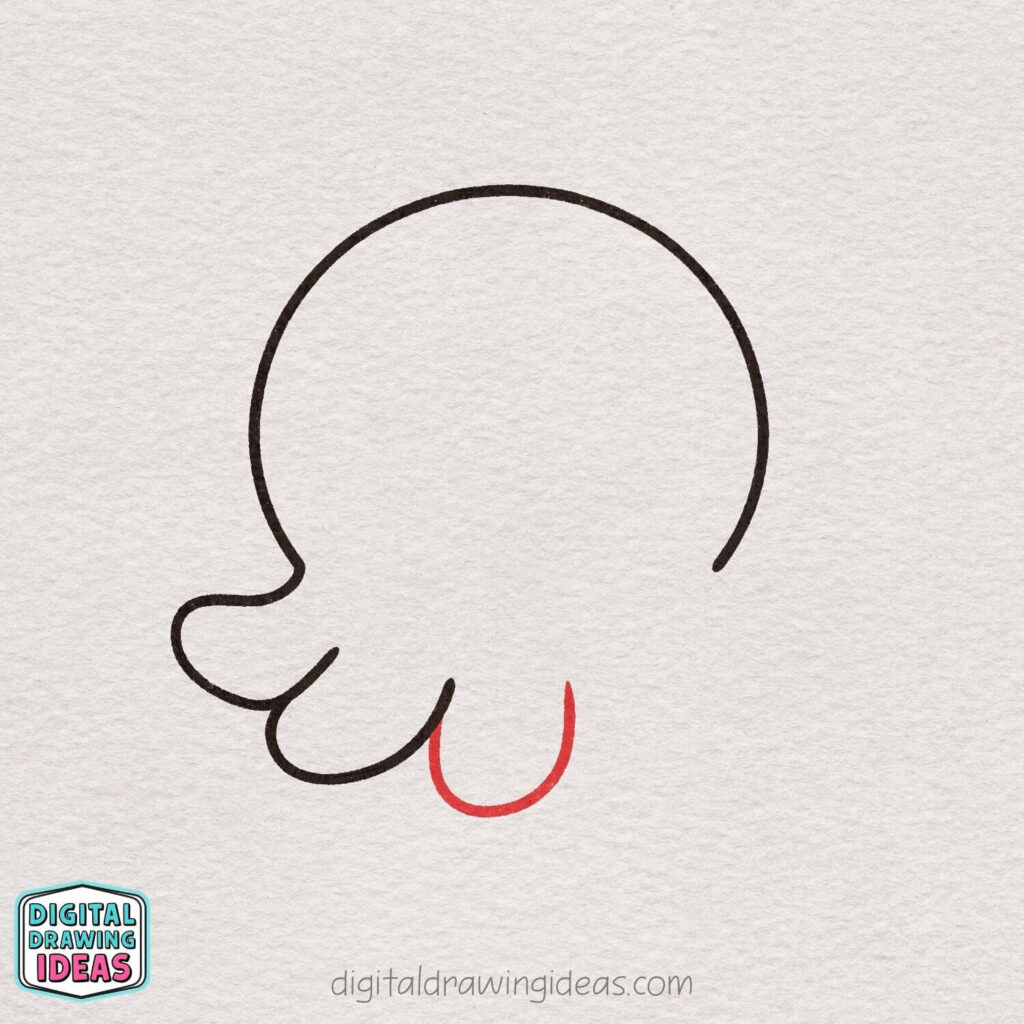
Step 5: Continue the Wavy Bottom
Add one more rounded “U” shape to the right to continue forming the octopus’s arms.
Keep the curve soft and similar in size to the others so everything looks balanced. You’re building a cute row of little bumps—almost like a fluffy edge!
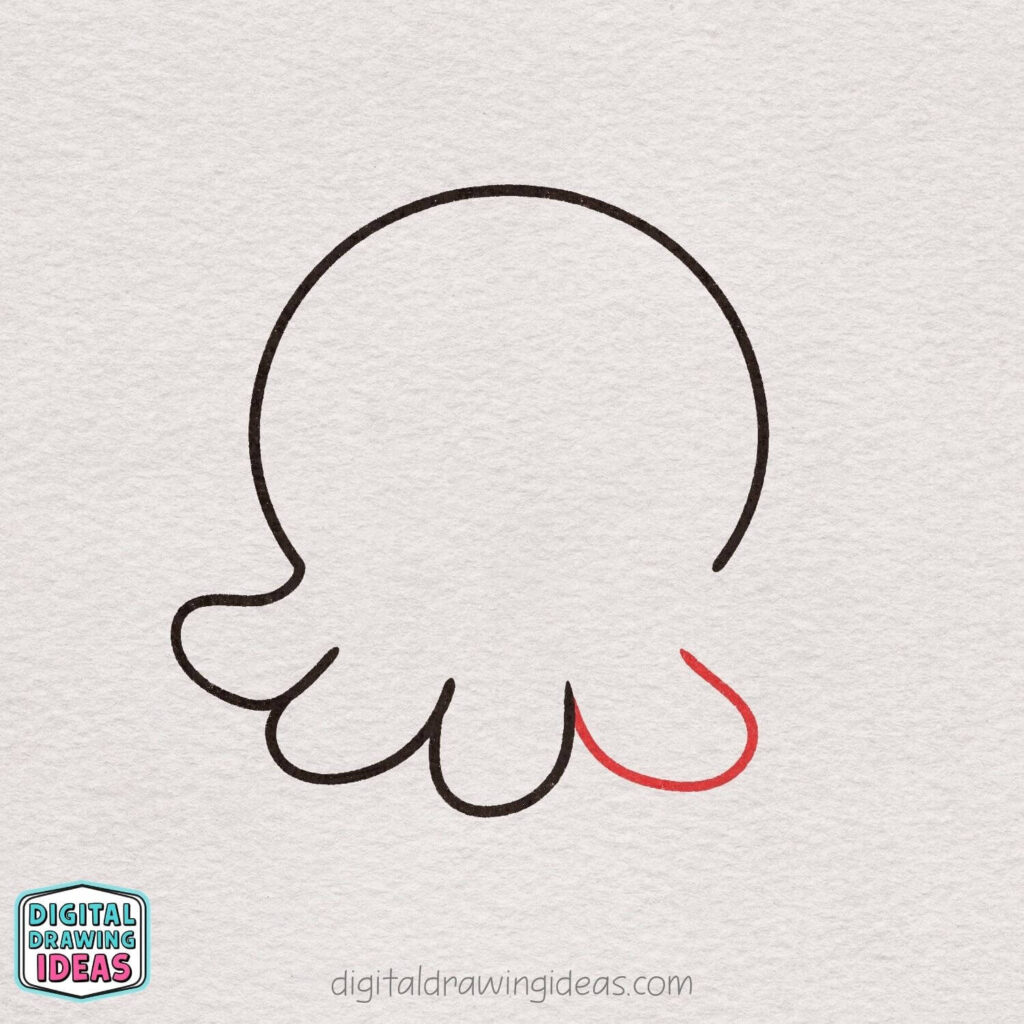
Step 6: Add the Side Arm
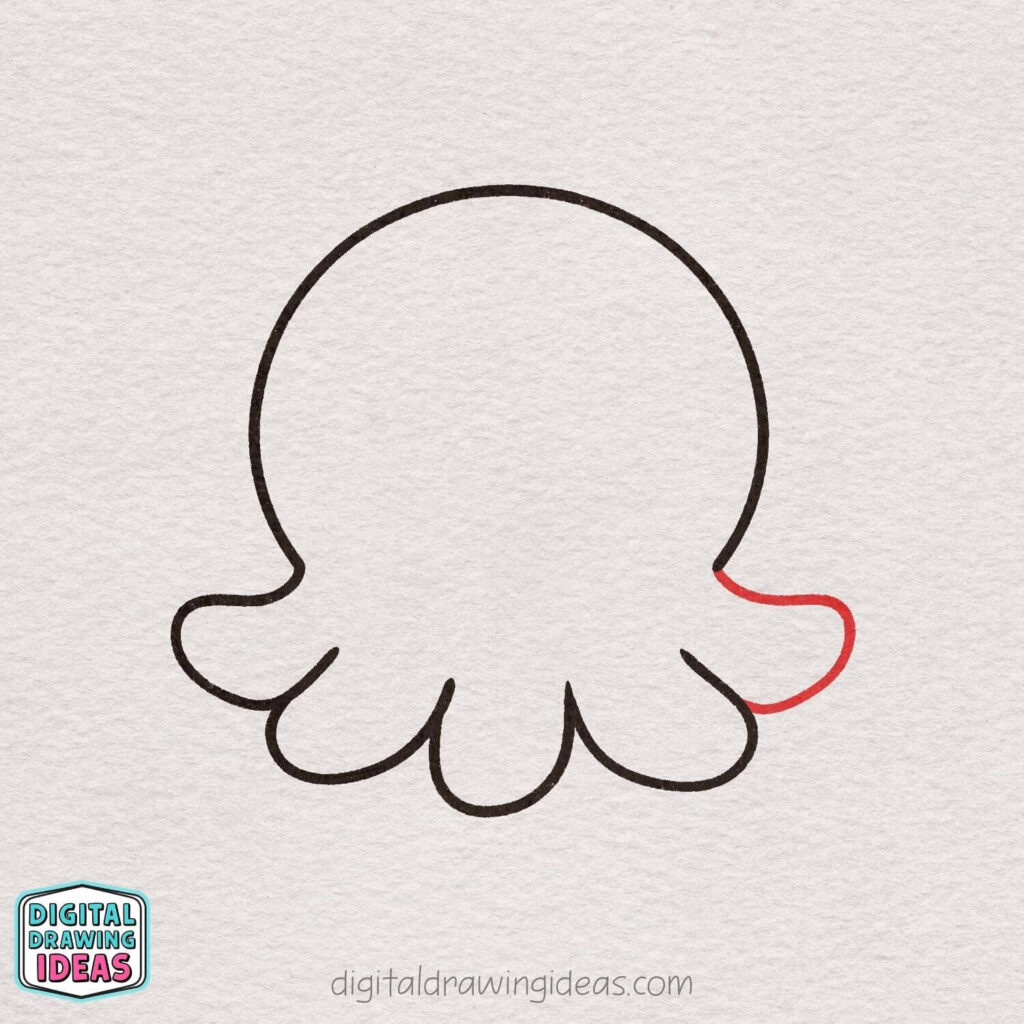
Now draw a wavy arm on the right side, similar to the one on the left.
Let the line curve outward and back in with a soft, rounded shape. Try to mirror the other side loosely—it doesn’t have to be exact, just keep it cute and balanced!
Step 7: Add the Cute Face
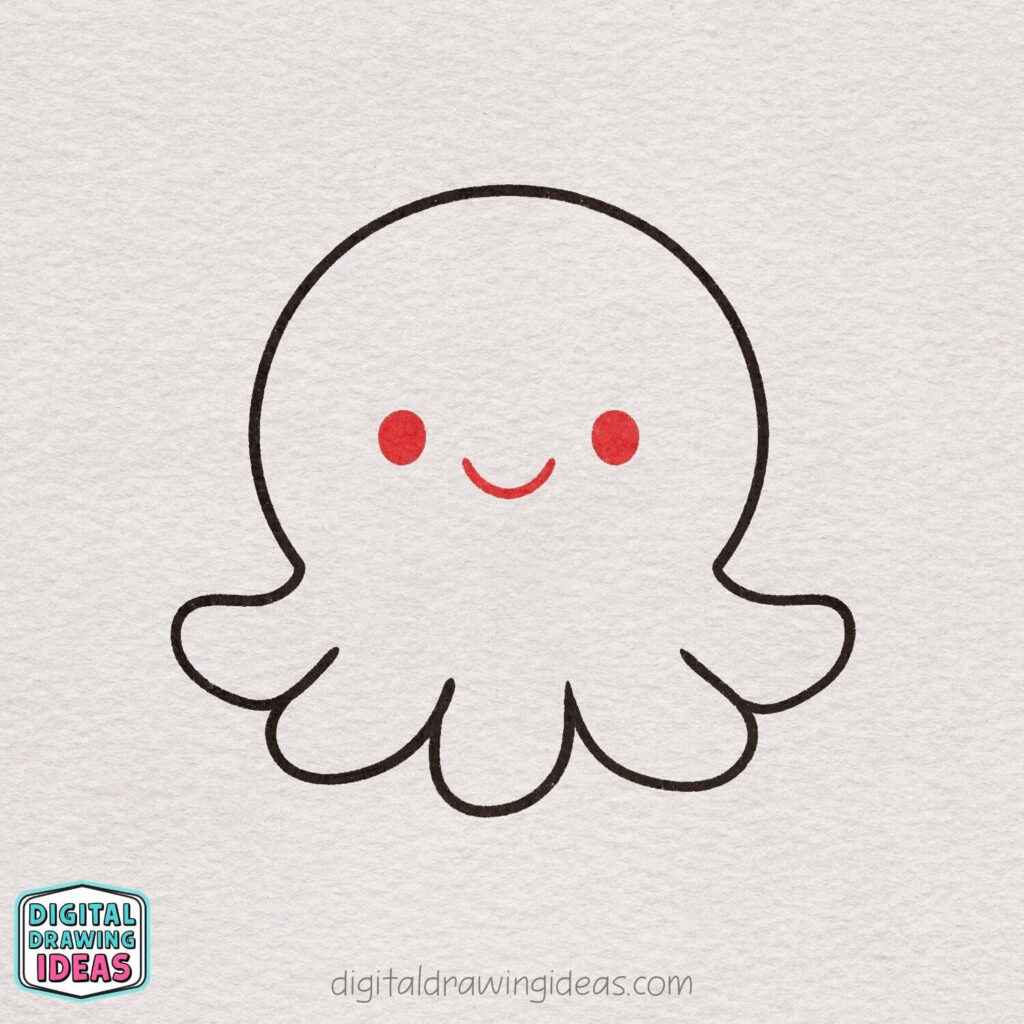
Now let’s bring your octopus to life! Draw two small round eyes and a tiny curved smile in the center.
Keep everything simple and evenly spaced for that adorable look. You can make the eyes like little dots—super easy and super cute!
Step 8: Add the Tiny Suction Cups
Now draw small rounded bumps along the bottom of each arm to create the suction cups.
Think of little “u” shapes lined up next to each other. Keep them small and soft for that extra cute detail—it really brings your octopus to life!
Step 9: Add Cute Little Details
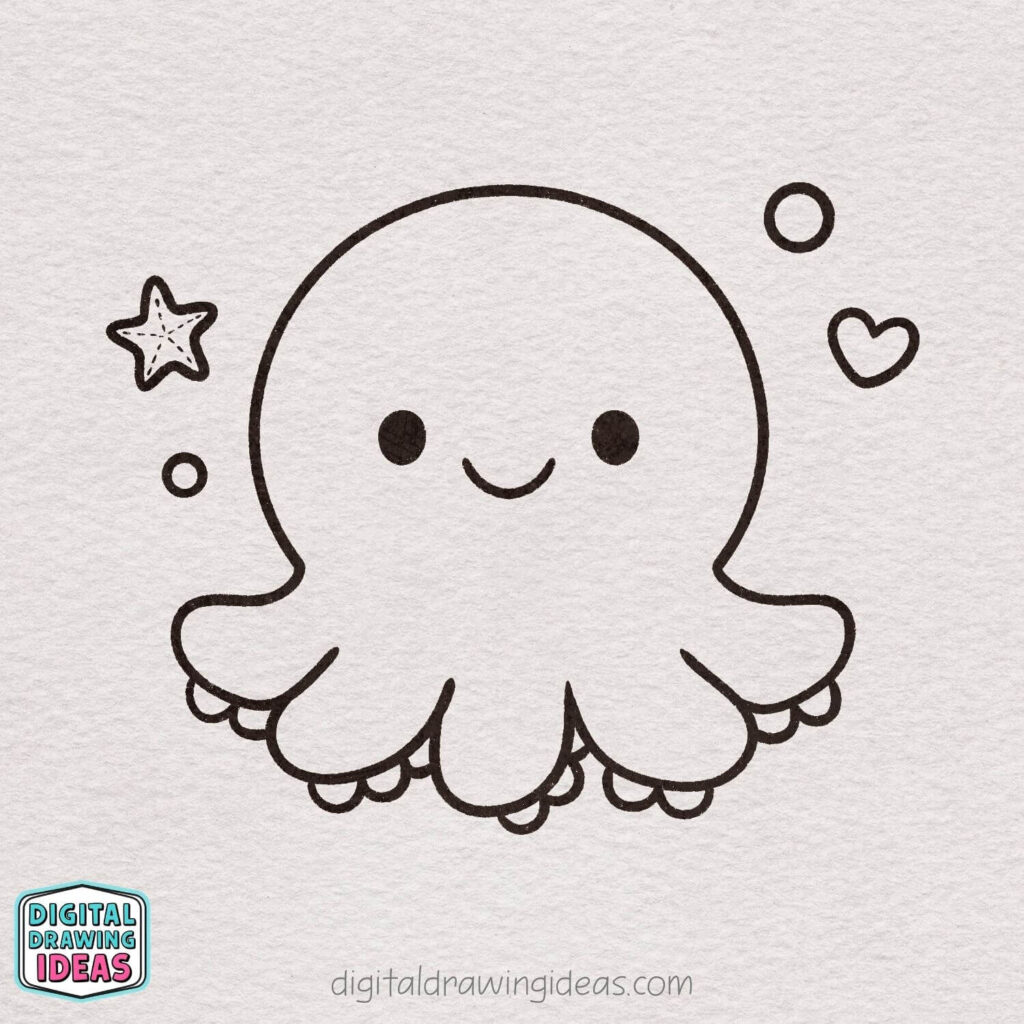
Let’s decorate your octopus! Draw a few small shapes around it like bubbles, a tiny heart, and a star.
These fun extras make your drawing feel more lively and playful. You can place them wherever you like—just keep them simple and cute!
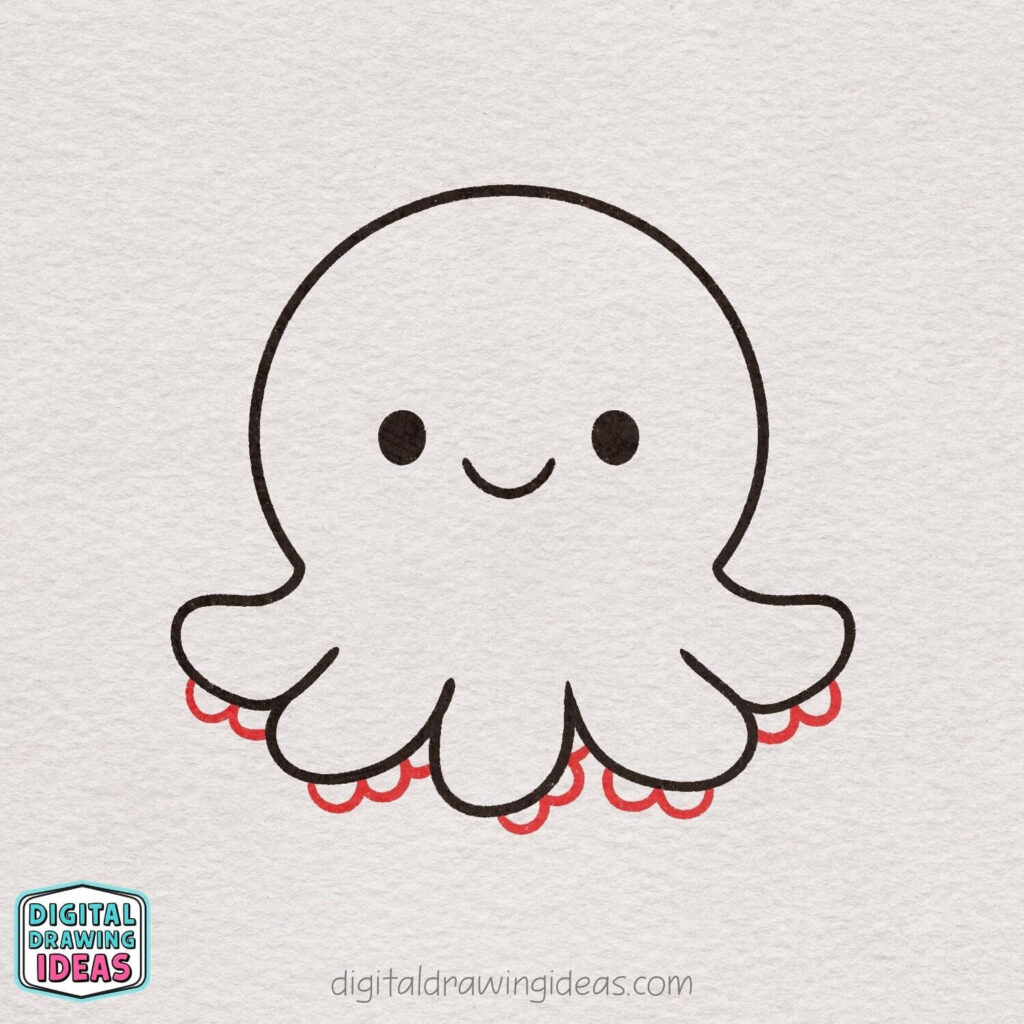
Step 10: Add Color and Finishing Touches

Now it’s time to bring your octopus to life with color! Fill in the body with a soft purple (or any color you love), and add a light pink blush on the cheeks.
You can also color the little details like the star, bubbles, and heart to make everything pop. Take your time and have fun—your cute octopus is finished!
My Personal Tip (That Changed Everything for Me)
When I first started practicing how to draw an octopus, I used to press too hard on the paper and overthink every line.
Now I always remind myself:
draw like you’re sketching in sand, not carving in stone.
Try this:
- keep your hand relaxed
- draw lightly first
- don’t fix mistakes immediately
It sounds simple, but it completely changes how your drawing feels.
Want to Draw More Cute Sea Creatures?
If you enjoyed this octopus drawing, I think you’ll love these too. I created them in the same cute, beginner-friendly style:
I actually made these as a little “underwater series,” because I got slightly obsessed with drawing ocean animals for a while. No regrets.
Keep Practicing (Even If It Feels Messy)
If your first try doesn’t look like mine, that’s completely normal.
I’ve drawn this same octopus more times than I can count, and honestly, some of them still look a bit wonky. That’s part of the process.
The goal isn’t perfection.
The goal is:
- enjoying the process
- improving a tiny bit each time
- letting your style grow naturally
Let’s Stay Connected
If you try this how to draw an octopus tutorial, I’d genuinely love to see your version.
And if you share your drawing, tag me on Instagram @digitaldrawingideas—I always get excited seeing your creations.
Final Thoughts
Now you know how to draw an octopus step by step in a way that’s simple, cute, and actually fun.
To quickly recap:
- start with a soft head shape
- build the arms with rounded curves
- add a simple face
- finish with small details and color
That’s it. Nothing complicated—just small steps that come together into something adorable.
So tell me—did your octopus turn out cute, goofy, or somewhere in between?
I’d love to hear (or see) it.

