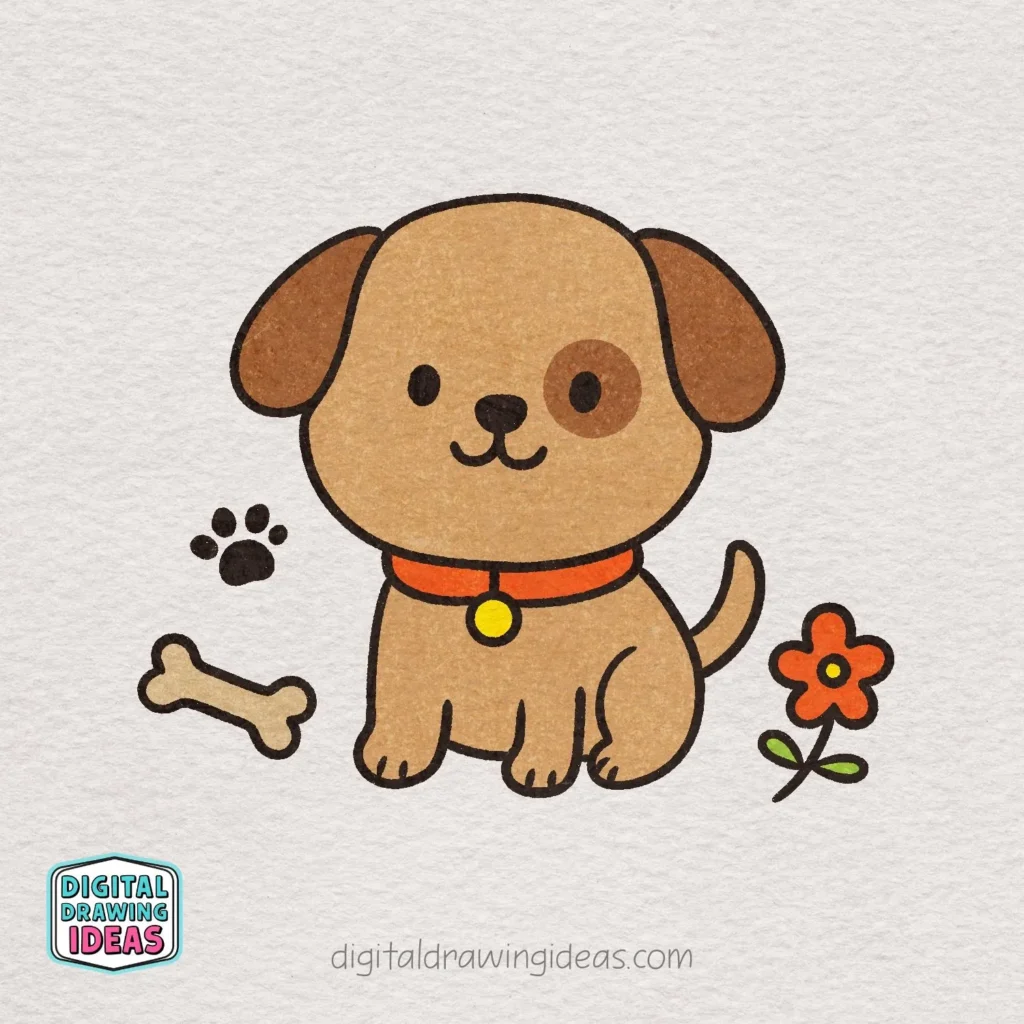
Have you ever wondered how to draw a robot that’s cute, friendly, and full of personality? I love turning simple shapes into adorable little characters, and this smiling robot with its round face, tiny antenna, and mechanical claw hands was such a fun drawing to create!
When I started designing this little robot, I didn’t want it to look like a complicated machine covered in wires, buttons, and technical details. I wanted something cheerful, with a big expressive face, a small body, and just enough mechanical features to make it instantly recognizable.
And I have to say, those little claw hands might be my favorite part!
One thing I really enjoy about creating my own drawing tutorials is watching an illustration slowly come together. A few simple lines might not look like much at first, but add a smiling face, an antenna, and some tiny details, and suddenly there’s a whole character looking back at you.
That’s exactly what I love about this robot drawing.
If you’ve been looking for an easy way to learn how to draw a robot, I’ve broken my original illustration down into 15 manageable steps. You can follow along at your own pace, and you don’t need any special drawing skills to get started.
Grab your pencil, find a comfortable spot, and let’s give this little robot some personality!

Why This Cute Robot Drawing Is Easier Than It Looks
Robots might sound tricky to draw, especially when you imagine all those complicated mechanical parts. But here’s a little secret: a cute cartoon robot doesn’t need any of that!
I designed this one around a handful of simple shapes:
- A large rounded rectangle for the head
- A smaller rounded rectangle for the face screen
- Two oval eyes and a tiny curved smile
- A small, rounded body
- Short mechanical arms and legs
- Two playful claw hands
- A little gear on the chest
See? Nothing too intimidating!
The trick when learning how to draw a robot is to focus on one shape at a time instead of worrying about the entire character.
I especially love using rounded corners in my illustrations. They make even something as mechanical as a robot look soft, sweet, and approachable.
And don’t worry if your robot ends up with one ear slightly bigger than the other. Maybe that’s just how it picks up better signals!
What You’ll Need for This Easy Robot Drawing
Before we get started, gather a few basic drawing supplies. You probably already have most of these at home.
- Pencil: For sketching the basic shapes and making adjustments
- Eraser: For fixing little lines before you finish the outline
- Black pen or fine-tip marker: To give your robot those lovely, bold outlines
- Colored pencils or markers: I used blue, yellow, gray, and a little pink
- Paper or sketchbook: Whatever you enjoy drawing on!
Personally, I love combining thick black outlines with soft, playful colors. It’s such a simple way to make a drawing stand out without adding a lot of complicated shading.
For this robot, I chose a light blue face screen, blue feet, a bright yellow antenna, and soft pink cheeks. The colors give it a cheerful personality while keeping the overall design nice and simple.
Of course, you can choose completely different colors if you prefer. A lavender robot with mint-green feet? Why not!
A Few Helpful Tips Before You Start
If you’re learning how to draw a robot for the first time, there are a couple of things worth remembering before you pick up your pencil.
The most important one is to leave enough room on your paper.
Our robot has a fairly large head, but we’ll also need space for its antenna, body, arms, and feet. I recommend starting the head in the upper half of your page rather than directly in the center.
A few other tips that can make the process easier:
- Start with light pencil strokes. You’ll have more freedom to adjust the shapes before tracing them.
- Keep the head larger than the body. This gives the character its adorable cartoon proportions.
- Don’t rush the face. Two simple eyes and a tiny smile can completely change your robot’s expression.
- Check the spacing. Leave enough room on both sides for the arms and claw hands.
- Enjoy the little imperfections. A slightly uneven curve can make your drawing feel more charming and handmade.
I also recommend following the steps in order, even if some of them seem very simple.
When I create my step-by-step illustrations, I like to separate the smaller details so you can clearly see how each new part fits into the drawing.
How to Draw a Robot Step by Step
Ready to start creating your own little robot?
Below, I’ll show you how to draw a robot in 15 easy steps using the original drawings I created for this tutorial.
In each picture, I’ve highlighted the new lines in red. That way, you can easily spot exactly what you need to add without getting confused by the parts you’ve already drawn.
We’ll begin with the head, gradually build the body and mechanical details, and finish everything with some lovely colors.
Let’s get drawing!
Step 1: Draw the Robot’s Head
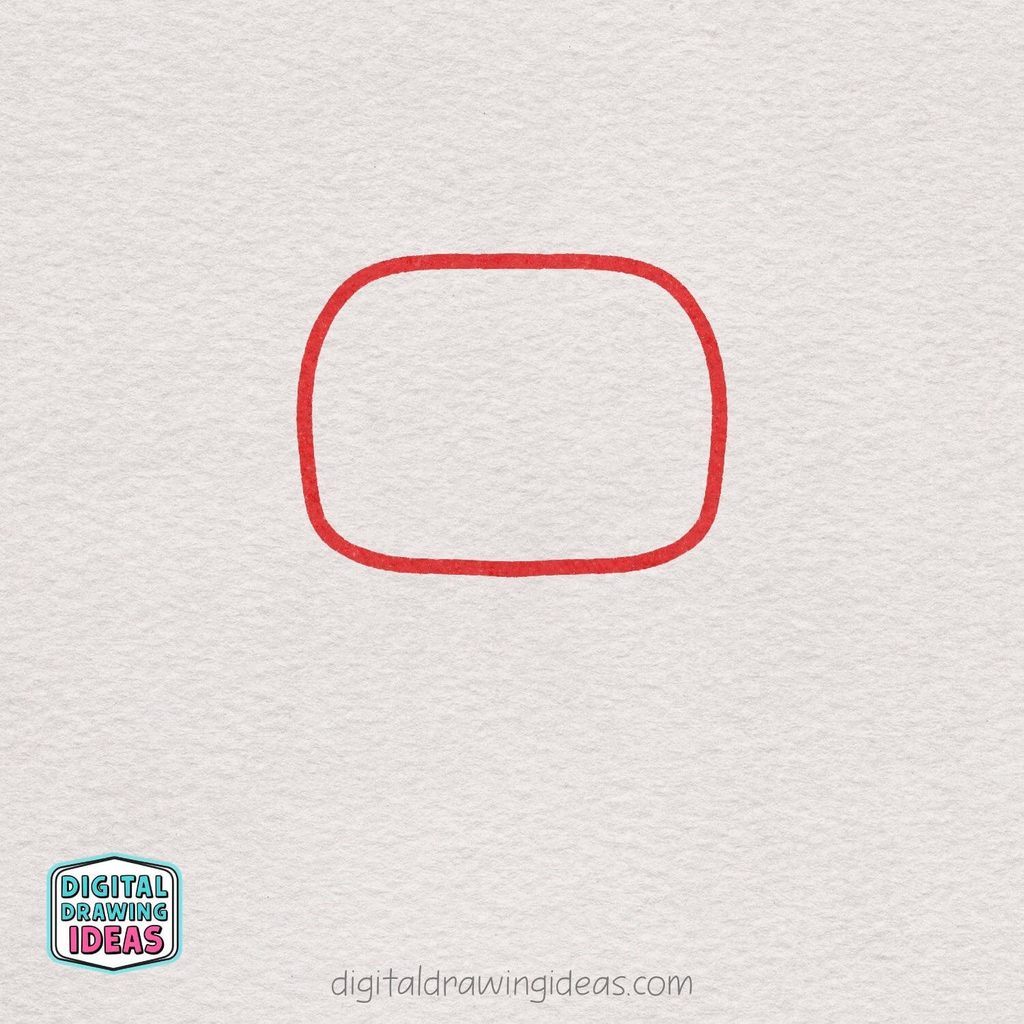
Let’s start our cute robot drawing with a large, rounded rectangle in the upper half of your paper.
Make the top and bottom edges slightly curved, and give each corner a nice, smooth, rounded shape.
This will be the main outline of our little robot’s head, so leave plenty of room underneath for the rest of its body!
Step 2: Add the Face Screen
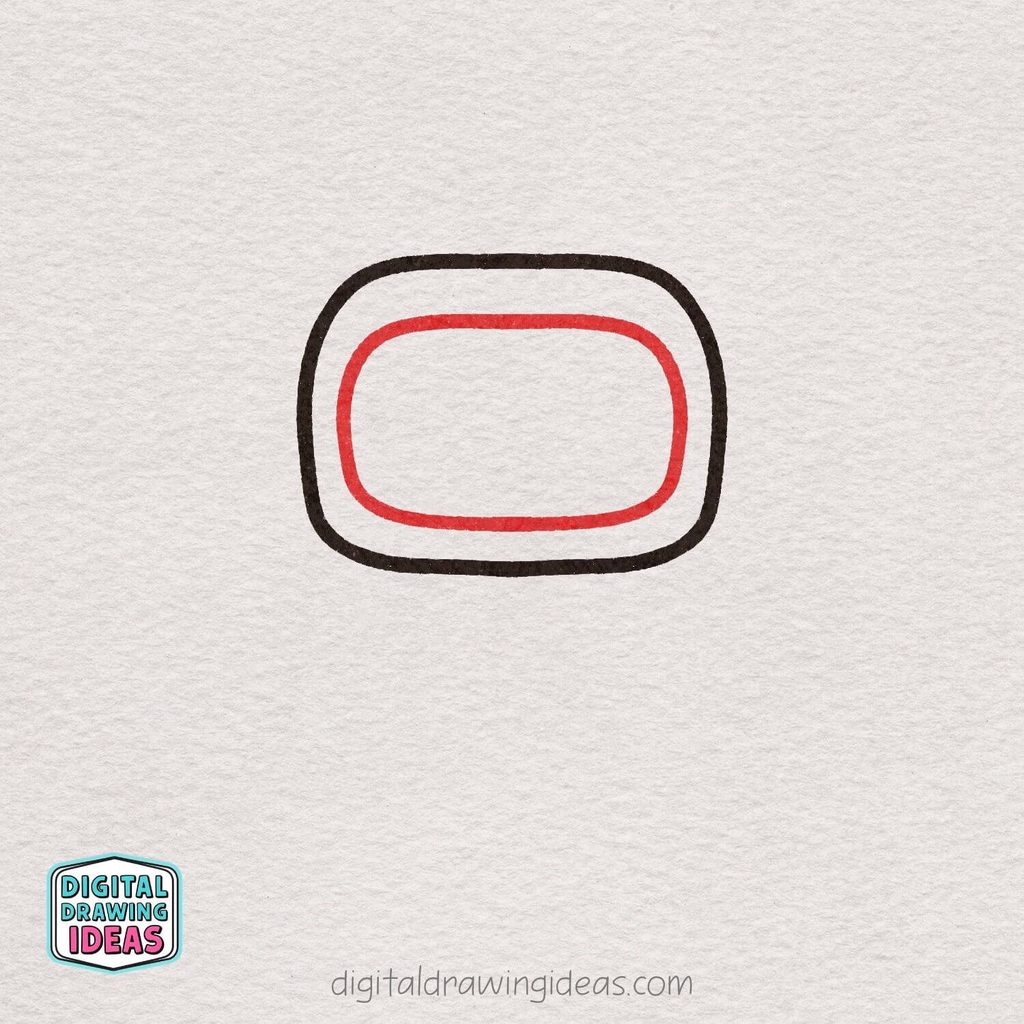
Now draw a smaller rounded rectangle inside the head shape to create the robot’s face screen. Try to keep the spacing fairly even all the way around so it looks neatly centered.
This inner shape gives your robot that cute little display area where we’ll add the face details later on.
Step 3: Draw the Cute Face

Next, add your robot’s sweet little face inside the screen area. Draw two small upright oval eyes with a simple curved smile placed between them, slightly lower in the middle.
Keep the features nice and spaced out so the robot looks friendly, cheerful, and easy to recognize.
Step 4: Add the Robot’s Side Ears and Antenna Base

Let’s give our little robot some extra details around its head! Draw a rounded, half-oval shape sticking out from each side, keeping them about the same size and lined up with the face screen.
Next, add a small curved arch at the very top of the head, right in the center. This will be the base for our robot’s antenna, which we’ll build in the next steps!
Step 5: Draw the Antenna’s Round Tip

Our little robot needs a fun antenna on top of its head! Start by drawing a small circle directly above the curved base you added in the previous step.
Make sure the circle is centered with the robot’s head, and leave a small gap between the two shapes.
This round piece will become the glowing tip of our robot’s antenna!
Step 6: Connect the Antenna to the Head

It’s time to finish our robot’s little antenna! Draw two short, straight vertical lines connecting the round tip to the curved base on top of the head.
Keep the lines parallel and close together to create a neat, narrow antenna stem. Now our friendly robot has a complete antenna, ready to pick up signals from outer space!
Step 7: Draw the Robot’s Body

Now that our robot’s head is complete, let’s give it a little body!
Starting just beneath the head, draw two gently curved lines that extend downward and slightly outward.
Connect them at the bottom with a smooth, rounded line to create a soft, trapezoid-like shape.
Keep the body smaller than the head to give our robot those adorable, cartoon-style proportions!
Step 8: Draw the Robot’s Feet
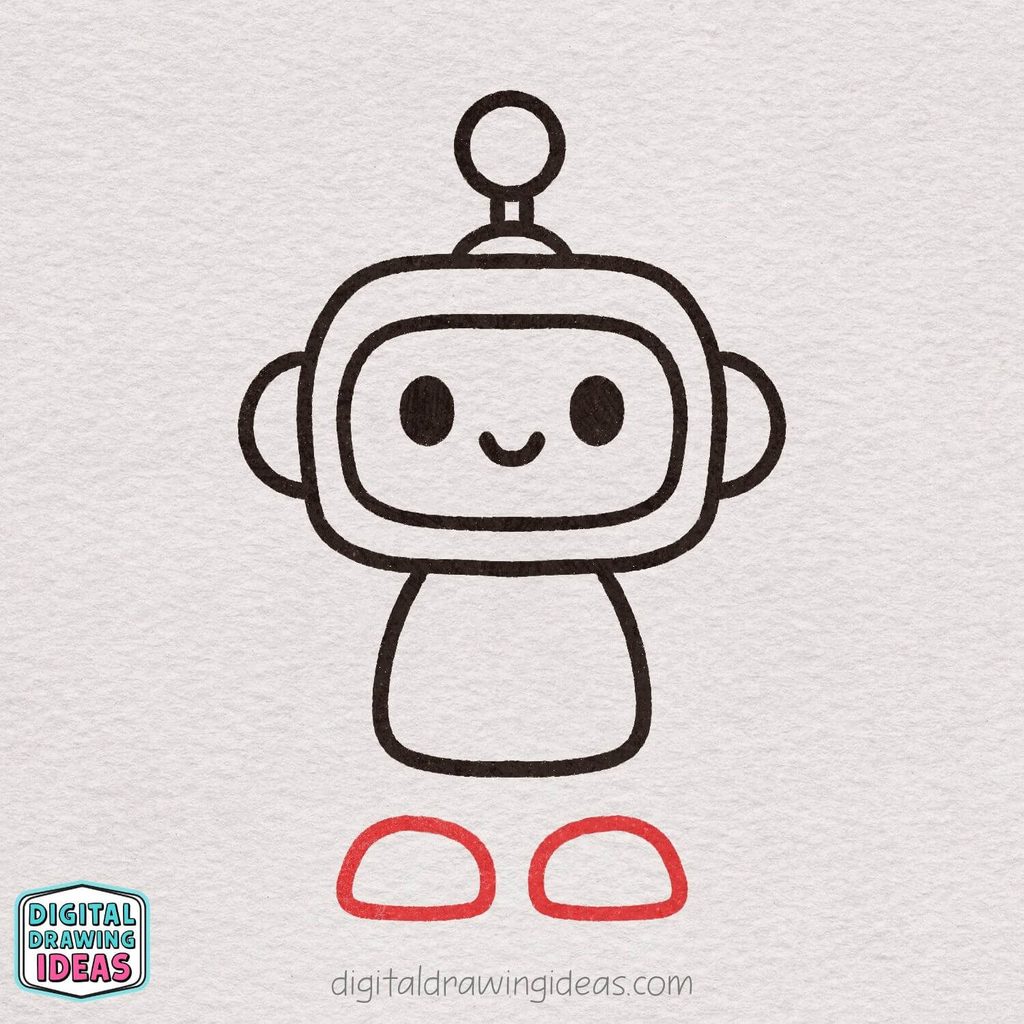
Let’s give our little robot a pair of cute, sturdy feet! Below the body, draw two small, rounded dome shapes with slightly flattened bottoms, placing one on each side.
Try to keep them about the same size and leave a little space between them.
Make sure there’s also a small gap between the feet and the body, since we’ll connect everything with the robot’s legs in the next step!
Step 9: Connect the Robot’s Legs
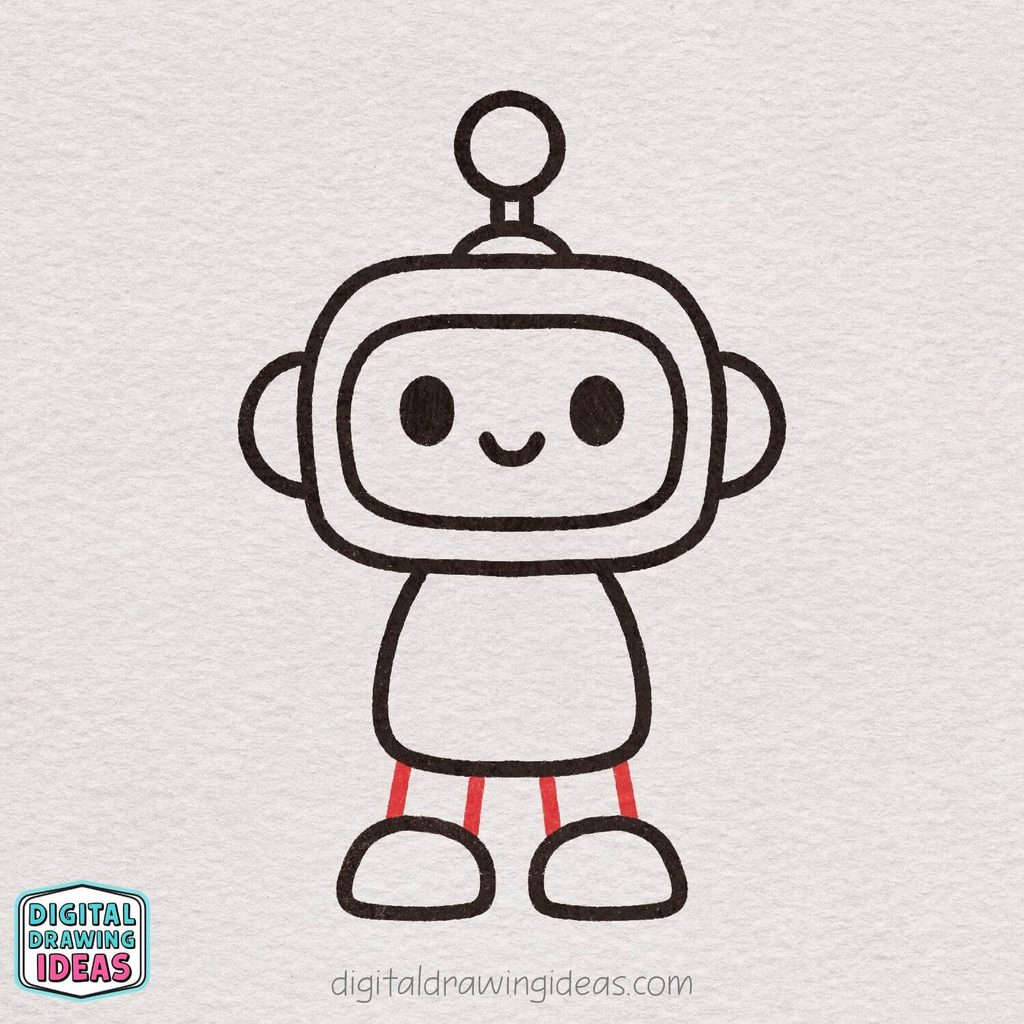
Now let’s connect those adorable little feet to the robot’s body! Draw two short, slightly slanted lines from the bottom of the body down to each foot, creating a pair of simple, sturdy legs.
Keep the lines on each leg fairly close together, leaving a small gap between the legs.
Our little robot is starting to look like it could walk around and explore!
Step 10: Draw the Robot’s Claw Hands

Our little robot needs a pair of hands, so let’s give it some fun, mechanical claws!
On each side of the body, draw a small, curved claw shape that looks a bit like a letter C with two rounded tips pointing inward. Make sure the claws face each other and sit at roughly the same height.
Leave some space between the hands and the body, as we’ll be adding the robot’s arms next!
Step 11: Connect the Robot’s Arms
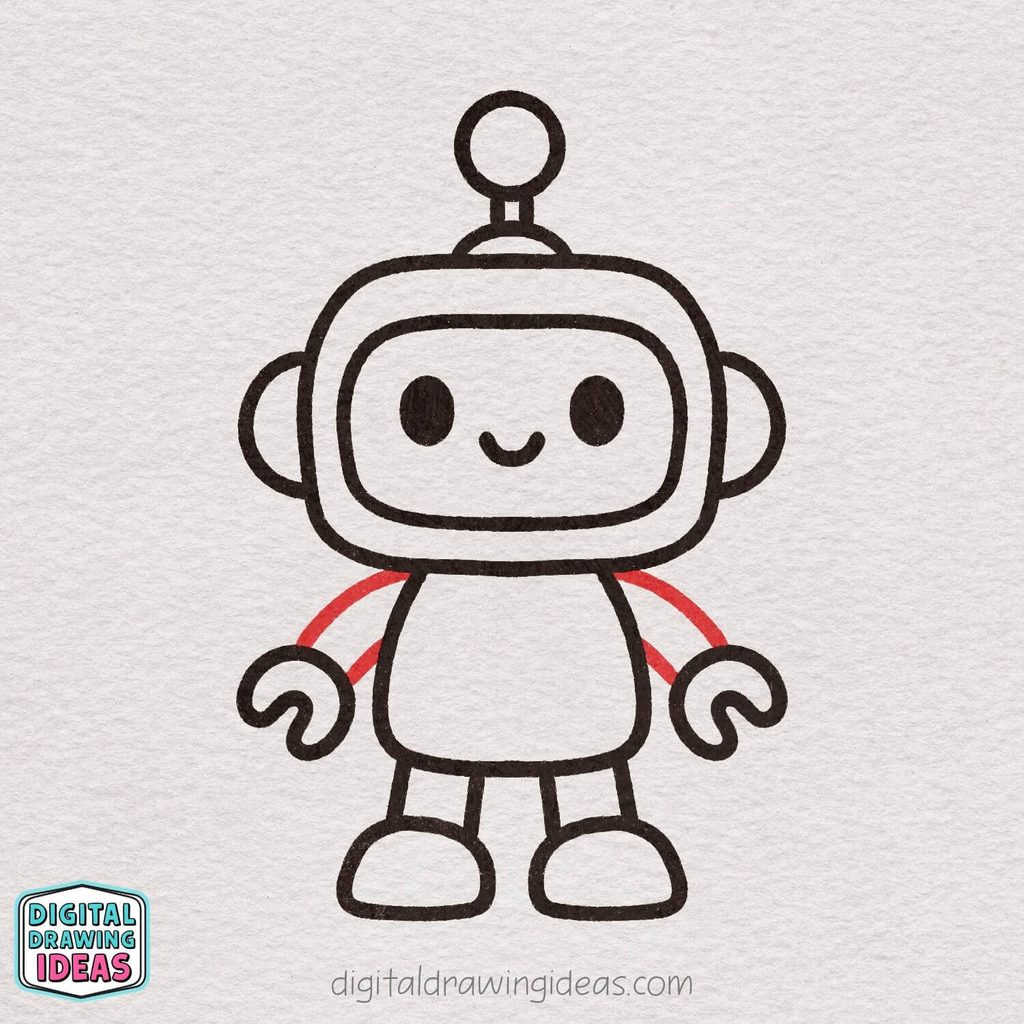
It’s time to give our little robot a pair of mechanical arms! On each side of the body, draw a long, gently curved line stretching from just below the head to the top of each claw hand.
Then, add a shorter, slightly diagonal line connecting the inner side of each claw to the robot’s body.
Try to make both arms look balanced, giving our friendly robot a relaxed, welcoming pose!
Step 12: Add Mechanical Details to the Arms and Legs

Let’s make our little robot look even more mechanical by adding some fun details to its arms and legs!
Draw two short, diagonal lines across each arm to create three separate sections, just like flexible robot joints. Then, add one horizontal line across each leg, slightly above the feet.
These simple little details give our robot a more realistic mechanical look while keeping its adorable cartoon style!
Step 13: Draw a Gear on the Robot’s Chest
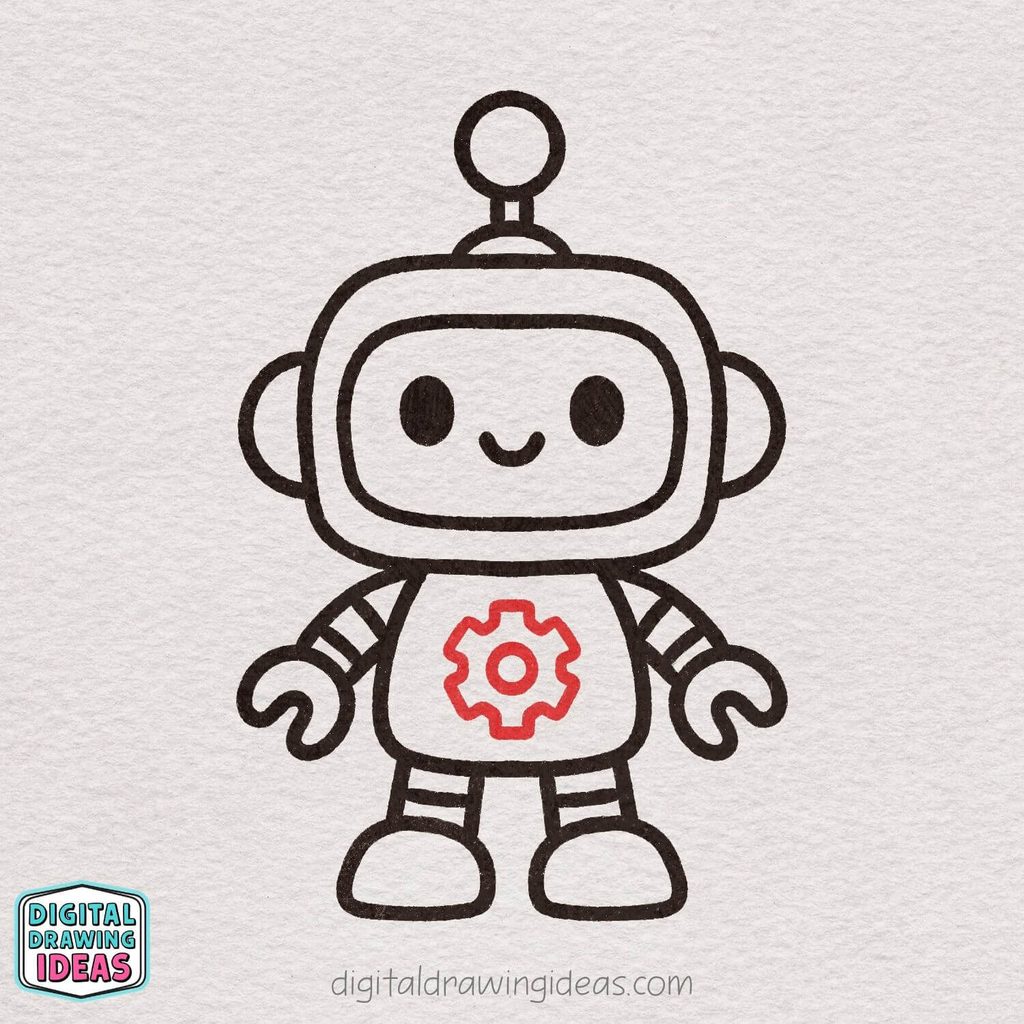
Let’s add a cool mechanical detail to the center of our robot’s body!
Start by drawing a small circle in the middle of the chest, then surround it with a larger gear shape featuring six little teeth around the edges.
Take your time with the bumps and corners to give the gear its recognizable shape.
This fun detail makes our little robot look like it has a special mechanical heart!
Step 14: Trace and Refine the Robot’s Outline
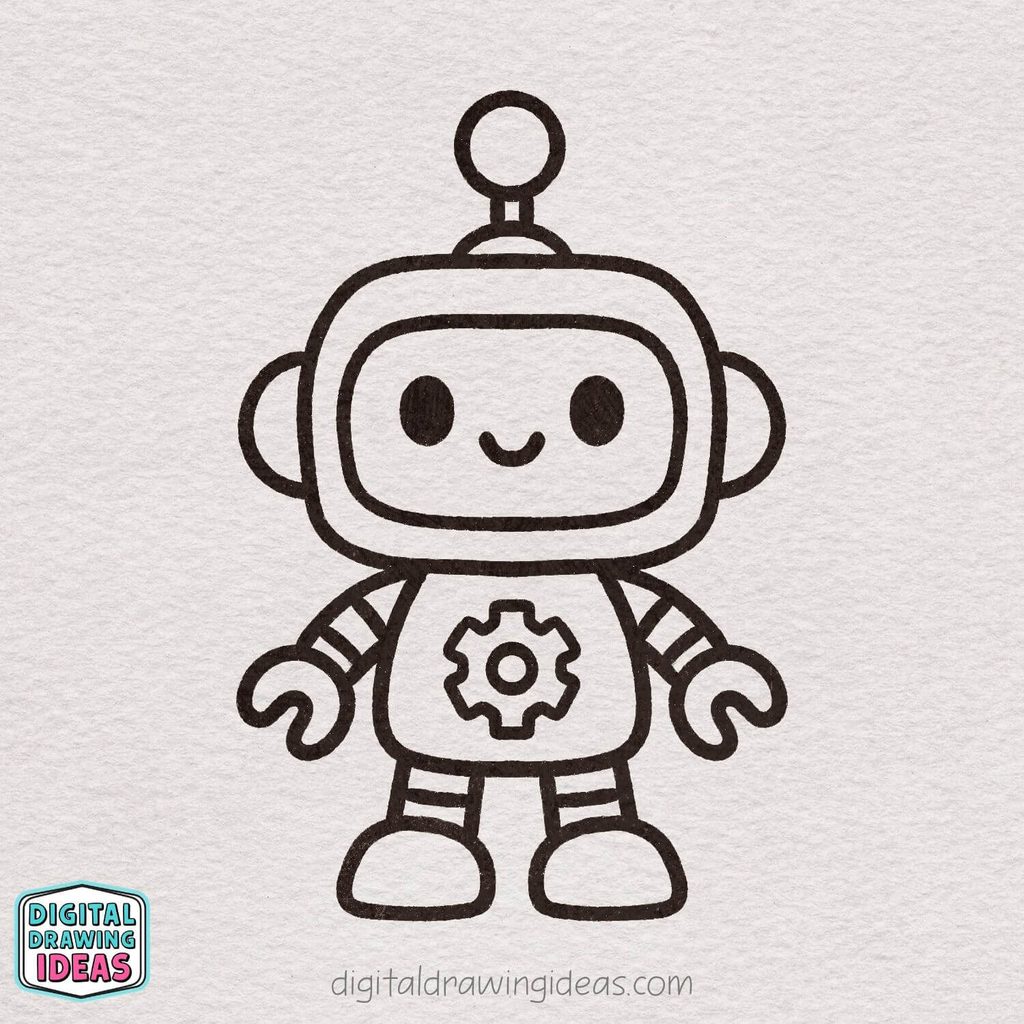
Our cute little robot is almost finished! Now it’s time to go over your drawing and carefully trace all the outlines to make them darker, smoother, and more defined.
Pay special attention to the rounded edges, mechanical joints, and the little gear on its chest.
Take your time to clean up any uneven lines so your robot looks neat and ready for the final step, where we’ll bring it to life with some color!
Step 15: Color Your Cute Robot

Hooray! Our adorable little robot is ready for its final splash of color!
Fill in the face screen, side ears, and feet with a soft shade of blue, while keeping the head frame and body white.
Add cheerful yellow to the antenna tip and the gear on its chest, then use light gray for the mechanical arms, legs, and claw hands. For an extra touch of cuteness, gently blend a little pink onto both cheeks to give your robot a sweet, rosy glow.
And there you have it—your very own friendly little robot is complete!
Little Tricks to Make Your Robot Drawing Even Cuter
Now that you’ve finished your robot drawing, I want to share a few small things I’ve found helpful when creating cute cartoon characters.
The funny thing about simple drawings is that even the tiniest detail can make a big difference. You don’t need dozens of decorations or complicated shading techniques to give your robot a personality.
Sometimes all it takes is changing the shape of a smile!
Here are a few ideas you can try:
- Make the eyes a little bigger. Larger eyes can give your robot a sweeter, more innocent expression.
- Add rosy cheeks. This is one of my favorite ways to make a simple character look extra adorable.
- Experiment with the antenna. Try a heart, star, or tiny lightning bolt instead of the round tip.
- Change the colors. Pastel pink, mint green, lavender, or even bright orange could look lovely.
- Personalize the chest decoration. Replace the gear with a heart, a lightning bolt, or your robot’s initial.
- Give your robot a background. A few stars, tiny planets, or fluffy clouds can turn your drawing into a whole little scene.
If your first attempt looks a little different from mine, that’s perfectly fine.
One of the things I love most about drawing is that even when we follow the same tutorial, our finished illustrations can have their own personalities.
Maybe your robot has a slightly tilted antenna or unusually big feet. I think those little differences are part of what makes drawing so enjoyable.
What If Your Robot Doesn’t Look Quite Right?
I know how frustrating it can be when you have a cute picture in mind, but the shapes on your paper don’t seem to cooperate.
Fortunately, most little drawing problems are much easier to fix than they first appear.
Does the head look too square?
Try rounding the corners a little more. My robot has a soft, almost pillowy head shape rather than a traditional square one.
Does the face look a little strange?
Check the spacing between the eyes. Keeping them at about the same height and placing the smile in the middle can make a surprisingly big difference.
Are the arms or legs uneven?
Use light pencil lines to adjust their length before tracing them with your black pen. They don’t need to match perfectly, but keeping them fairly balanced helps the character look more natural.
Does your robot look too serious?
Give it a slightly bigger smile or add a little color to the cheeks. It’s amazing how quickly a tiny expression can change the whole mood of a drawing.
And if you’re having trouble with one particular shape, try practicing it separately on a scrap piece of paper.
You don’t need to restart the whole illustration just because one curve didn’t turn out the way you imagined!
More Easy Drawing Tutorials You’ll Love
If you enjoyed learning how to draw a robot, there are plenty of other cute illustrations you can try next!
I love creating drawings that start with simple shapes and gradually turn into something colorful and full of personality. Sometimes I’ll finish one little illustration and immediately start imagining what I could draw to go with it.
For example, wouldn’t it be fun to draw your robot driving a tiny car or exploring a magical castle?
Here are a few more step-by-step tutorials I’ve created that you might enjoy:
- How to Draw a Car – Easy Car Drawing Tutorial – Give your little robot its very own vehicle! This cute car drawing would make a lovely addition to a playful robot scene.
- How to Draw a Castle – Easy Castle Drawing Tutorial – Maybe your robot is off on an adventure to explore a beautiful castle. This tutorial is another fun way to practice simple shapes.
- How to Draw a Crown – Easy Crown Drawing Tutorial – Who says robots can’t be royalty? Try giving your little character a cute golden crown.
- How to Draw a Hamburger – Easy Hamburger Drawing – A completely different subject, but just as much fun! Create a cheerful little hamburger to add to your collection of cute drawings.
You could even combine several of these illustrations on one sketchbook page and create a funny little story around them.
Imagine a robot wearing a crown, driving a car toward a castle, with a giant hamburger packed for the journey.
A little ridiculous? Absolutely. But that’s what makes drawing fun!
Your Cute Little Robot Is Ready!
And there we have it! You’ve learned how to draw a robot in 15 simple steps, starting with a rounded rectangle and finishing with a cheerful little character full of personality.
I hope you enjoyed following this tutorial as much as I enjoyed creating the original illustration.
My favorite thing about this drawing is how the little details bring everything together. The big smiling face, tiny antenna, mechanical claws, and bright yellow gear all give our robot its own charming look.
And those soft pink cheeks? I couldn’t resist adding them!
I also hope this tutorial reminds you that you don’t need to be an experienced artist to create something you genuinely love. Some of my favorite illustrations are built from the simplest shapes, and that’s exactly what makes them so enjoyable to draw.
If you feel inspired, why not try drawing a second robot with a completely different personality?
Maybe a shy little robot with sleepy eyes, a cheerful pink robot covered in hearts, or a space explorer with a colorful antenna.
You can even give your robot a name. I think mine looks like it needs one!
Let’s Keep Drawing Together!
If you enjoyed this tutorial, I’d love for you to explore more of my creative ideas.
You can find plenty of easy drawing inspiration on my Pinterest page, where I share cute illustrations and step-by-step drawing ideas.
And if you prefer watching the drawing process, visit my Digital Drawing Ideas YouTube channel for more fun tutorials.
I’d also love to hear about your finished robot!
Did you stick with my blue and yellow color combination, or did you give yours a completely different look?
Feel free to share your drawing on Pinterest or tag me on Instagram at @digitaldrawingideas so I can see your creation.
Happy drawing, and don’t forget to have fun with those little details!