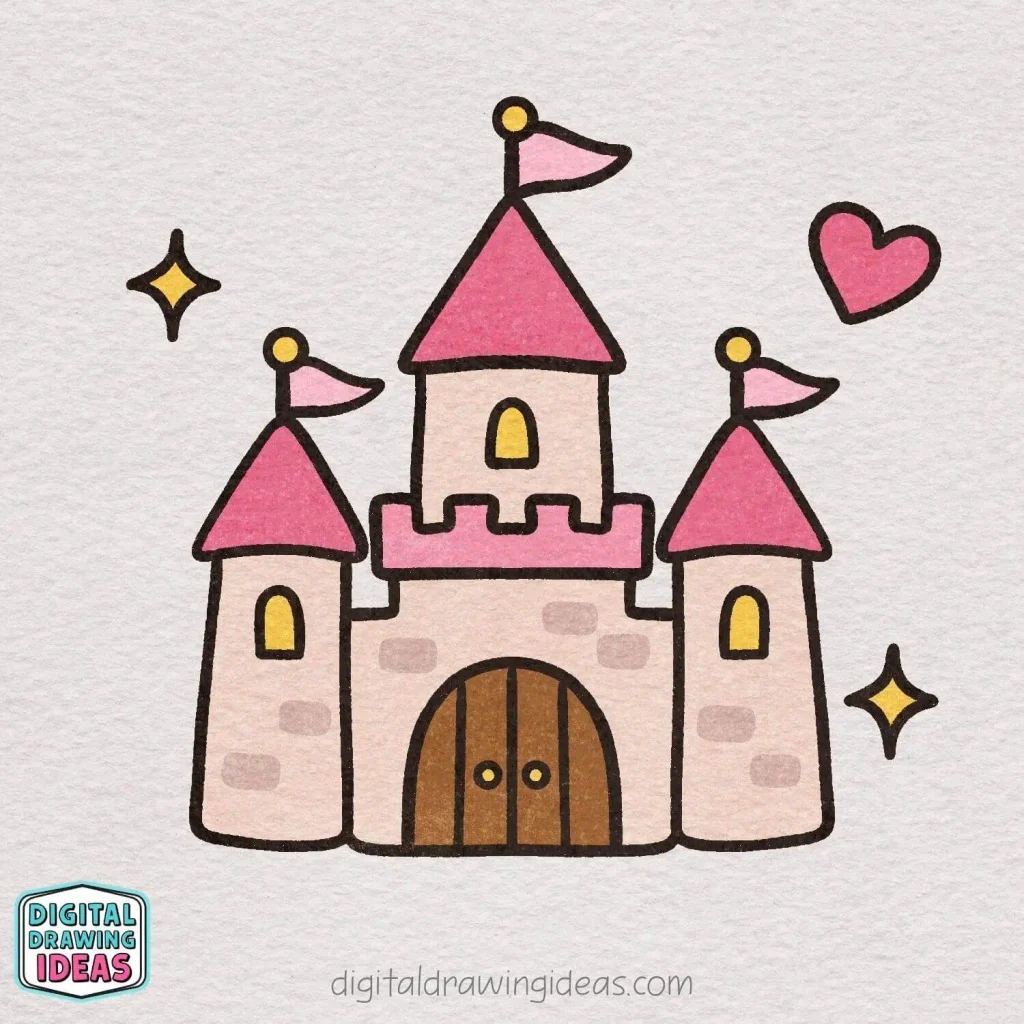
Have you ever wondered how to draw a castle without getting lost in complicated details? I love drawing little fairytale-inspired things, and castles are especially fun because you can turn a few simple shapes into something that looks straight out of a storybook.
When I started working on this castle drawing, I wanted to create something cute, colorful, and easy enough for beginners to follow. Instead of adding dozens of tiny windows, complicated walls, and realistic stone textures, I kept things simple: three towers, pointed roofs, a big wooden door, and a few playful decorations.
My favorite part of creating drawing tutorials is seeing how a simple sketch slowly comes together. You start with a couple of triangles, add a few lines, and suddenly there’s a little castle on your paper. It’s almost like building your own tiny kingdom, minus the construction work!
In this how to draw a castle tutorial, I’ll walk you through 15 easy steps using my own drawings. You can follow along at your own pace, and I’ll show you exactly which lines to add at each stage.
So grab your favorite pencil or drawing pen, find a comfortable spot, and let’s create something lovely!
What You’ll Need for This Easy Castle Drawing
You don’t need fancy art supplies to follow this tutorial. I always think the best drawing projects are the ones you can start with whatever you already have nearby.
Here’s what I recommend:
- A pencil: Perfect for sketching your castle and making small adjustments.
- An eraser: Just in case your towers end up a little crooked.
- Drawing paper or a sketchbook: Any smooth paper will work.
- A black fineliner or marker: Great for creating those bold, clean outlines.
- Colored pencils or markers: You’ll need these to bring your finished castle to life.
If you’re drawing digitally, you can follow the same steps using your favorite drawing app.
One little tip before we begin: don’t press too hard with your pencil at first. Light lines are much easier to adjust, especially when you’re figuring out where to place the towers.
A Few Tips Before You Start Drawing Your Castle
Learning how to draw a castle becomes much easier when you stop thinking about the entire building and focus on one small shape at a time.
That’s exactly how I designed this tutorial. You don’t need to draw a perfect castle in one go. Just follow the shapes, enjoy the process, and let your drawing develop naturally.
Here are a few things I find helpful:
- Start with simple shapes. Most of this castle consists of triangles, straight lines, arches, and circles.
- Leave enough space between the towers. You’ll need room for the center wall and the taller middle tower.
- Don’t worry about perfect symmetry. Slightly uneven lines can make a cute castle drawing look even more charming.
- Follow the red lines. In each tutorial image, the red lines show exactly what you need to draw next.
- Save the little details for later. Focus on the castle’s main structure before adding windows, flags, and decorations.
And remember, your castle doesn’t have to look exactly like mine. You might want taller towers, a wider entrance, or even a completely different color scheme.
That’s the fun part of drawing: you get to make the rules!
How to Draw a Castle Step by Step
Now we’re ready to start our easy castle drawing tutorial!
I’ve divided the process into 15 manageable steps, beginning with the two side towers and finishing with the colors and decorations.
Each picture shows the new lines in red, so you can easily see what to add to your drawing.
Step 1: Draw the Two Tower Roofs
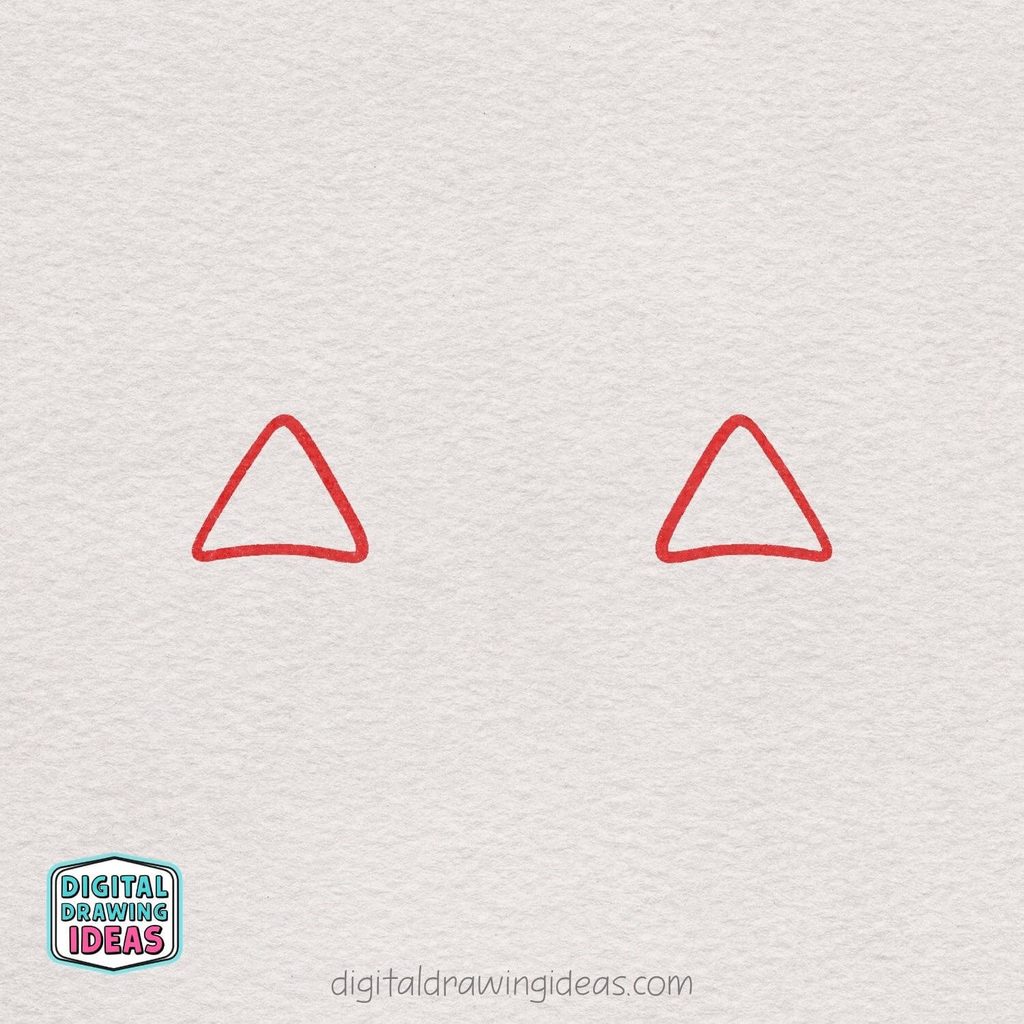
Start your castle drawing by sketching two triangle-shaped roofs, leaving a nice amount of space between them.
Give each triangle slightly rounded corners and a gently curved bottom line to create a soft, playful look.
Try to keep both roofs about the same size, as they will sit on top of the castle’s two side towers.
Step 2: Draw the Two Side Towers
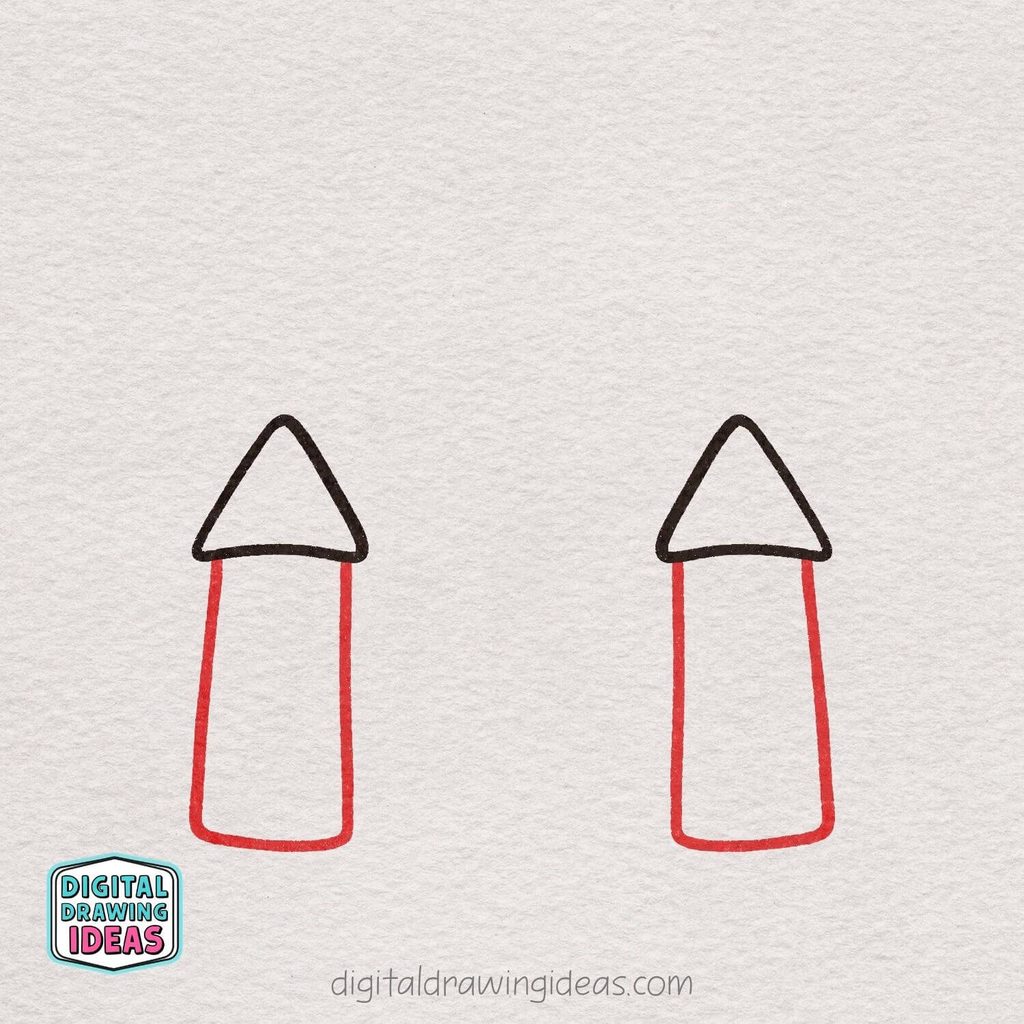
Now that the roofs are in place, it’s time to build the castle’s two side towers! Starting just beneath each triangular roof, draw two long, slightly slanted vertical lines extending downward.
Connect the lines at the bottom with a gently curved horizontal line, giving each tower a soft, rounded base.
Try to keep both towers about the same height so your castle looks nicely balanced.
Step 3: Add the Middle Castle Wall
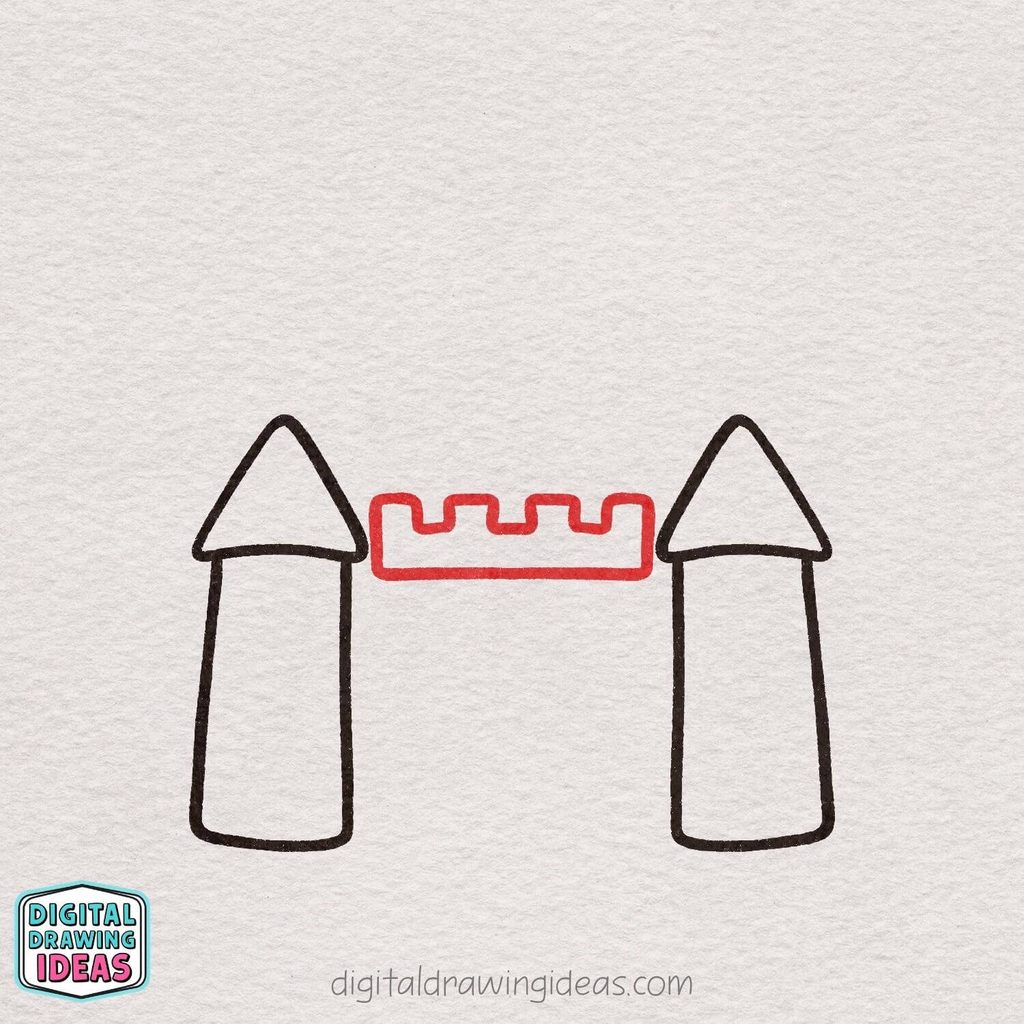
Next, draw the castle wall that connects the two towers. In the space between them, sketch a wide horizontal shape with a straight bottom and a top edge that has four rounded battlements.
These little notches give the castle its classic look and help start forming the front section of the building.
Step 4: Draw the Main Body of the Castle
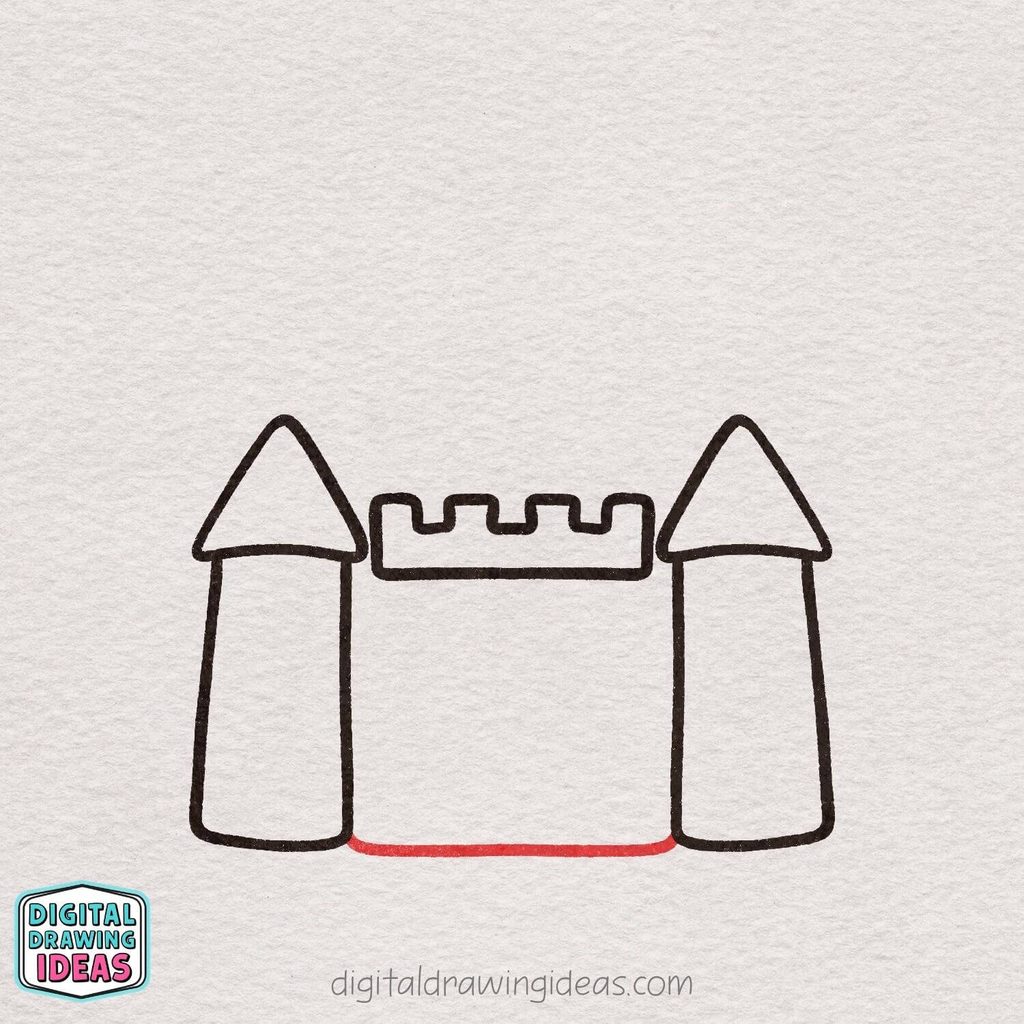
Now connect the two towers by drawing the large front wall of the castle underneath the middle battlement section.
Start at the bottom of the left tower, draw a line across toward the right tower, and gently curve the corners upward so the shape feels soft and rounded.
This wide shape creates the main body of the castle and gives you a nice space for the door and extra details later on.
Step 5: Connect the Castle Walls to the Towers
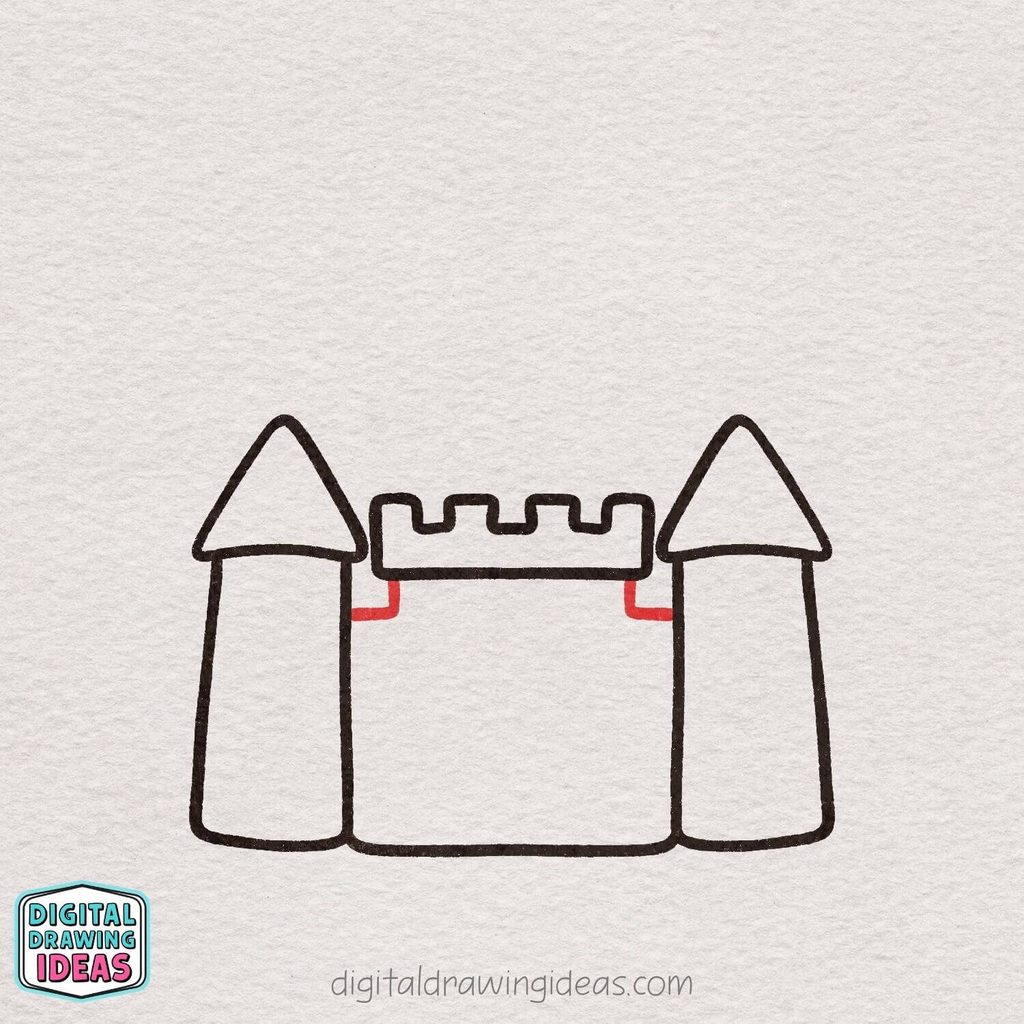
Next, add two small connecting sections just below the battlements to complete the upper part of the castle’s main wall.
On each side, draw a short vertical line downward, then extend a small horizontal line outward until it meets the neighboring tower.
Keep both sides roughly symmetrical to give your castle a neat, balanced appearance.
Step 6: Draw the Roof of the Center Tower
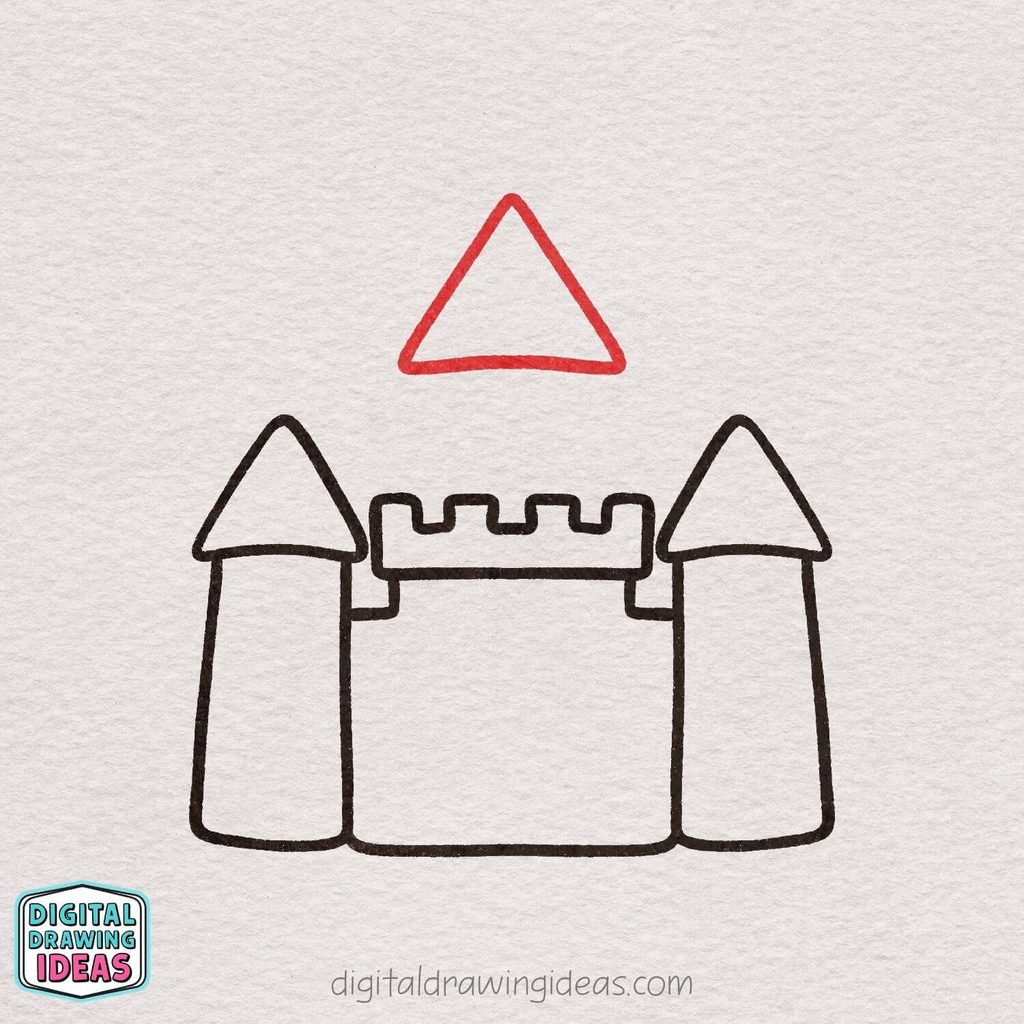
Now it’s time to add a taller tower in the middle of your castle!
Above the battlements, draw a large triangle with slightly rounded corners and a gently curved bottom edge, just like the two smaller roofs.
Position it in the center, leaving a little space between the roof and the wall below.
Make this triangle slightly larger and higher than the other two to give your castle a lovely fairytale appearance.
Step 7: Complete the Center Tower
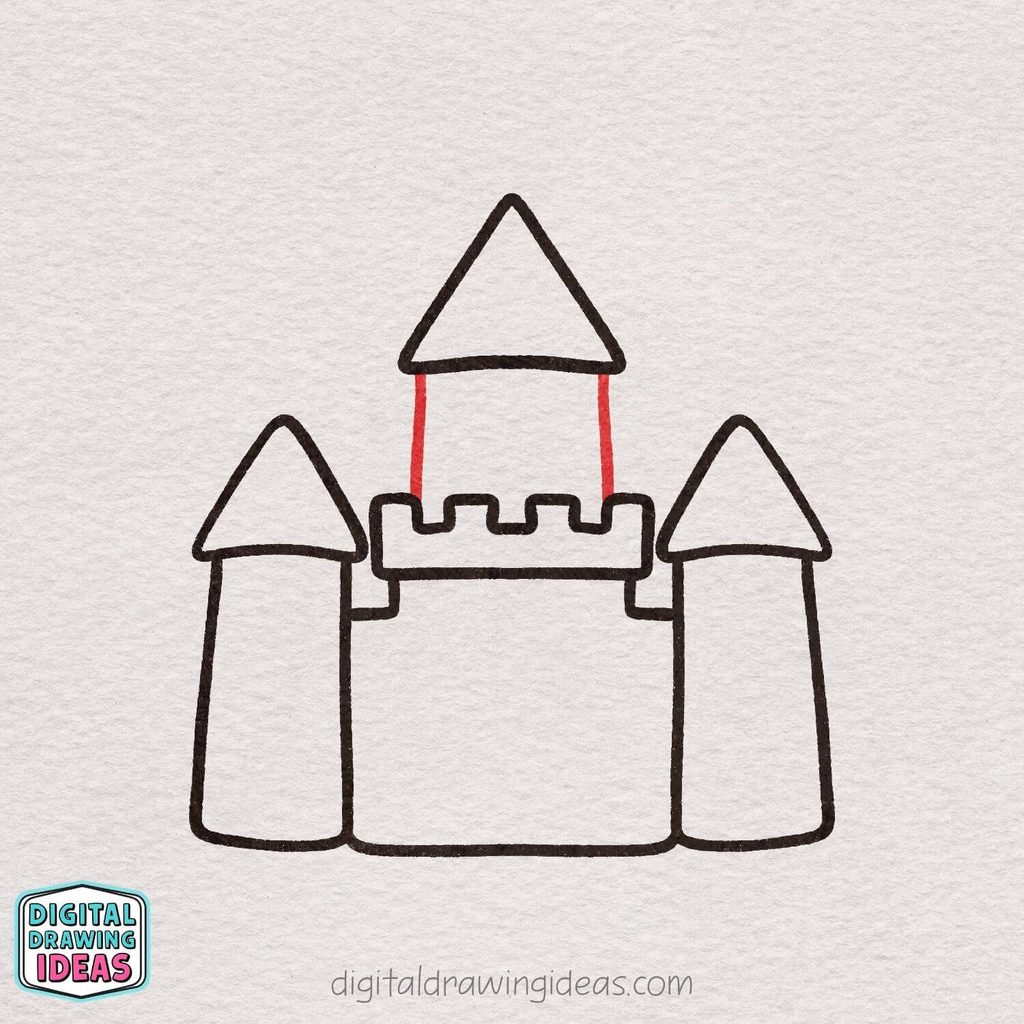
Now let’s give the center tower its walls!
Starting just below the triangular roof, draw two straight vertical lines downward until they meet the battlements of the castle’s front wall.
Keep the lines evenly spaced and aligned with the roof above to create a tall, balanced tower.
Your castle now has three lovely towers, and its main structure is really starting to come together!
Step 8: Add Windows to the Castle Towers
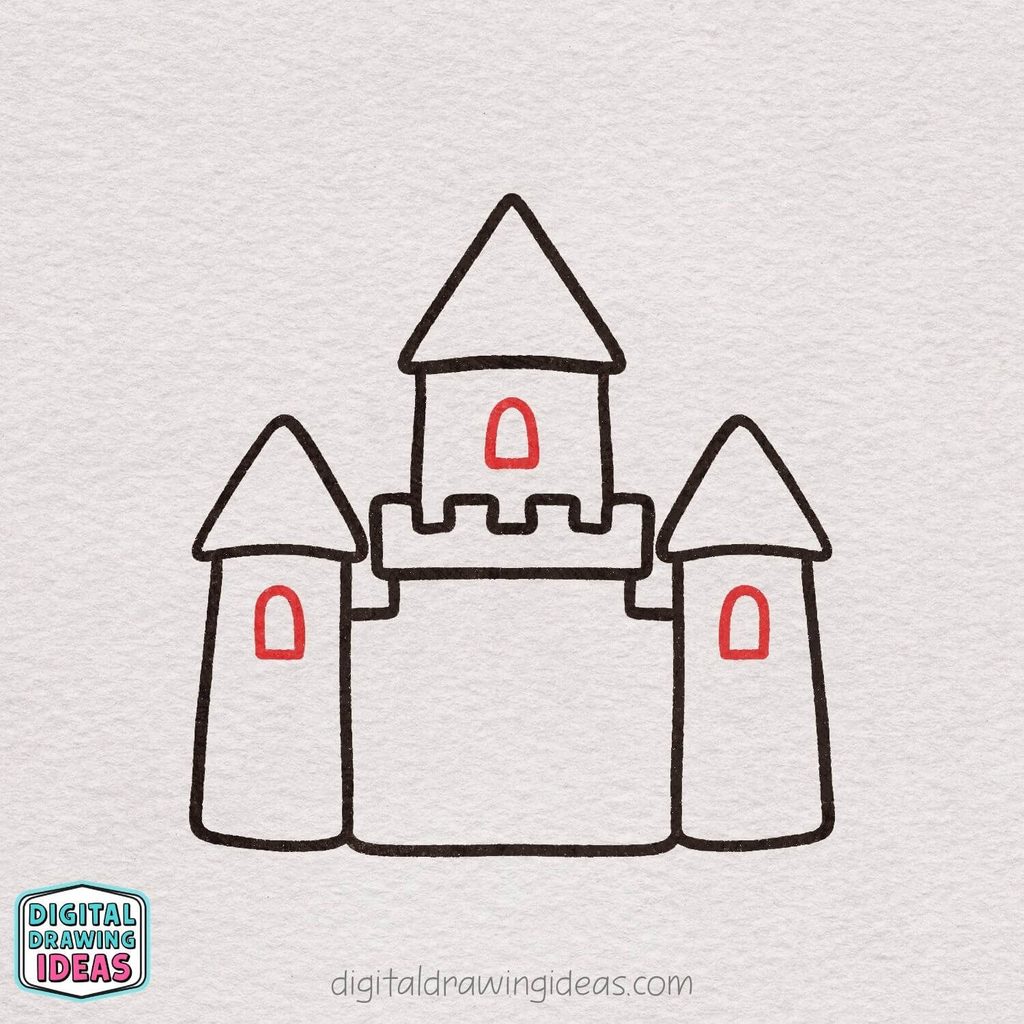
Now let’s make your castle look even more charming by adding a small window to each of the three towers!
Draw a narrow, arch-shaped window on the upper half of each side tower, using a rounded top, two short vertical sides, and a straight bottom.
Repeat the same shape in the center tower, placing it just below the roof. Try to keep all three windows similar in size for a neat, balanced look.
Step 9: Draw the Castle’s Main Entrance
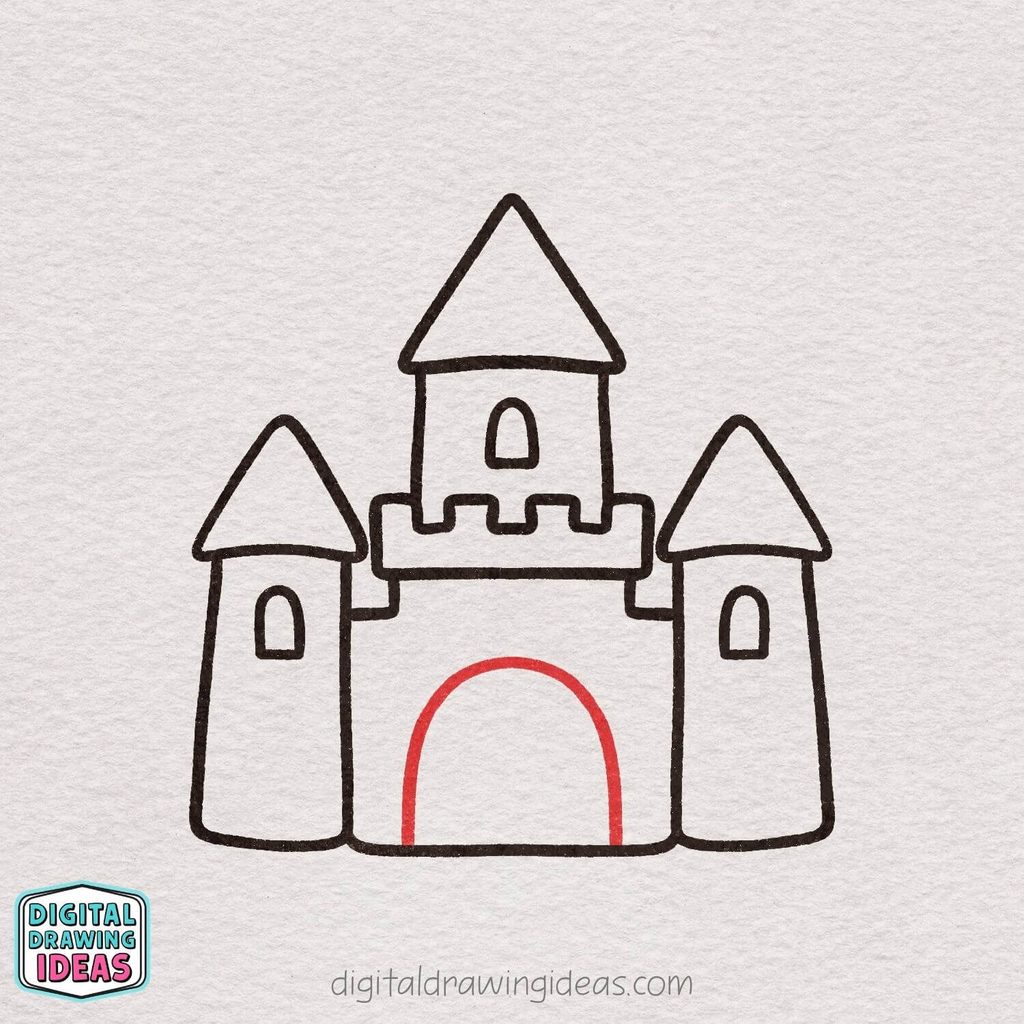
Every fairytale castle needs a grand entrance! In the center of the main wall, draw a large arch-shaped doorway, starting with a tall, curved line that forms a rounded top.
Extend both sides straight down until they reach the bottom edge of the castle.
Make the doorway wide enough to stand out as the main entrance, while leaving some space on either side for additional details later.
Step 10: Add Wooden Planks to the Castle Door
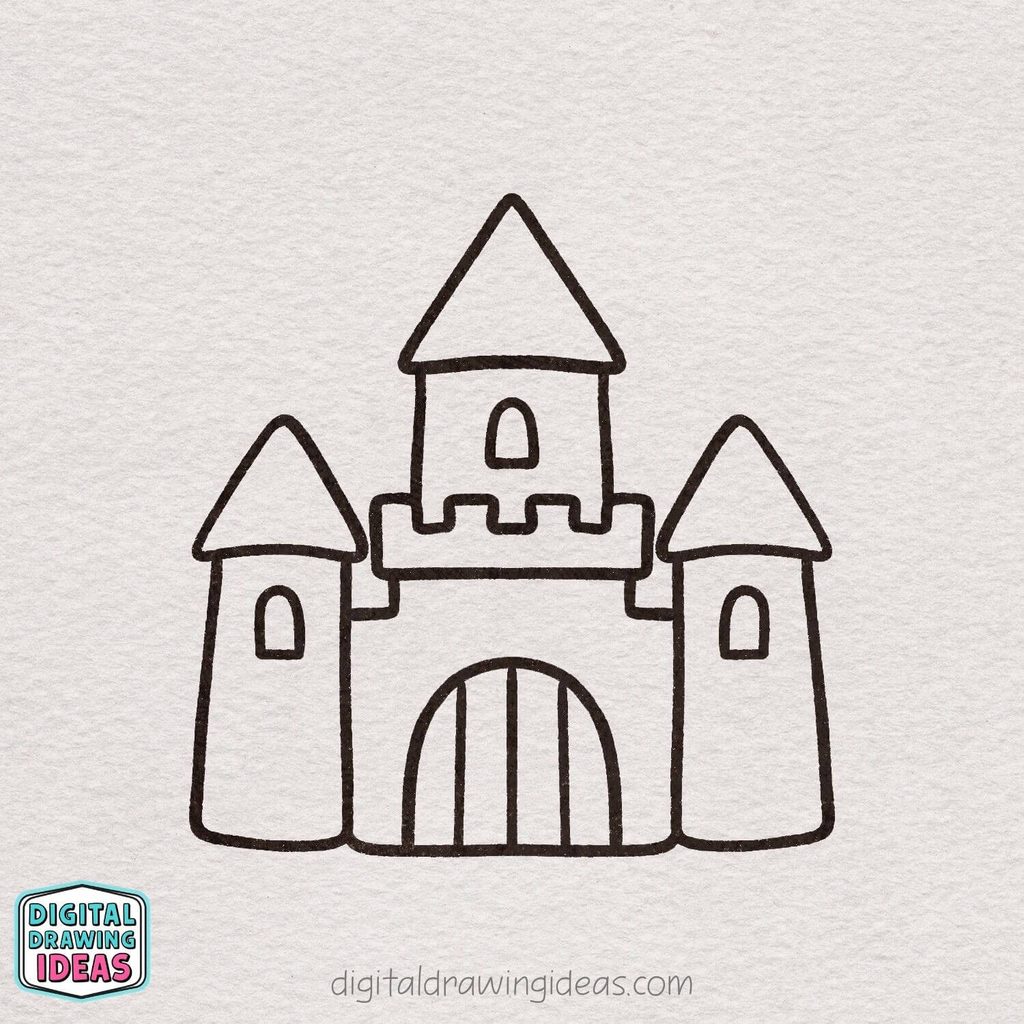
Now let’s add some detail to the castle’s main entrance! Inside the large arched doorway, draw three straight vertical lines extending from the top of the arch down to the bottom.
Space them evenly to divide the door into four wooden sections, giving it the appearance of a sturdy castle gate.
Try to keep the lines nice and straight, but don’t worry if they aren’t perfectly even!
Step 11: Add the Door Handles
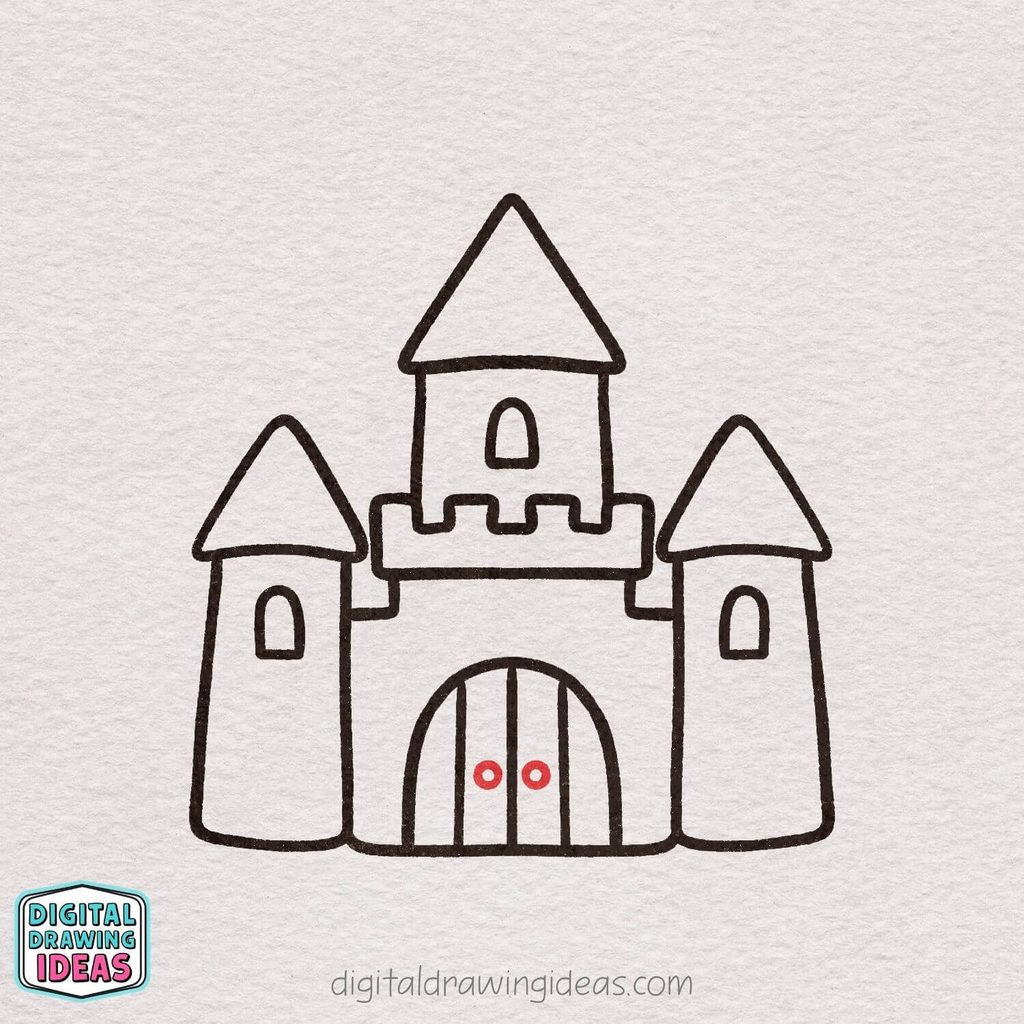
Let’s finish the castle’s main entrance by adding two small door handles!
Draw a tiny circle on each side of the center line, placing them next to each other at about the same height. Keep the circles similar in size and leave a little space between them.
These simple details make the large wooden gate look like a pair of doors that can open to welcome visitors into your fairytale castle!
Step 12: Add Decorative Circles Above the Towers
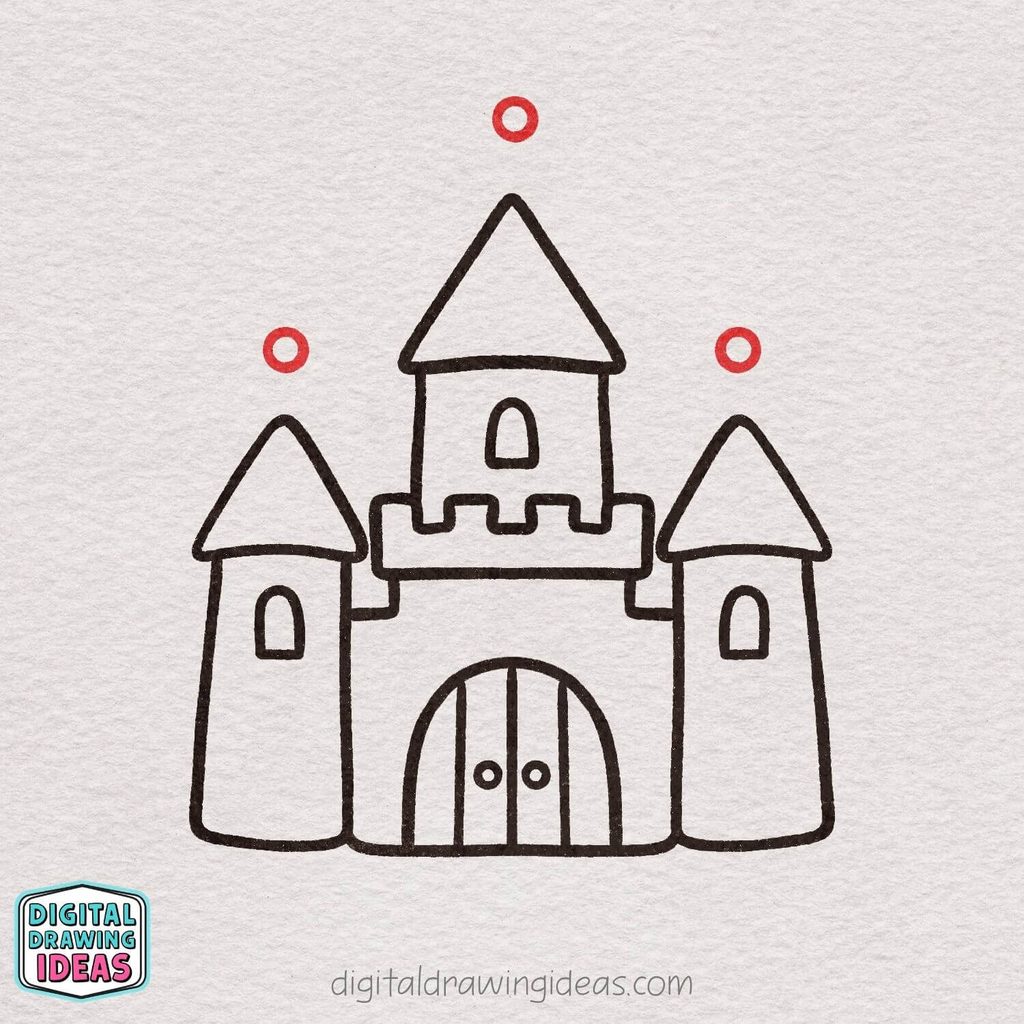
Let’s add a few charming details to the tops of your castle towers!
Draw a small circle above the pointed roof of each tower, leaving a little gap between the circles and the roof tips.
Try to center each circle directly above its tower and keep all three about the same size. These little decorations will become the finishing touches for the flagpoles we’ll add next!
Step 13: Draw the Flags on Top of the Towers
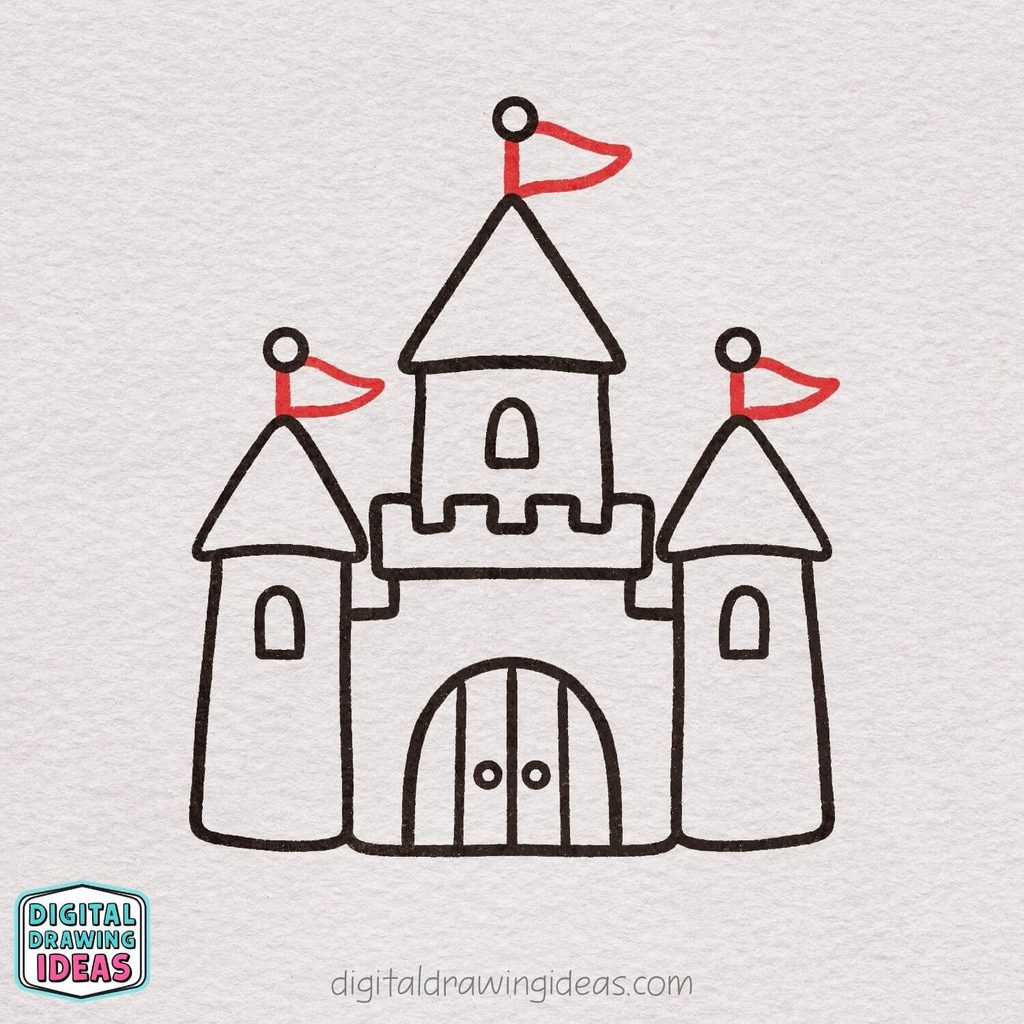
Now let’s add three cute little flags to the tops of your castle towers! Start by drawing a short vertical line from each roof tip up to the small circle above it, creating a flagpole.
Then, from each pole, draw two gently curved lines extending to the right and meeting at a rounded point to form a waving flag.
Repeat this on all three towers, making the center flag slightly larger to match the taller tower.
Step 14: Add a Heart and Magical Sparkles
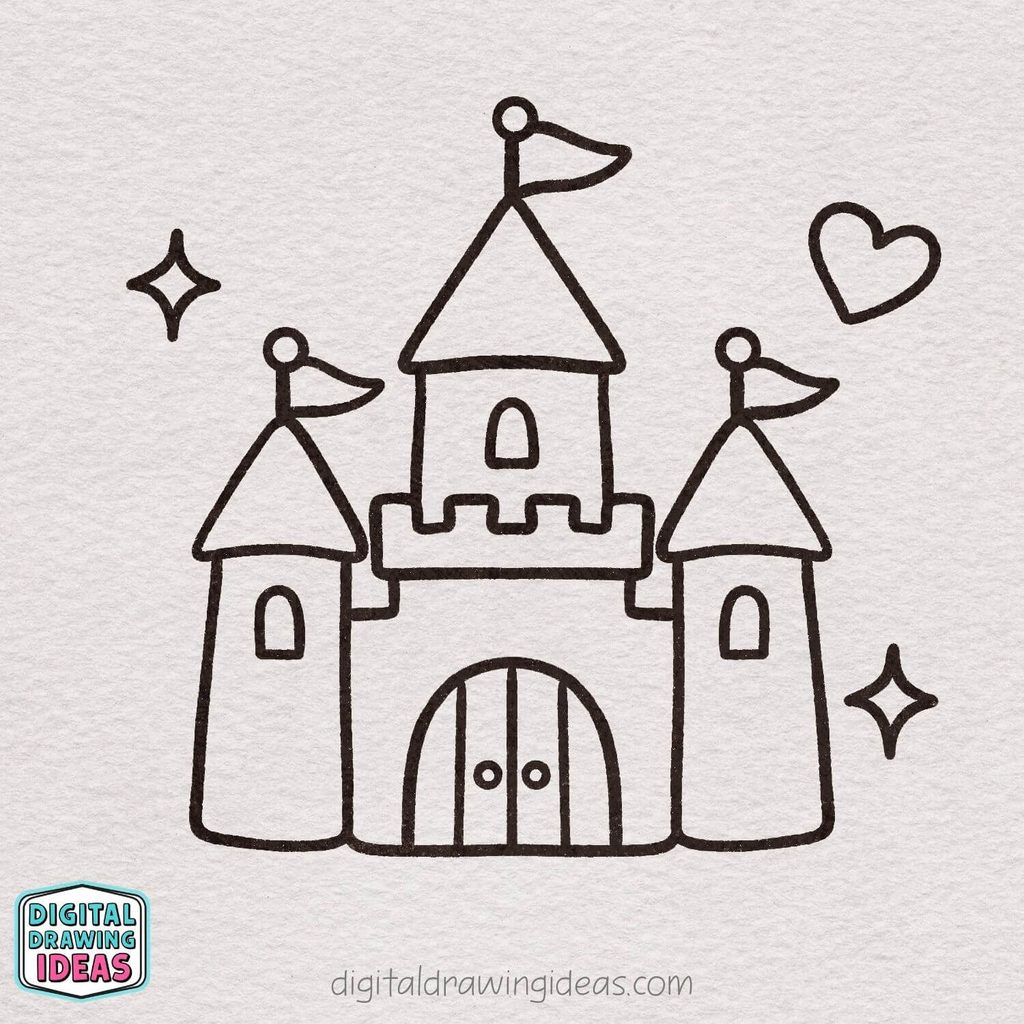
Your castle is almost finished! Let’s give it a little extra fairytale charm by adding some cute decorations around it.
Draw a small heart in the upper right corner, then add two four-pointed sparkles—one to the left of the castle and another near the lower right side.
Give each sparkle slightly curved sides to create a playful, magical look.
These sweet little details make your castle drawing feel even more special!
Step 15: Color Your Fairytale Castle
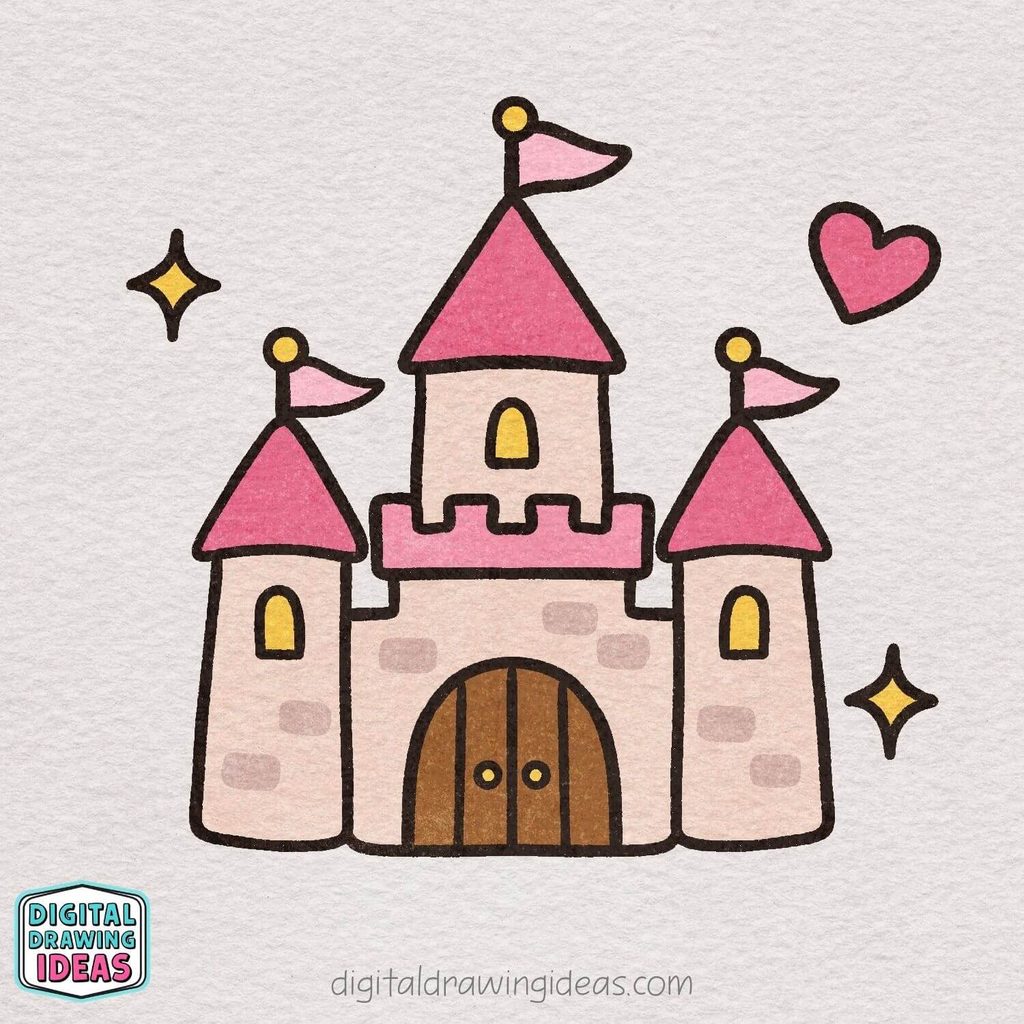
Your castle drawing is complete, and now it’s time to bring it to life with some beautiful colors! Start by coloring the three pointed roofs a lovely shade of pink, then use a lighter pink for the flags and battlements.
Fill in the castle walls with a soft peach or cream color, and add a warm brown to the large wooden doors. Use bright yellow for the windows, door handles, sparkles, and flagpole decorations.
Finally, color the heart pink and add a few soft brick-shaped details to the walls for extra texture.
Feel free to experiment with your favorite colors to make your fairytale castle truly your own!
My Favorite Tips for Making Your Castle Drawing Even Cuter
One of the things I enjoy most about drawing is that even the smallest changes can give a picture a completely different personality.
For this castle, I chose pink roofs, soft peach walls, and little yellow windows because I wanted something sweet and cheerful. But you certainly don’t have to stick to my colors!
If you feel like getting a little more creative, here are a few ideas worth trying:
- Make a princess castle: Use lavender, pastel pink, and gold for a dreamy fairytale look.
- Create a medieval castle: Choose gray stone walls, dark red roofs, and a deep brown wooden door.
- Draw a nighttime castle: Add a crescent moon, tiny stars, and a dark blue sky behind your drawing.
- Turn it into a magical kingdom: Surround your castle with flowers, fluffy clouds, or a winding path.
- Add stone details: Draw a few small, rounded rectangles across the walls to create a simple brick pattern.
Personally, I love adding little details at the end of a drawing. A tiny heart or a couple of sparkles might seem insignificant, but they can completely change the mood of the finished picture.
You can also try drawing the same castle more than once, using different colors and decorations each time. It’s a lovely way to experiment without having to learn an entirely new drawing.
What If Your Castle Doesn’t Look Quite Right?
If you’re following this how to draw a castle tutorial and something looks a little uneven, don’t worry. It’s completely normal to need a few tries before a shape looks the way you imagined.
For me, one of the most useful things about breaking drawings into small steps is that it’s easier to spot where something needs adjusting.
If your castle isn’t coming together as expected, try these simple fixes:
- The towers look uneven: Compare the bottom edges and adjust their heights before adding more details.
- The middle tower seems off-center: Check the space between its walls and the two outer towers.
- The windows look too large: Sketch them lightly in pencil before outlining them with a pen.
- The door looks crooked: Find the center of the main wall first, then draw the arch around that point.
- The drawing feels too plain: Add a few decorative stones, clouds, or extra sparkles after completing the main outline.
My biggest tip? Don’t erase every line just because it isn’t perfectly straight.
A little wobble can actually give your drawing more character, especially when you’re creating something cute and playful rather than realistic.
More Easy Drawing Tutorials You’ll Love
If you enjoyed learning how to draw a castle, I have a few more drawing tutorials that you might like to try next.
I especially enjoy creating tutorials that turn familiar objects into simple, approachable drawings. There’s something satisfying about starting with a blank page and realizing that you can draw much more than you expected.
Here are three more projects you can explore:
- How to Draw a Diamond – Easy Diamond Drawing – A fun little drawing project if you enjoy simple geometric shapes and sparkling details. You could even use your diamond drawing as inspiration for a royal treasure!
- How to Draw a Shell – Easy Shell Drawing Tutorial – Try something inspired by the seaside, with soft curves and a lovely natural shape.
- How to Draw a House – Easy House Drawing Tutorial – A great next project if you enjoyed drawing the roof, windows, and entrance of this castle.
You could even combine a few of these drawings into one larger picture. Imagine a little fairytale village with a castle on a hill and cute houses scattered around it.
Sometimes one small drawing is all it takes to spark an entirely new idea!
Final Thoughts: Your Very Own Fairytale Castle
And there you have it! You’ve learned how to draw a castle using simple shapes, easy lines, and a few fun little details.
What I love about this particular drawing is how much personality it has without being complicated. The three pointed towers give it that classic castle shape, while the waving flags, arched windows, and little heart make it feel like something from a cheerful fairytale.
I chose to keep the design simple because I genuinely believe that drawing should feel enjoyable, not intimidating. You don’t need years of practice or expensive supplies to create something you can feel happy about.
Whether you followed my pink color scheme or turned your castle into a mysterious medieval fortress, I hope this tutorial encouraged you to spend a little time doing something creative.
And if your first attempt didn’t turn out exactly as planned, that’s perfectly fine. Keep your drawing, try again whenever you feel like it, and enjoy seeing how your style develops over time.
Let’s Keep Drawing Together!
I’d love to know how your castle turned out!
Did you choose a pink fairytale castle, a classic stone castle, or something completely different? And if you could add one magical detail to your castle, what would it be?
You can find more drawing inspiration on my Pinterest page, where I’d love to hear about your finished drawing in the comments on the castle pin.
If you’d like to see more creative drawing ideas, you can also visit my YouTube channel for more drawing content and inspiration.
And if you share your castle drawing on Instagram, feel free to tag me @digitaldrawingideas. I’d love to see your version!
Thank you for drawing along with me. I hope your little castle brings a bit of creativity and fairytale magic to your day.