Learning how to draw a shell always brings me back to the calm, creative feeling of walking along the beach and noticing all the tiny shapes hidden in the sand. Some shells have delicate ridges, others have uneven edges, and none of them look completely identical—which is wonderful news when you are drawing one. Your lines do not need to be perfectly symmetrical to create something charming.
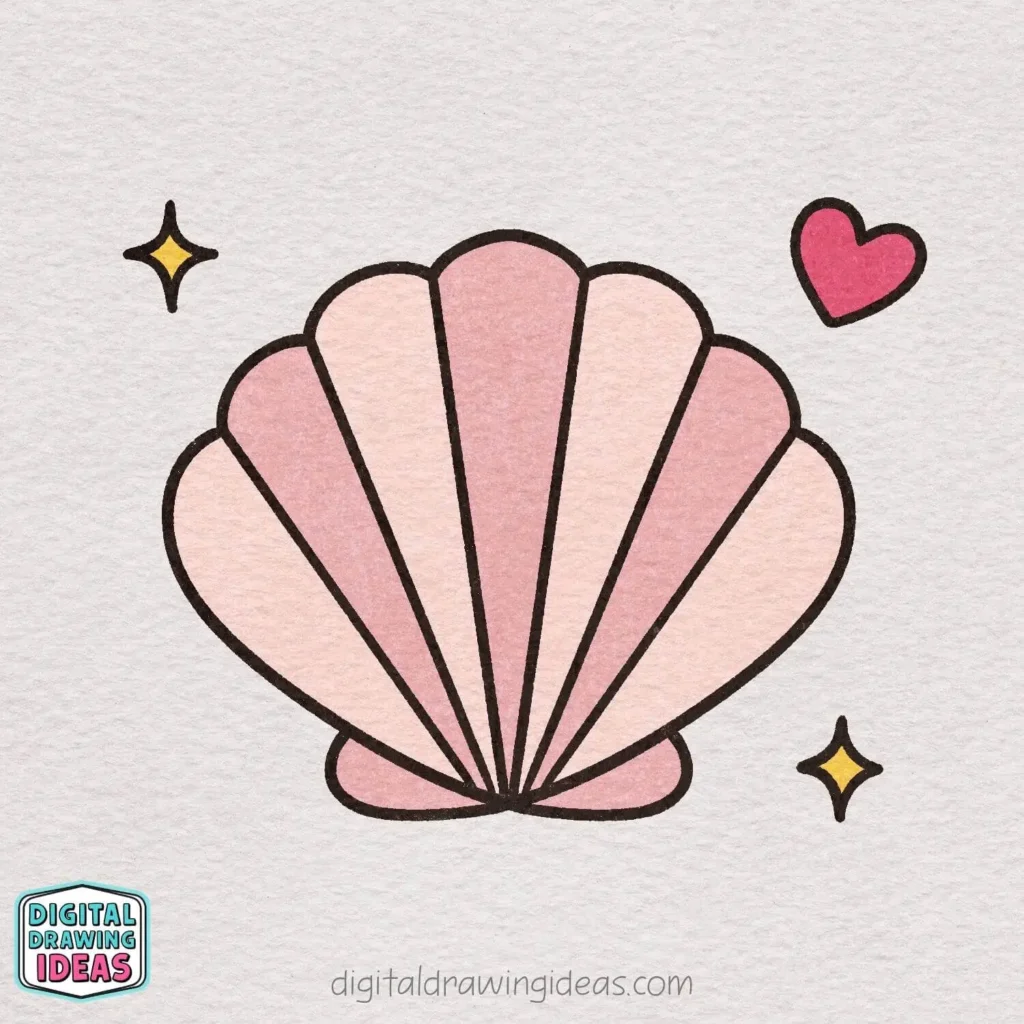
I created this shell drawing tutorial for anyone who wants a relaxing project without complicated shapes or overwhelming details. I also drew every illustration in the tutorial myself, using red lines to show exactly what needs to be added in each new step. By the end, you will have a sweet pink shell with a classic fan shape and a few playful decorations around it.
Why This Shell Drawing Is Easier Than It Looks
A shell may appear detailed at first because of its ridges and curved outline. However, once you break it into smaller sections, the entire drawing becomes much easier to manage.
This tutorial uses:
- One wide curved outline
- A scalloped top edge
- A small rounded base
- Six simple section lines
- A heart and two sparkles
- Soft colors for the finishing touch
I know curved shapes can sometimes feel frustrating, especially when both sides refuse to match. I have been in that exact situation too—one side looks elegant, while the other suddenly develops a personality of its own. Fortunately, shells are natural objects, so a little unevenness can actually make your shell drawing feel more organic.
What You Will Need
You can complete this tutorial with only a few basic drawing supplies:
- A pencil or drawing pen
- An eraser
- Drawing paper or a sketchbook
- Pink and yellow pencils, markers, or digital brushes
- A black pen for the final outline
Start lightly if you are using a pencil. That way, you can adjust the curves before tracing over them with a darker line.
How to Draw a Shell Step by Step
Ready to learn how to draw a shell without getting tangled in complicated details? Follow the eight steps below and take your time with each new shape.
Step 1: Draw the Basic Shell Shape
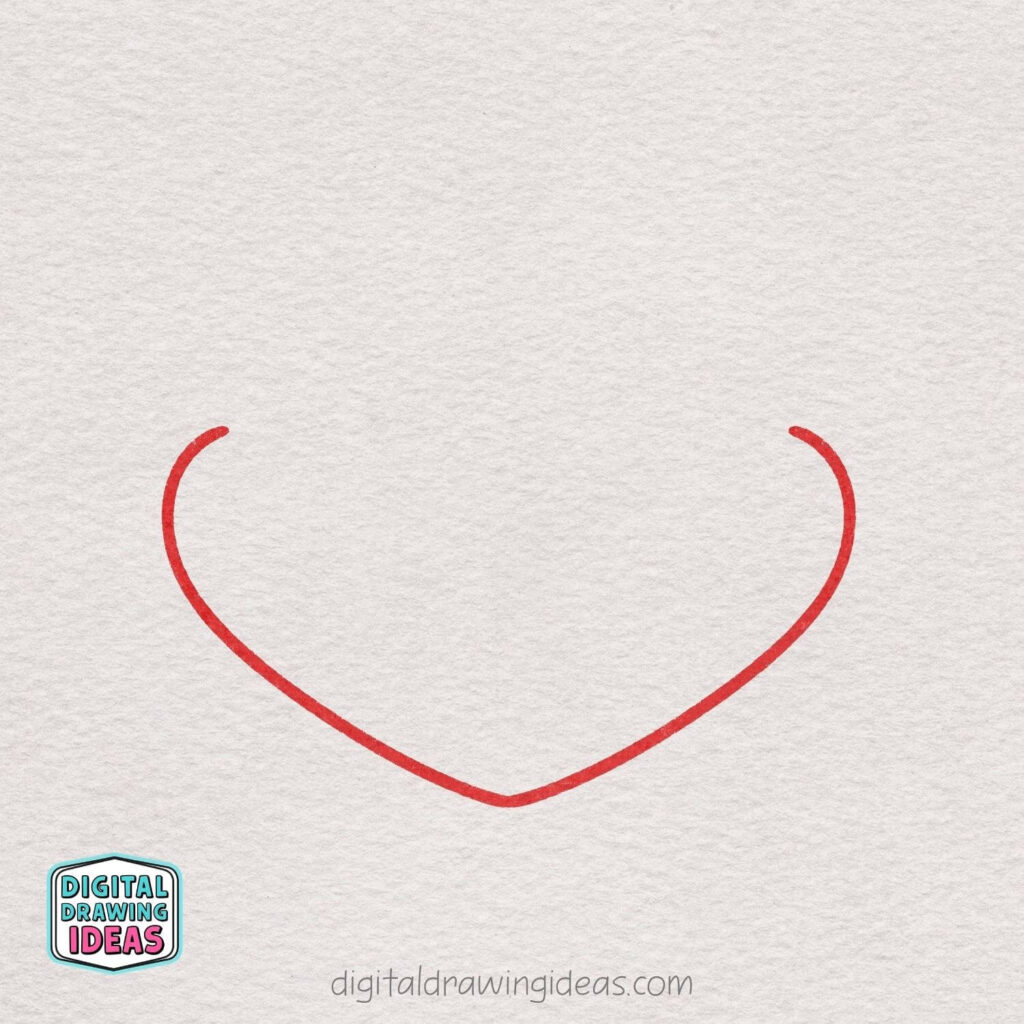
Start by drawing a wide, curved U-like shape for the main outline of your shell.
Let both sides curve gently downward and inward, then bring them together in the middle with a soft point at the bottom.
Keep the top open, and make sure the two sides feel fairly balanced.
Don’t worry about making it perfect—just focus on creating a smooth, rounded base shape that will guide the rest of the drawing.
Step 2: Add the Scalloped Top Edge
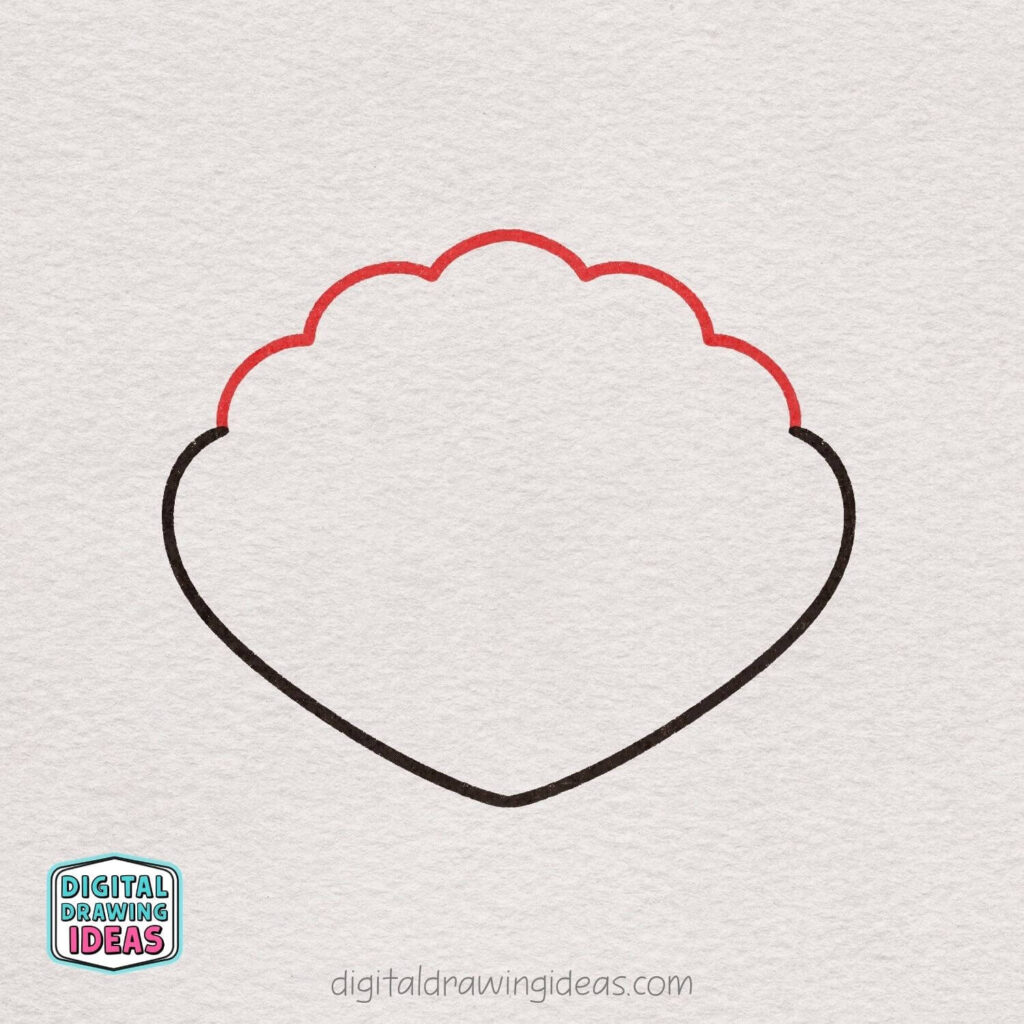
Now close the open top of the shell by drawing a row of soft, rounded bumps from one side to the other. Start at the left opening and create a series of curved scallops across the top, finishing at the right side.
Try to make the middle bump slightly taller so the shell looks nicely balanced and decorative.
Keep the curves smooth and gentle, since this scalloped edge gives the shell its cute and classic seashell look.
Step 3: Draw the Small Bottom Base
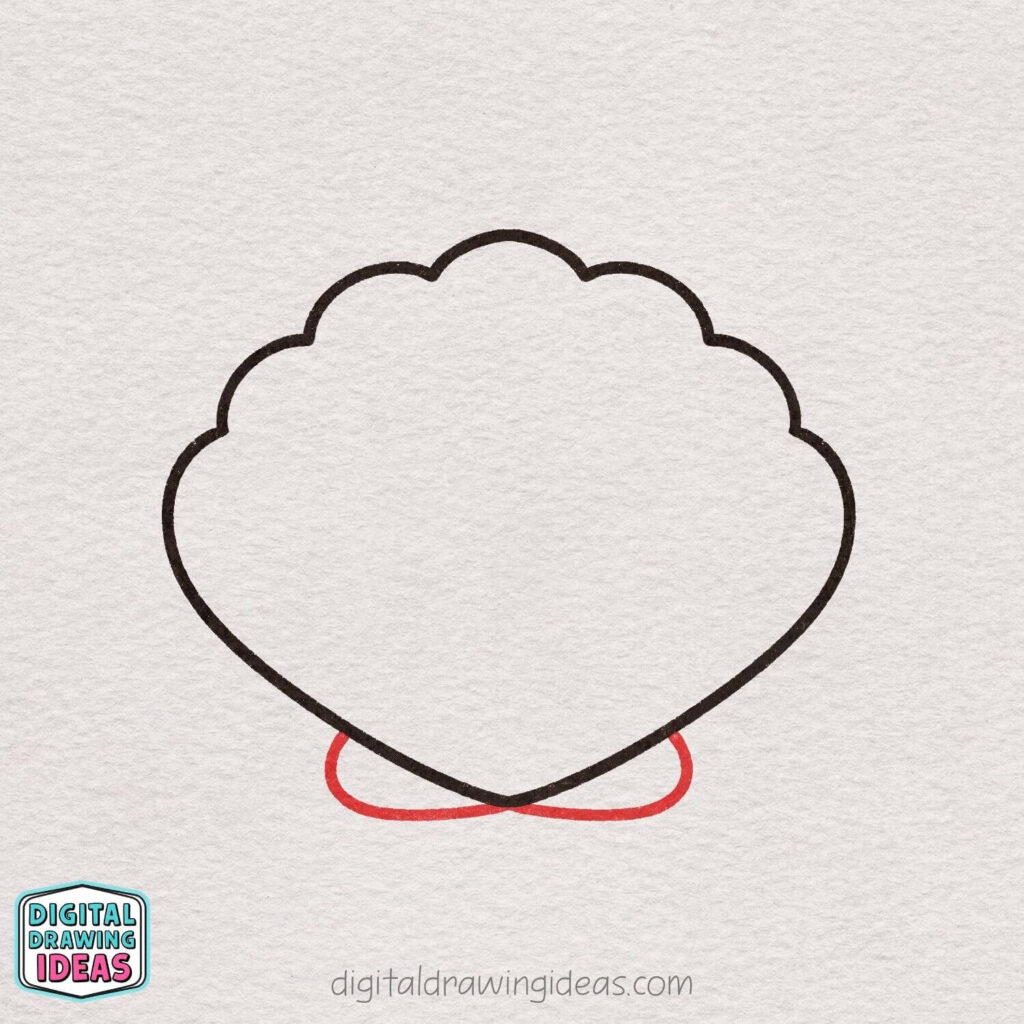
Next, add a small base shape underneath the shell. Starting just below the lower left side, draw a rounded curve that comes inward toward the center, then repeat the same kind of curve on the right side so the two shapes meet neatly in the middle.
These little rounded sections should peek out from under the shell and look like a soft, supportive base. Keep the lines low, smooth, and symmetrical so they gently frame the bottom point of the shell without taking attention away from the main shape.
Step 4: Add the Center Section Lines
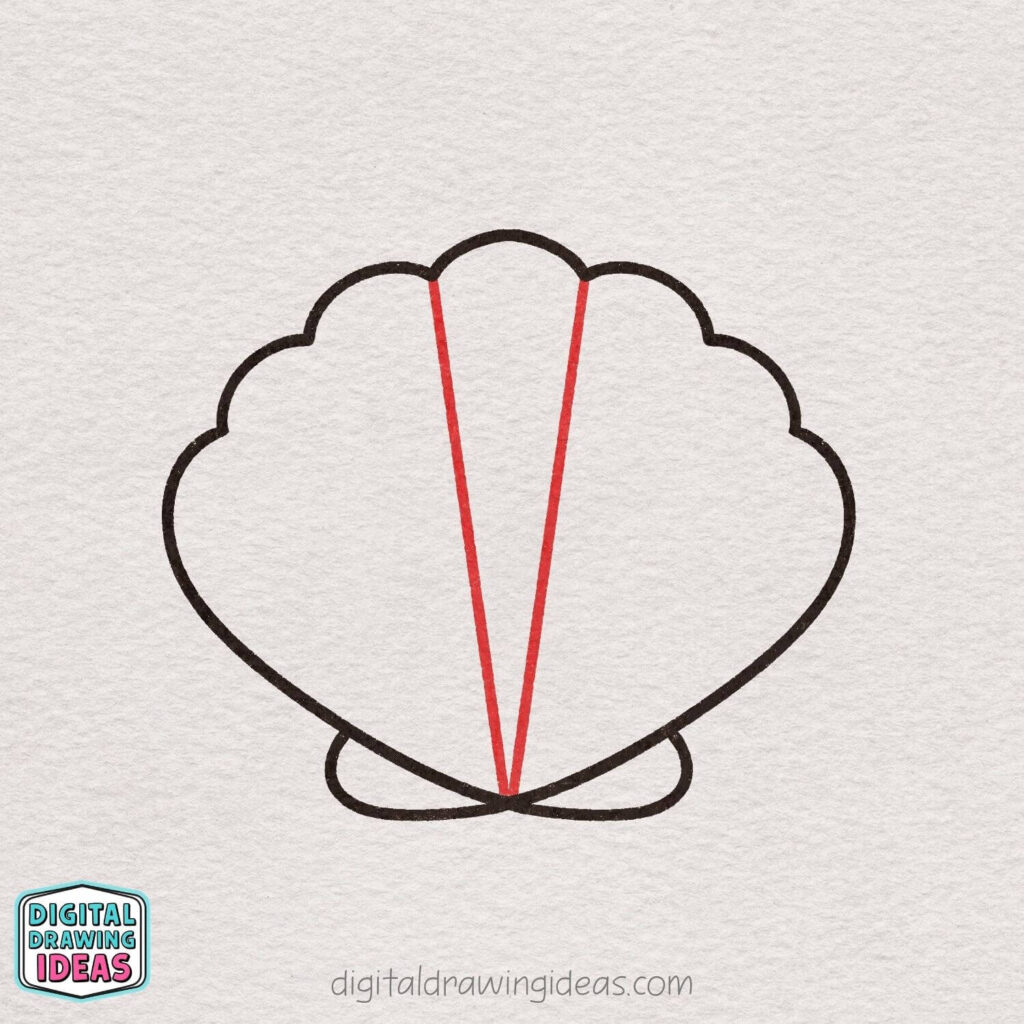
Now begin adding the shell’s inner details by drawing two long lines in the center. Start near the top middle bump and draw each line downward so they angle inward and meet at the bottom center point of the shell.
This creates the tall middle section and helps give the shell its classic fan-like structure.
Try to keep the two lines evenly spaced and nicely symmetrical, since this center panel will guide the rest of the inner shell pattern.
Step 5: Create the Next Shell Sections
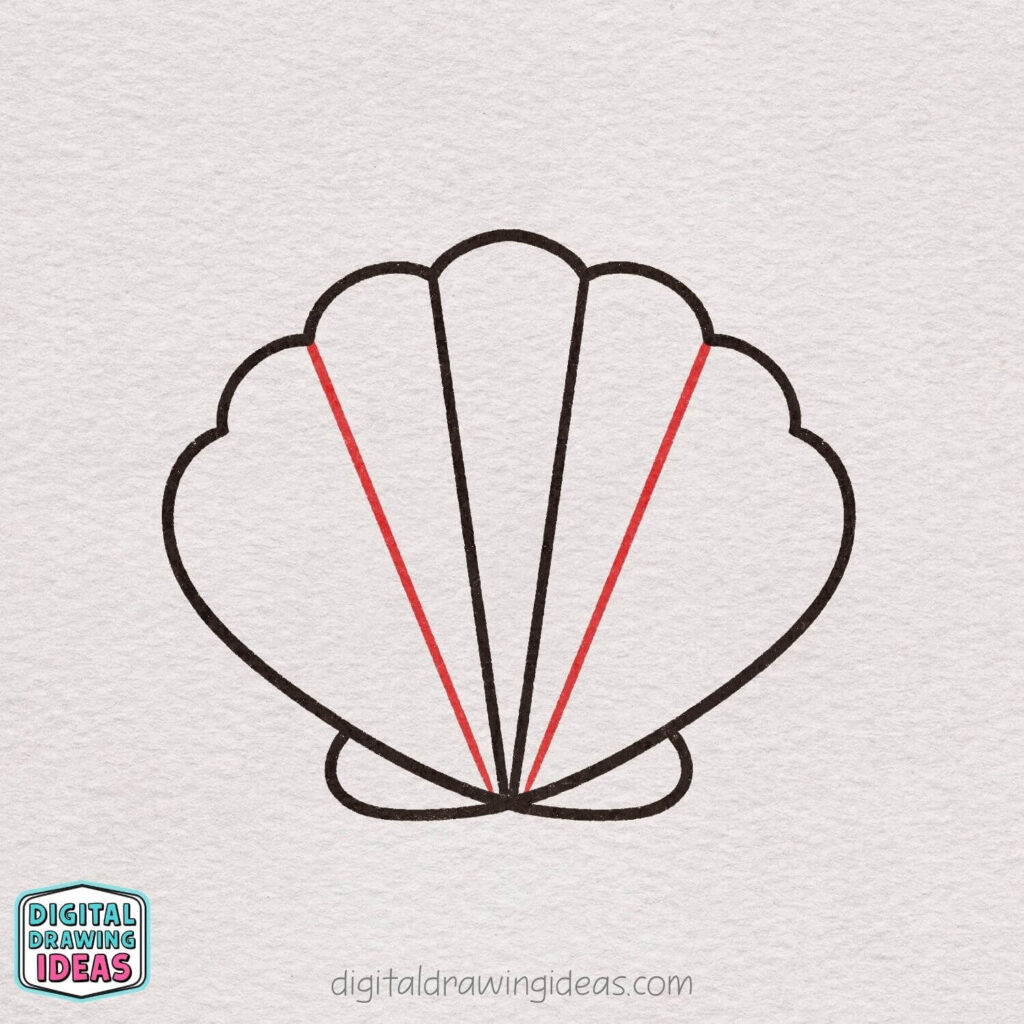
Add two more long lines to divide the shell into additional fan-shaped sections. Begin each line at the next inward curve along the scalloped top edge, then angle it downward until it reaches the same center point at the bottom.
Try to mirror the lines on both sides so the pattern remains balanced. These new divisions make the shell look fuller and begin creating its recognizable ridged texture.
Step 6: Finish the Last Inner Lines
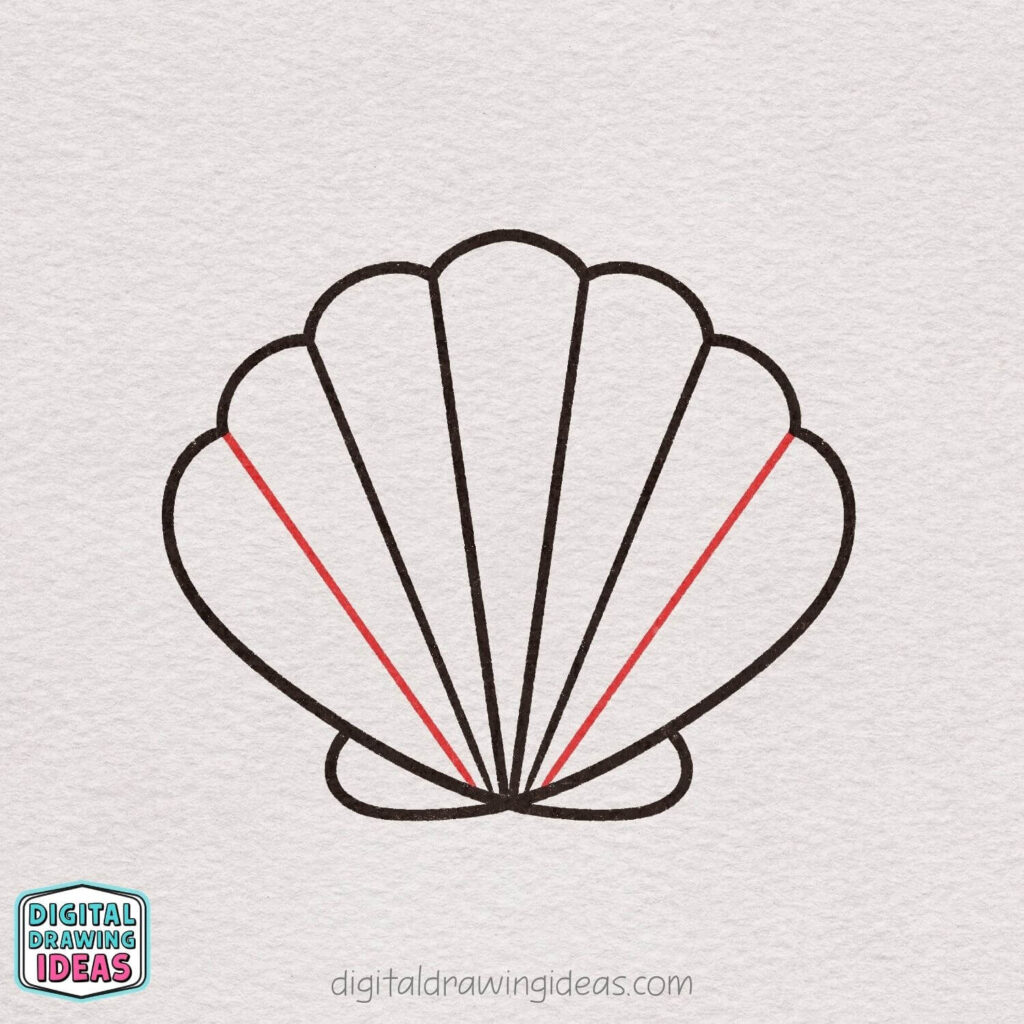
Now draw the final two section lines to complete the shell’s fan pattern. Start from the next outer scallop on the left and draw a long line down to the bottom center point, then do the same on the right side.
These lines should angle inward just like the others, creating the last two outer sections of the shell.
Take your time to keep both sides as even as possible, because this step finishes the classic ridged look and makes the shell feel complete and nicely structured.
Step 7: Add a Few Cute Decorative Details
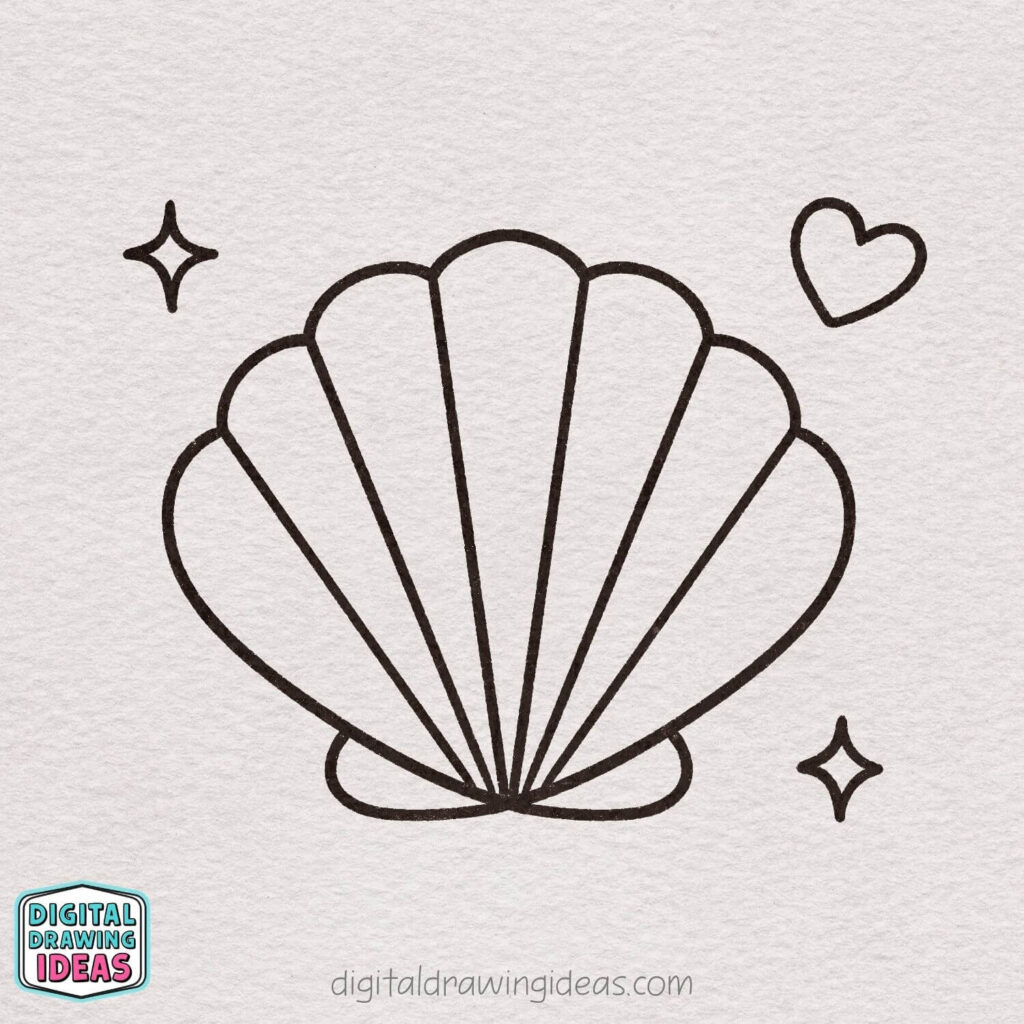
Now give your shell drawing a little extra charm by adding some simple decorations around it. Draw a small four-point sparkle near the upper left side, a heart near the upper right, and another sparkle close to the lower right corner.
Keep these shapes simple and leave a little space between them and the shell so the picture does not feel crowded.
These playful details make the finished drawing look sweeter, brighter, and more complete.
Step 8: Color Your Shell and Decorations
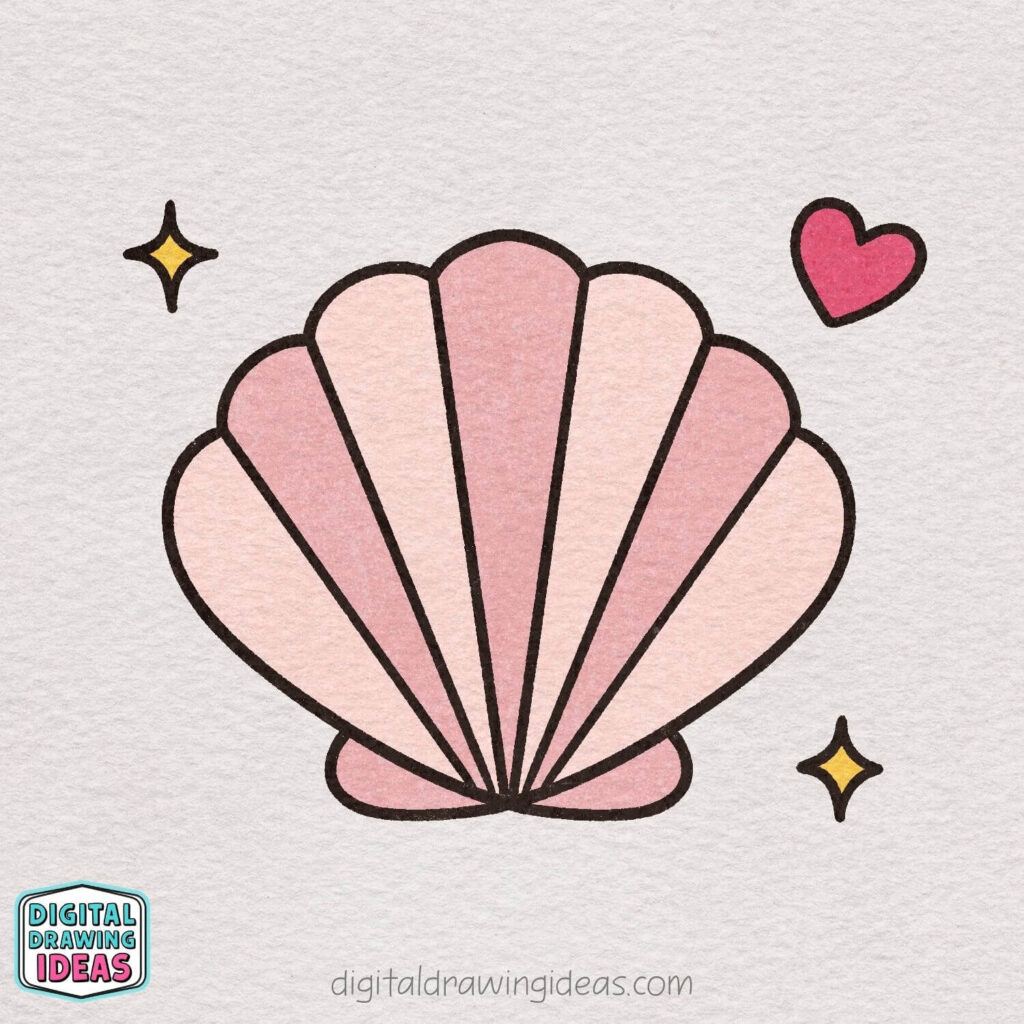
To finish your drawing, add some soft color to bring the shell to life. Use light pink and pale blush tones for the shell sections, alternating the shades to create a cute and gentle look.
Then color the small bottom base in pink as well, fill the heart with a brighter pink, and make the sparkles a warm yellow.
Once everything is colored in, your seashell drawing will look sweet, polished, and complete.
Simple Ways to Make Your Shell Drawing Unique
Now that you know how to draw a shell, you can change the final design to match your own style. I used gentle pink shades because I wanted this version to feel soft and playful, but there is no rule saying a shell has to be pink.
Try one of these ideas:
- Use ocean-inspired shades such as turquoise, blue, lavender, and coral.
- Add tiny dots, stripes, or wavy patterns inside each section.
- Draw bubbles, small stars, pearls, or pieces of seaweed around the shell.
- Turn the shell into a summer sticker or sketchbook decoration.
- Add sand underneath it to create a miniature beach scene.
- Use metallic gold details for a more magical finish.
When I create drawing tutorials, I enjoy starting with a simple structure and then adding one or two details that give the picture more personality. That is often the difference between a basic sketch and a drawing that feels like your own.
What to Do When the Shell Looks Uneven
One of the most common challenges when learning how to draw a shell is keeping both sides balanced. You may notice that one curve is wider, one scallop is taller, or the center lines do not meet in exactly the same place.
Before erasing everything and declaring a dramatic artistic emergency, try these fixes:
- Turn the paper around and look at the shape from another angle.
- Adjust only the line that bothers you instead of redrawing the entire shell.
- Use the bottom center point as a guide for all inner lines.
- Sketch lightly before creating the final dark outline.
- Remember that real shells are rarely perfectly symmetrical.
A slightly uneven drawing can still look lovely. In fact, those small differences often make handmade art feel warmer and more interesting than a perfectly mechanical image.
More Cute Drawing Tutorials to Try
Once you finish this shell, continue your creative session with another easy project. You might enjoy learning how to draw a bow if you like sweet, decorative drawings.
For another ocean-themed idea, try my cute whale drawing tutorial. The rounded shapes make it a fun companion project for this seashell.
When you feel ready to add a little magic to your sketchbook, follow my cute unicorn drawing tutorial. It is another friendly step-by-step drawing built from approachable shapes.
You can also find more drawing inspiration on my Digital Drawing Ideas Pinterest page and watch creative tutorials on the Digital Drawing Ideas YouTube channel.
Final Thoughts on Drawing a Shell
I hope this tutorial showed you how to draw a shell in a way that feels clear, relaxing, and genuinely enjoyable. The whole design begins with one curved outline, and each small addition gradually transforms it into a detailed fan-shaped shell.
Do not worry if your first version looks different from mine. Your curves, colors, and decorative details are what make the final artwork personal—and that is one of my favorite things about creative drawing.
Which colors did you choose for your shell? Share your finished drawing on Pinterest, or post it on Instagram and tag @digitaldrawingideas so I can see your version.