If you want to learn how to draw a car in a simple, cute, and beginner-friendly way, this tutorial is a perfect little creative project to try today.
I have always loved drawings that look easy at first glance but slowly come together with each tiny detail. A car is one of those fun subjects where you start with two basic circles, and before you know it, you have a cheerful little vehicle sitting on your page like it is ready for a mini road trip.
For this tutorial, I created the car drawing myself and broke it down into 11 simple steps. I wanted it to feel calm, doable, and not intimidating, because I know how frustrating it can be when a “simple” drawing tutorial suddenly turns into a geometry exam with wheels.
This one is not like that.

Why This Easy Car Drawing Is Great For Beginners
When you are learning how to draw a car, it is easy to get stuck on the shape. Cars can feel tricky because they have wheels, windows, bumpers, lights, curves, and lots of little details.
But the secret is to build the car slowly, one simple shape at a time.
In this tutorial, you will start with the wheels and then add the body, roof, windows, lights, and final coloring. Each new part is shown in red, so you can clearly see what to draw next.
This makes the whole process feel much less overwhelming.
Before You Start Drawing
You do not need fancy tools for this car drawing. A pencil, eraser, black pen, and a few coloring supplies are more than enough.
I usually like to sketch lightly first, then go over the final lines once I am happy with the shape. That way, if one wheel looks a tiny bit more oval than the other, I can fix it before committing to the bold outline.
Here is what you can use:
- A pencil for sketching
- An eraser for small corrections
- A black pen or marker for the outline
- Red, blue, yellow, gray, and black coloring tools
- A piece of paper or sketchbook
And honestly, don’t worry about making it perfect. A slightly wobbly line can make a cute drawing feel more personal and handmade.
A Small Tip Before The First Step
The biggest challenge when learning how to draw a car is keeping the two wheels balanced. They do not need to be mathematically perfect, but try to keep them similar in size and place them on the same invisible line.
Once the wheels look balanced, the rest of the car becomes much easier to build around them.
I also recommend leaving enough empty space above the wheels. The car roof will need room later, and it is always better to have a little extra space than to accidentally squeeze your car into the top of the page.
How to Draw a Car Step by Step
Follow the steps below and take your time with each part. The new lines are shown in red, so you can easily spot what changes in every step.
Step 1: Draw the Wheels
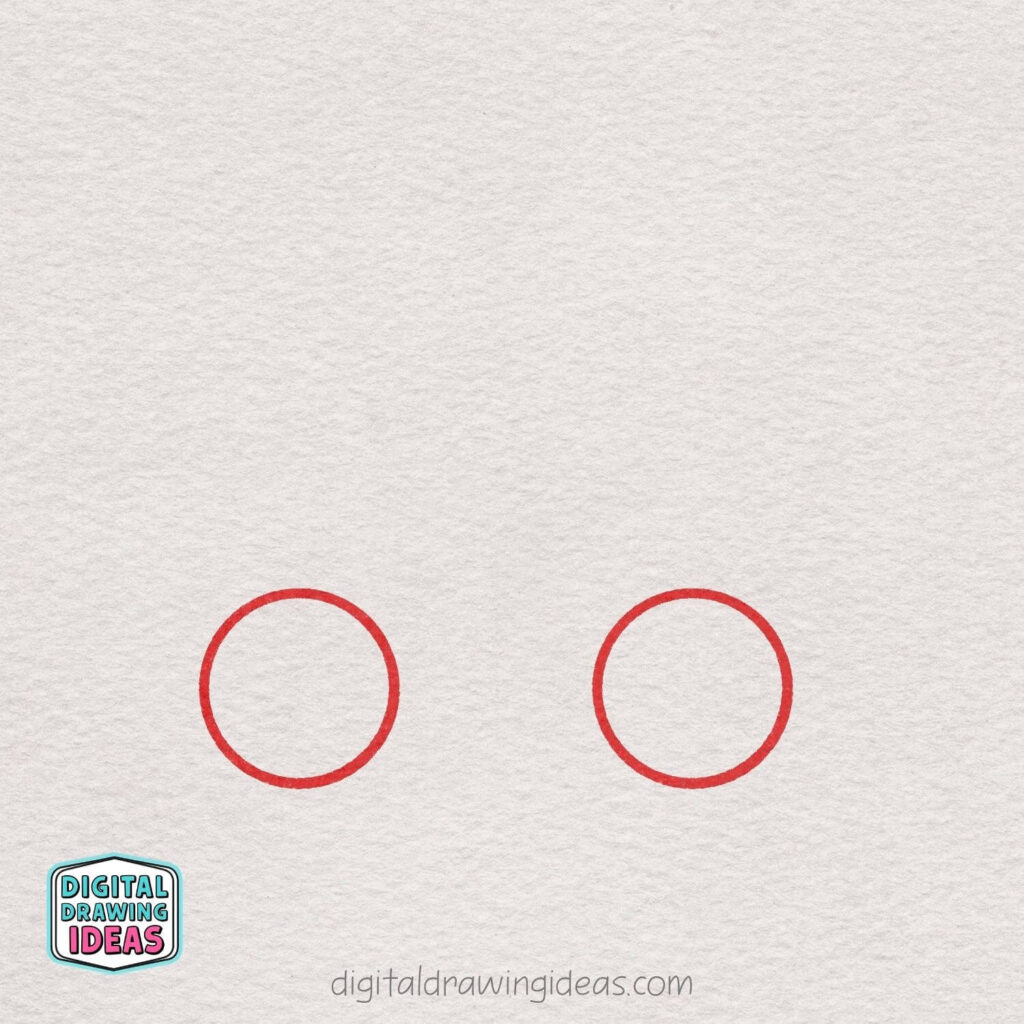
Start by drawing two simple circles near the bottom of your page. These will become the wheels of the car, so try to keep them about the same size and leave a good amount of space between them.
Don’t worry if the circles are not perfect — a slightly hand-drawn look makes the car feel cute and playful.
Step 2: Add the Wheel Centers

Draw a smaller circle inside each wheel to create the center parts.
Try to place each small circle near the middle of the larger wheel, but it does not need to be perfectly exact.
These little circles help the wheels look more complete and give the car a simple, cartoon-style look.
Step 3: Draw the Bottom Line
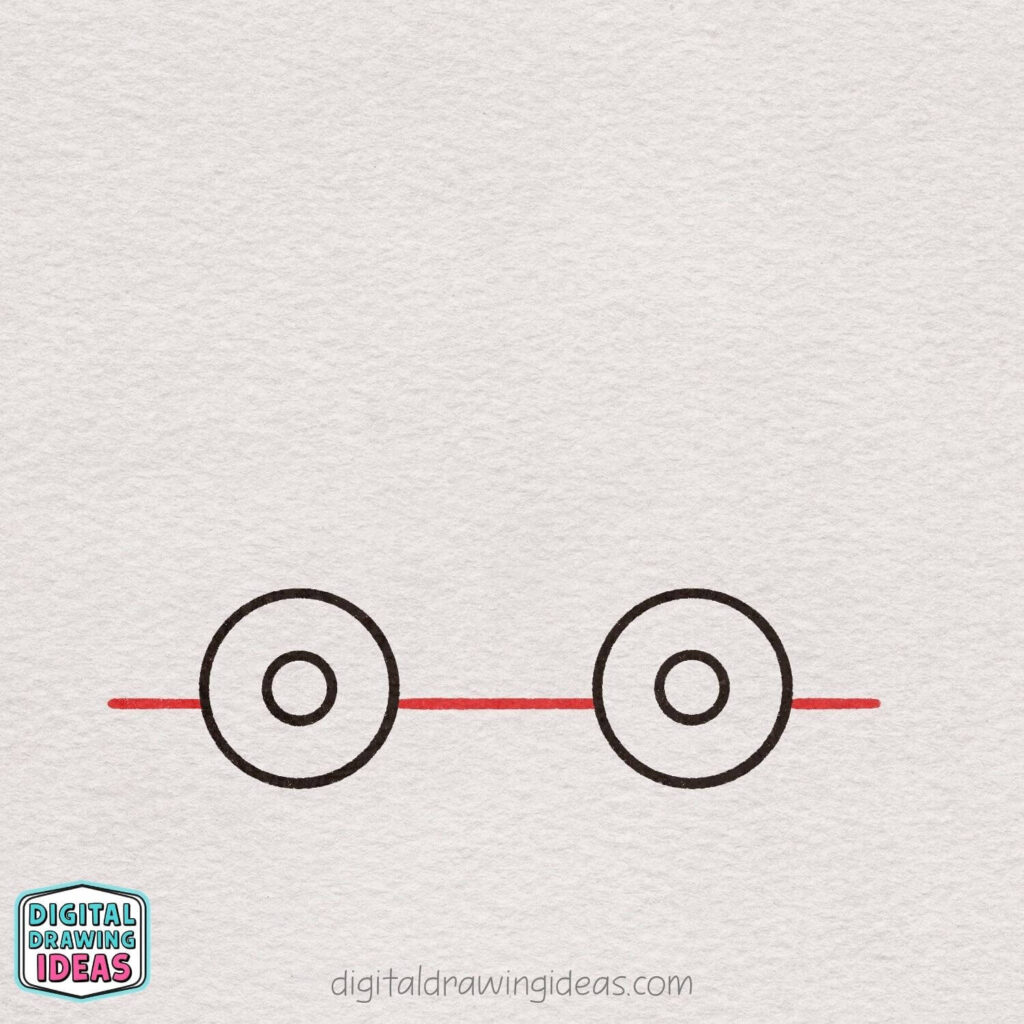
Draw a straight horizontal line through the wheels to start forming the bottom of the car. Let the line begin a little before the first wheel and continue a little past the second wheel.
This gives the car a simple base and helps connect the wheels to the body shape you will build in the next steps.
Step 4: Add the Bumpers
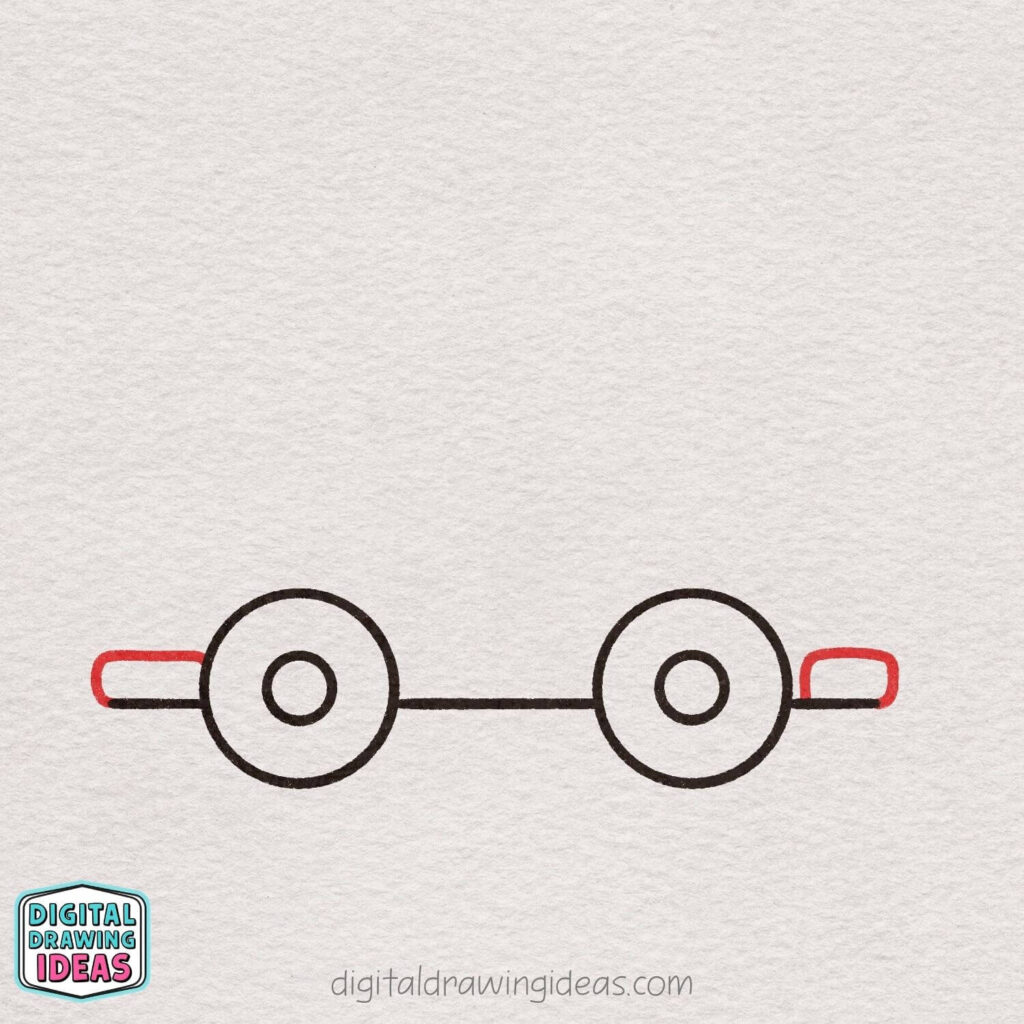
Draw a small rounded rectangle at the front and back of the car to create the bumpers. Place each bumper on the bottom line, just outside the wheels.
These simple rounded shapes will help the car look more finished and give the drawing a cute, playful style.
Step 5: Start the Car Body
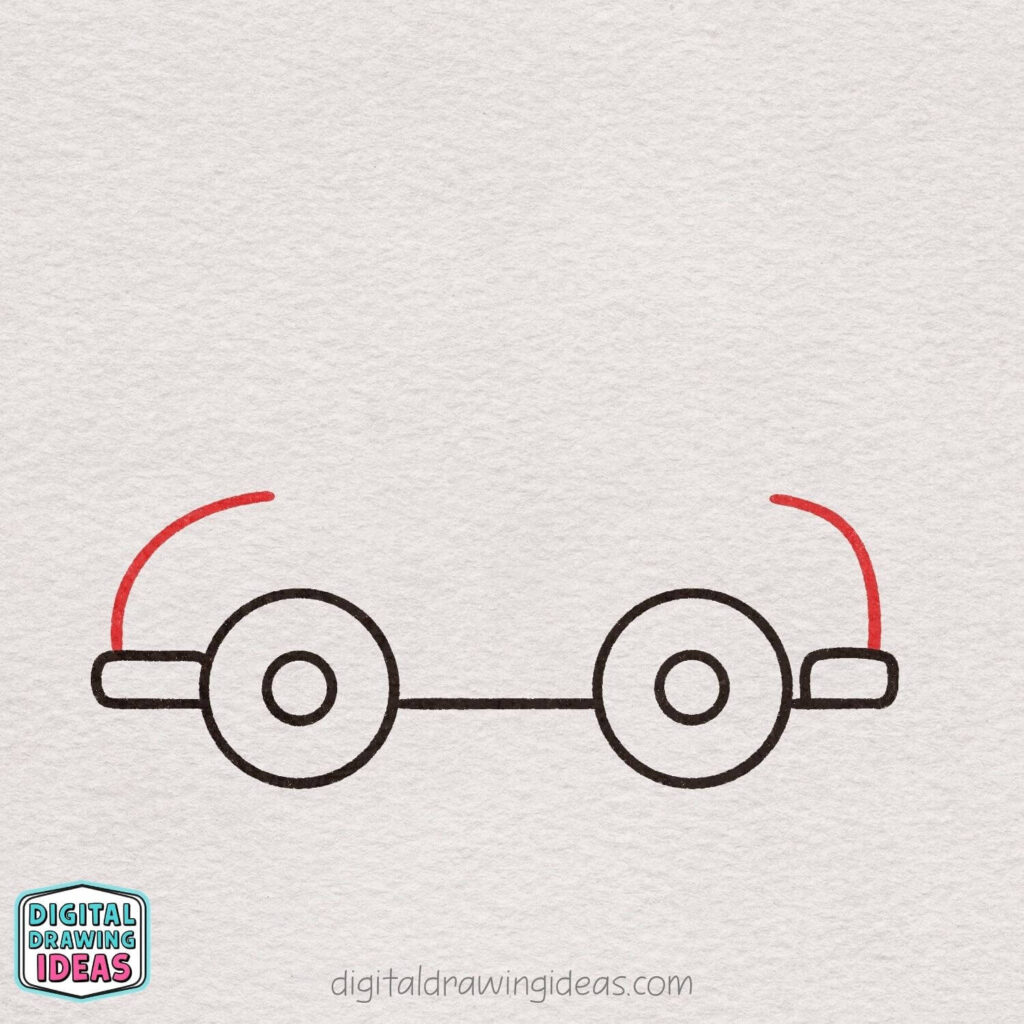
Draw two curved lines above the bumpers to begin shaping the front and back of the car. Each line should curve upward from the bumper and then gently move inward toward the wheels.
These rounded lines will make the car body look soft and cute instead of sharp or boxy.
Step 6: Draw the Roof
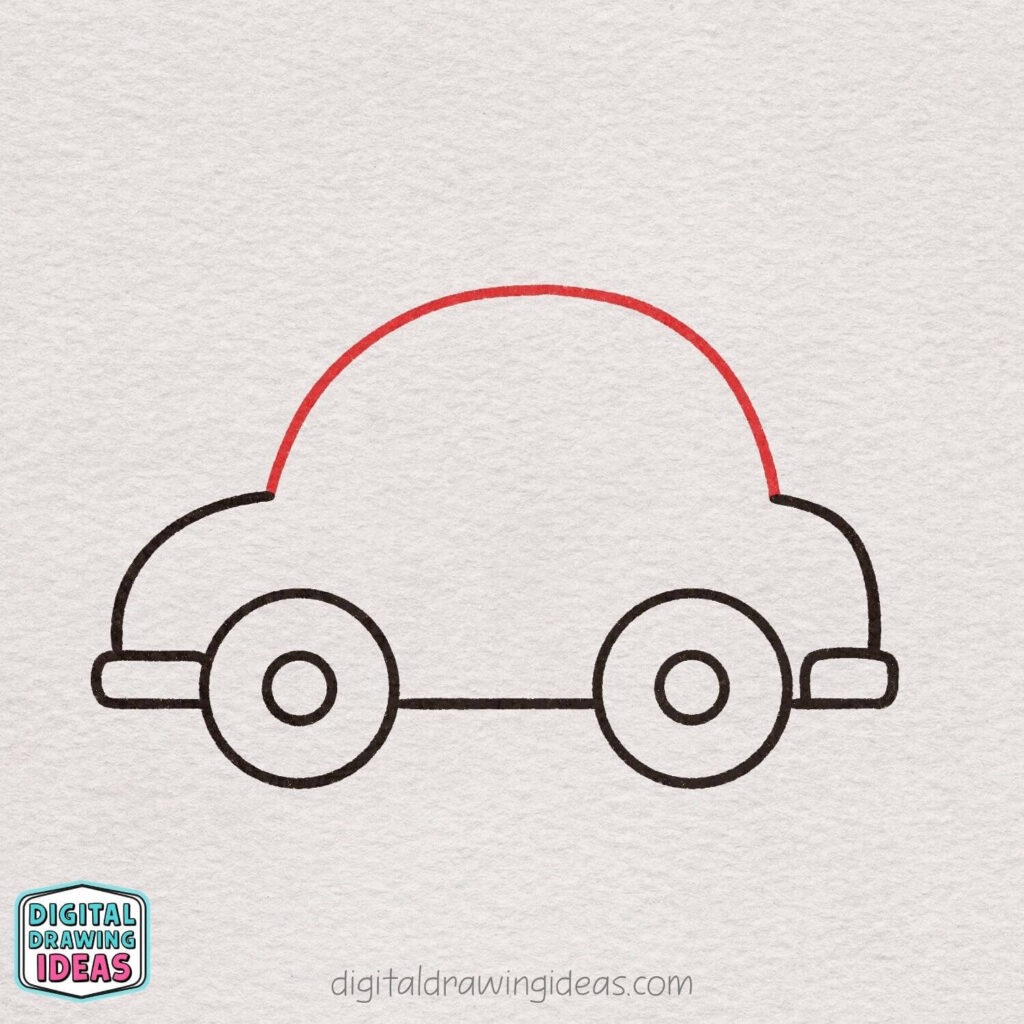
Draw a large, smooth curved line over the top of the car to create the roof. Start near the top of the front body line, curve the line upward, and bring it back down near the back of the car.
Keep the shape rounded and simple so the car has a cute, friendly look.
Step 7: Add the Windows
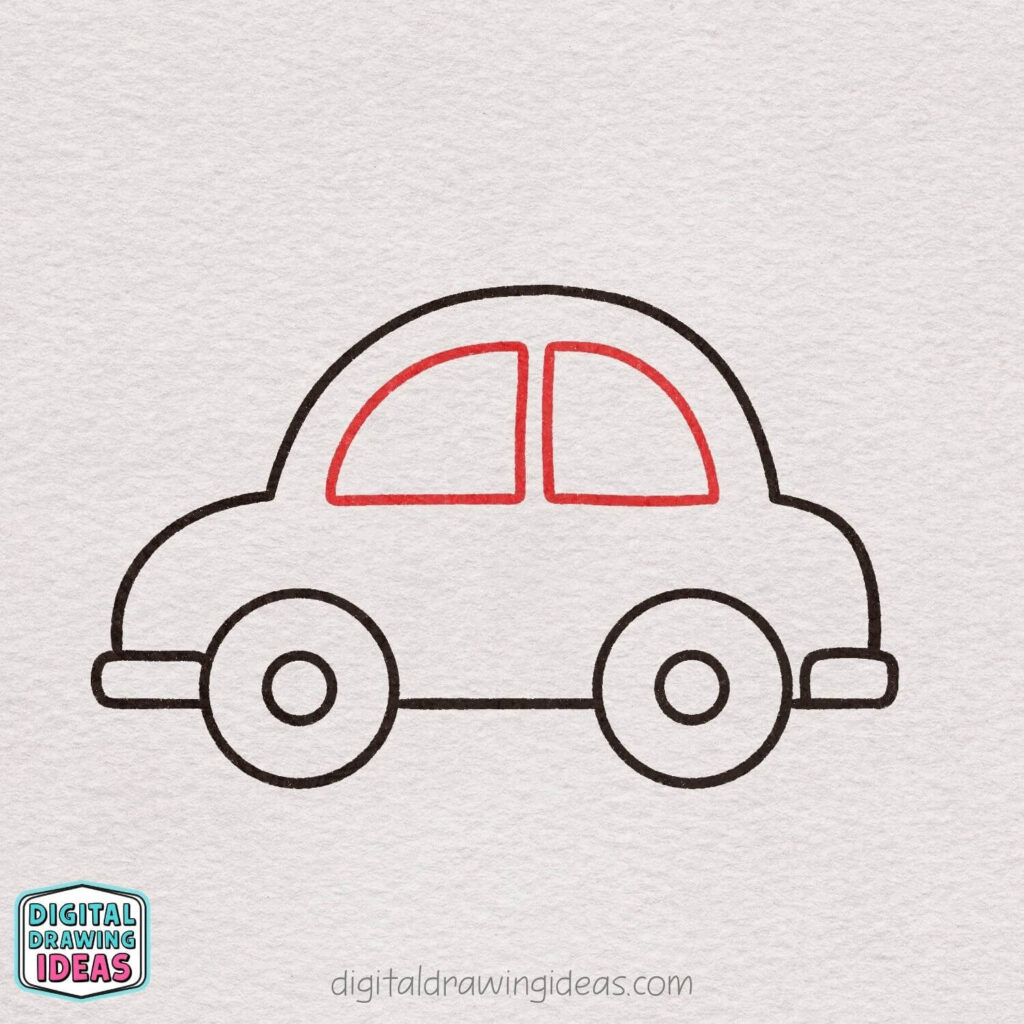
Draw two rounded window shapes inside the top part of the car. Make the first window a little wider for the front section, then add a second window beside it for the back section.
Leave a small space between them so it looks like the middle frame of the car.
Step 8: Draw the Lights

Add a small curved shape on the front and back of the car to create the lights.
Place one light near the front bumper and the other near the back bumper, following the rounded shape of the car body.
These little details make the car look more complete and help show which parts are the headlights and tail lights.
Step 9: Add the Door Handle
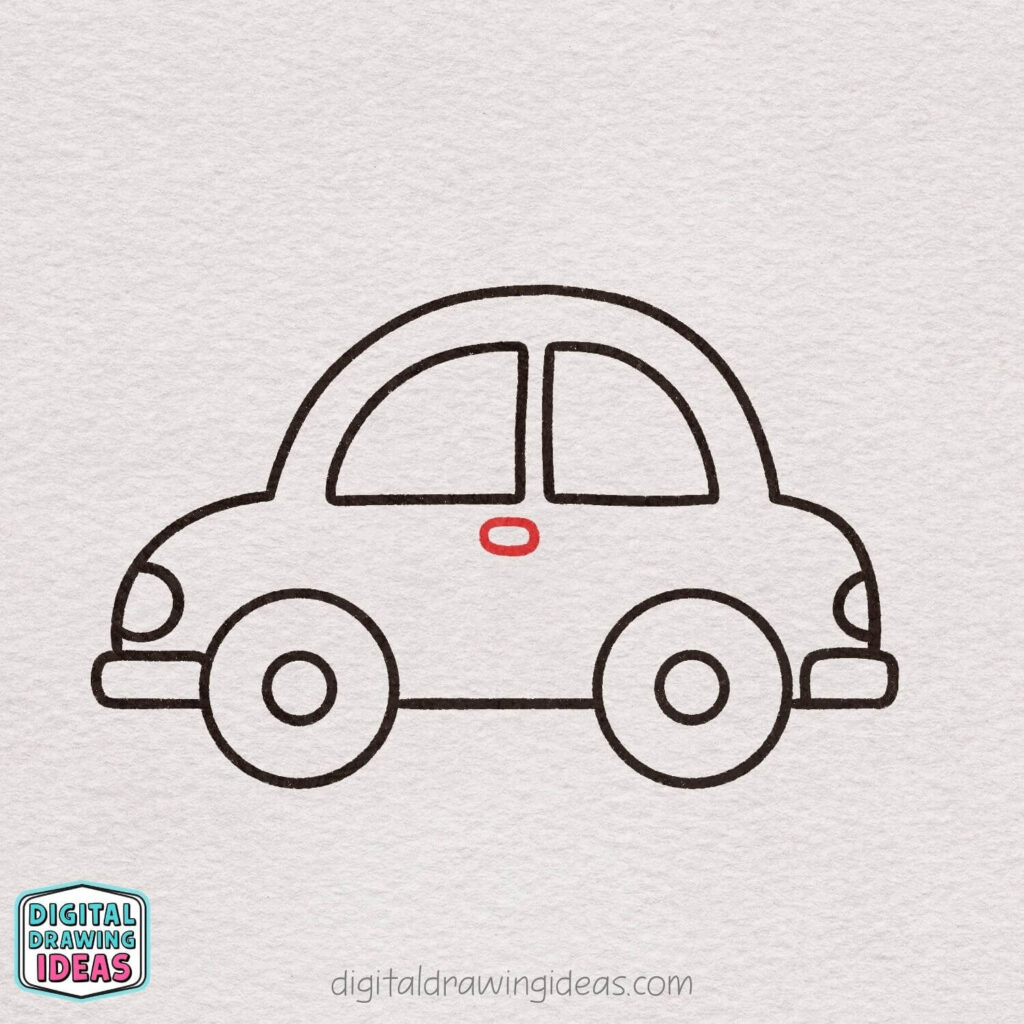
Draw a small rounded rectangle underneath the windows to create the door handle.
Place it near the center of the car body, just below the window line.
This tiny detail makes the car look more realistic while still keeping the drawing simple and cute.
Step 10: Finish the Outline
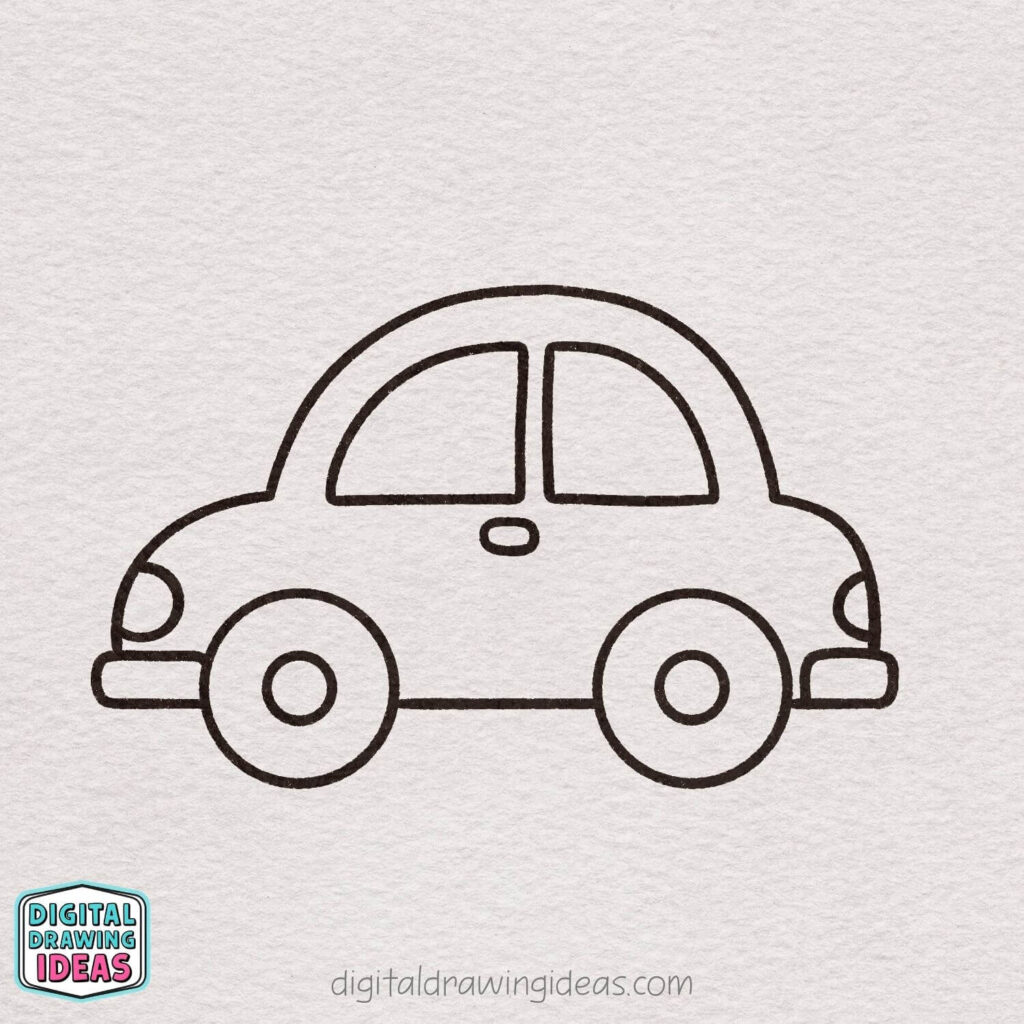
Go over the main lines of the car to make the outline clean and bold. Make sure the wheels, windows, bumpers, lights, and door handle are all easy to see.
This step helps bring the whole drawing together before adding color in the final step.
Step 11: Color Your Car
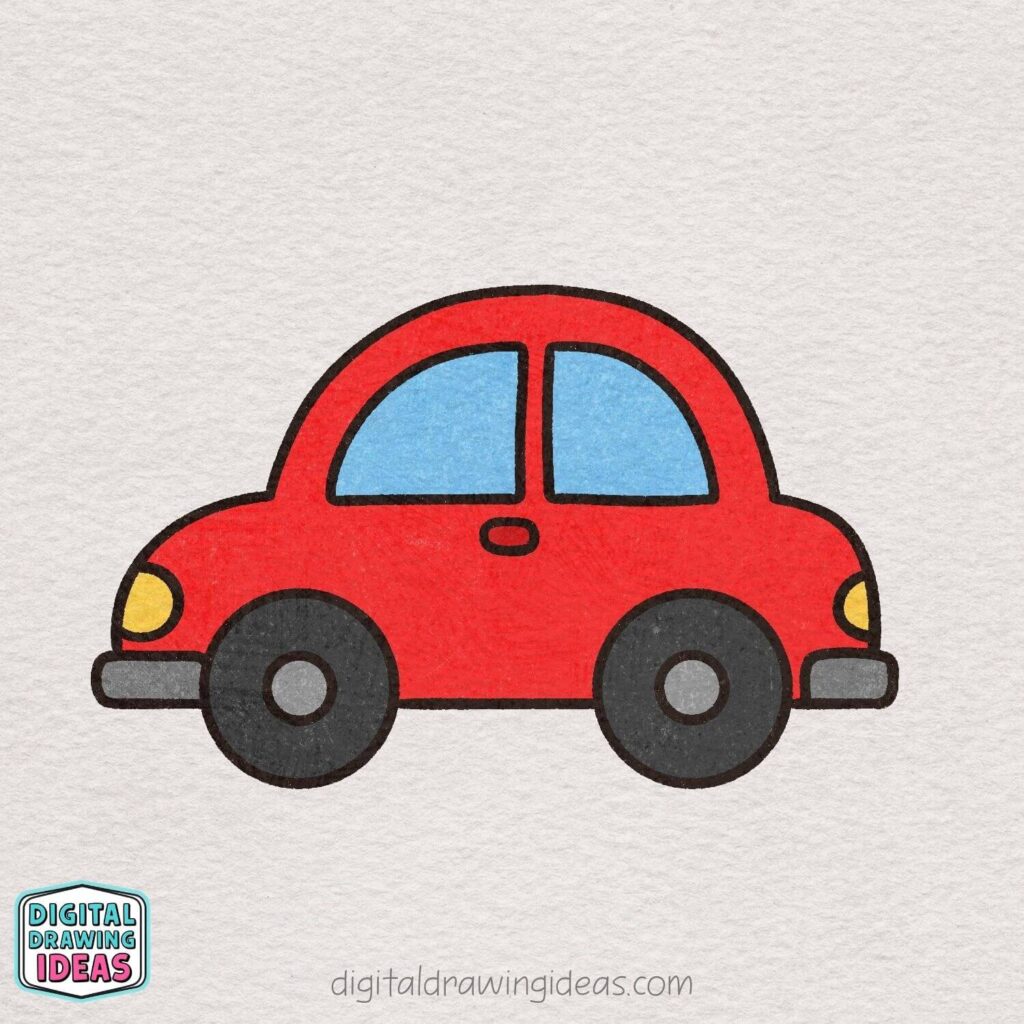
Now it is time to color your car and bring the drawing to life. Use red for the car body, blue for the windows, yellow for the lights, gray for the bumpers, and dark gray or black for the wheels.
You can also choose your own colors if you want to make the car look different.
Once the coloring is finished, your cute car drawing is complete!
More Easy Drawing Tutorials To Try Next
Once you finish this cute car, you might want to try another simple drawing tutorial while you are already in a creative mood.
If you like step-by-step drawings with clear shapes, you may also enjoy my easy graduation cap drawing tutorial. It is a fun one if you want something simple but still a little special.
You can also try this easy donut drawing tutorial if you want something sweet, round, and very beginner-friendly. I love drawing food because there is always room to make it playful.
And if you enjoyed building this car from basic shapes, you may also like my easy house drawing tutorial. It has that same cozy, simple feeling and works well as a relaxing creative break.
Creative Ideas For Your Finished Car Drawing
After you learn how to draw a car, you can make the finished drawing feel more personal by changing the colors or adding a few extra details.
You could turn it into a tiny yellow taxi, a pastel blue car, a pink cartoon car, or even a little red road-trip car with bags on top. You can also draw a road underneath it, a sun in the corner, or small clouds in the background.
Here are a few fun ideas:
- Add flowers or stars on the car body
- Draw a road under the wheels
- Make the windows light blue or purple
- Add a tiny license plate
- Try a rainbow-colored car
- Draw a little suitcase on top for a travel theme
This is one of my favorite parts of drawing. The tutorial gives you the base, but then you get to make it yours.
Common Little Mistakes And How To Fix Them
If your first car drawing does not look exactly like the example, that is completely normal. Mine rarely looks perfect on the first try either, and that is part of the fun.
If the wheels look uneven, lightly adjust one circle before outlining it. If the roof feels too tall, bring the curve down a little. If the windows look too small, make them wider before adding color.
Most drawing “mistakes” are just tiny changes waiting to happen.
The goal is not to create a perfect car. The goal is to enjoy the process and feel proud that you made something from a blank page.
Final Thoughts
I hope this tutorial made how to draw a car feel simple, fun, and actually possible. Starting with basic circles and slowly adding each piece is such a satisfying way to draw, especially when the final picture turns into something cute and colorful.
This easy car drawing is a great reminder that creative projects do not have to be complicated to feel rewarding. Sometimes all you need is a quiet moment, a pencil, and a little idea that turns into something sweet on the page.
You can find more drawing ideas on my Pinterest page and watch more creative tutorials on my YouTube channel.
If you try this tutorial, I would love to see your version. Save it on Pinterest, share your drawing, or tag me on Instagram at @digitaldrawingideas so I can see your cute car creation.

