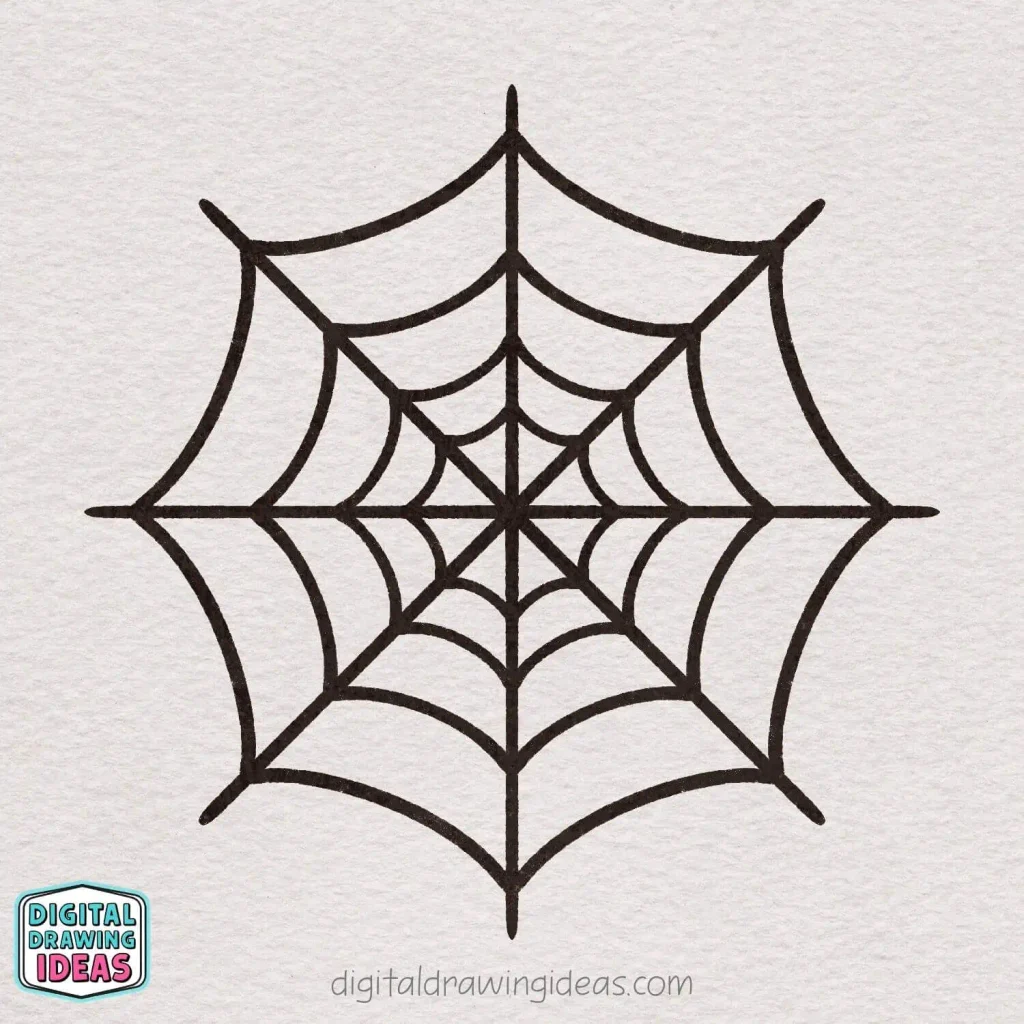
Learning how to draw a spider web is one of those little creative projects that looks complicated at first, but turns out to be surprisingly easy once you break it down. I love drawings like this because you can start with a few simple lines and gradually turn them into something really eye-catching.
Whenever Halloween season comes around, I find myself reaching for my sketchbook to draw all sorts of spooky things. Ghosts, spiders, pumpkins, and, of course, spider webs! There’s something especially satisfying about watching a spider web take shape as you add one curved line after another.
For this tutorial, I created my own simple spider web drawing and broke the process into seven easy steps. You don’t need any special drawing skills or fancy supplies to follow along. Just grab a pencil, find a comfortable spot, and let’s create something fun together!
What You’ll Need for This Spider Web Drawing
One of my favorite things about this drawing is how little preparation it requires. You probably already have everything you need sitting somewhere on your desk.
- Pencil: Perfect for sketching the basic structure and making adjustments as you go.
- Eraser: Handy for fixing any lines that don’t look quite right.
- Paper or sketchbook: A plain sheet of paper works perfectly.
- Black pen or marker: Optional, but great for making the finished spider web stand out.
I usually recommend starting with a pencil, especially when you’re working with symmetrical shapes. It gives you the freedom to adjust the spacing without worrying about getting everything perfect on your first try.
How to Draw a Spider Web in 7 Easy Steps
Ready to give it a try? I’ll show you how to draw a spider web using a simple framework of straight lines, followed by several layers of gentle curves.
The trick is to work from the center outward rather than trying to draw the entire web at once. In the illustrations I made for this tutorial, the red lines show exactly what you need to add in each step, so you can easily follow along.
Step 1: Draw Two Crossing Lines
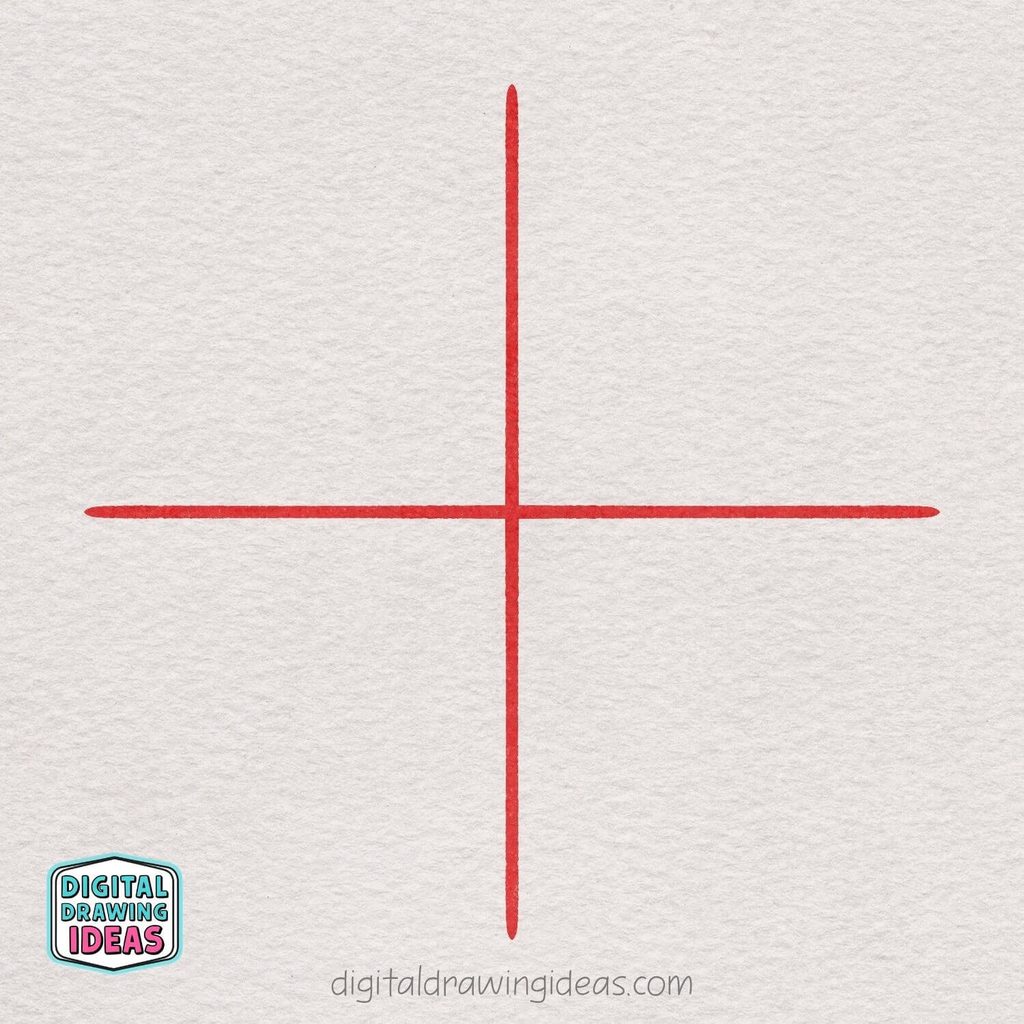
Start your spider web drawing by making a long vertical line down the center of your paper.
Next, draw a horizontal line across the middle, making sure it crosses the vertical line at the center.
These two lines will form the basic structure of your spider web and help you keep everything balanced as you add more details.
Step 2: Add Four Diagonal Lines
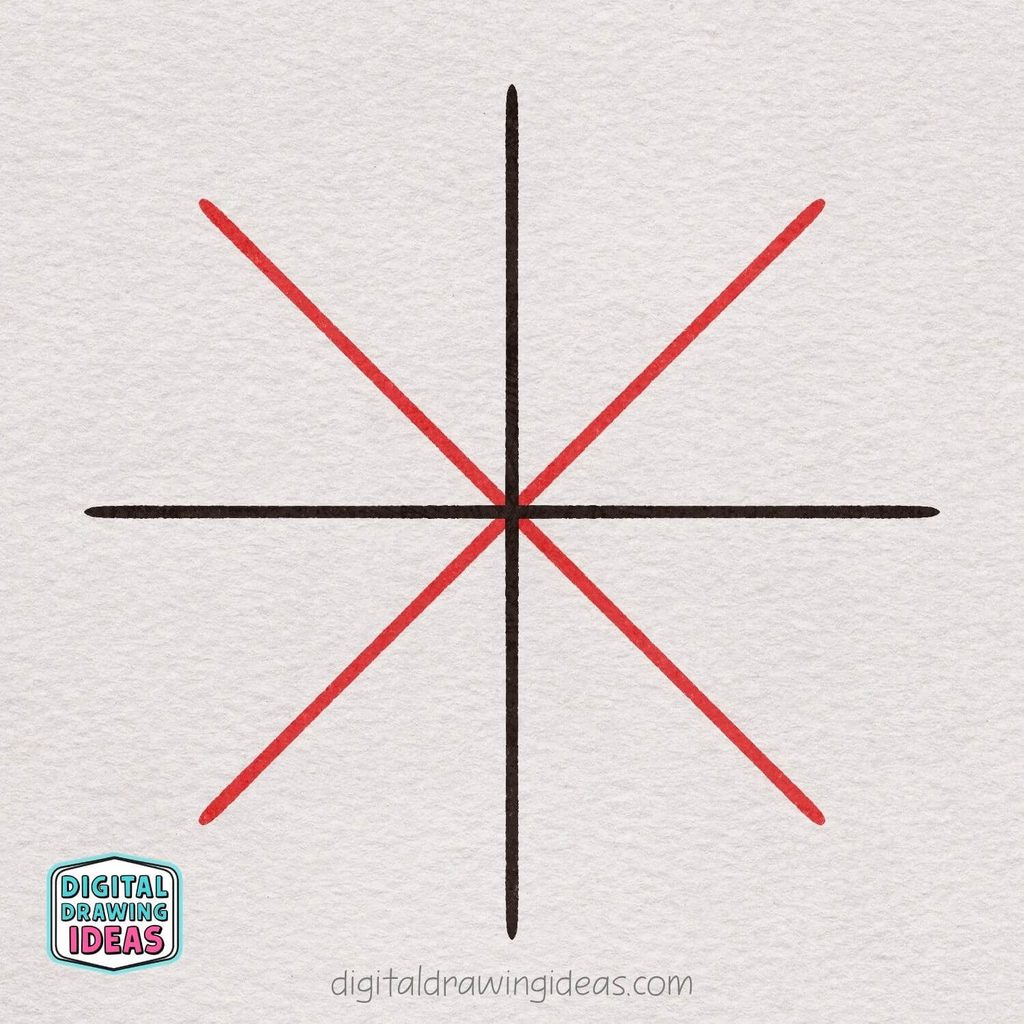
Now, draw two diagonal lines that cross at the same center point as your first two lines, forming a large X shape.
Try to space them evenly between the vertical and horizontal lines so your spider web has eight sections.
These lines will act as the main supports for your web and give you a nice, symmetrical base to work with.
Step 3: Draw a Small Center Ring

Next, begin shaping the middle of the spider web by drawing a small ring of curved lines around the center point.
Add one curved section between each pair of lines, connecting them smoothly as you go.
Keep these curves fairly even in size so the center of your web looks neat and balanced.
Step 4: Add the Next Larger Curves
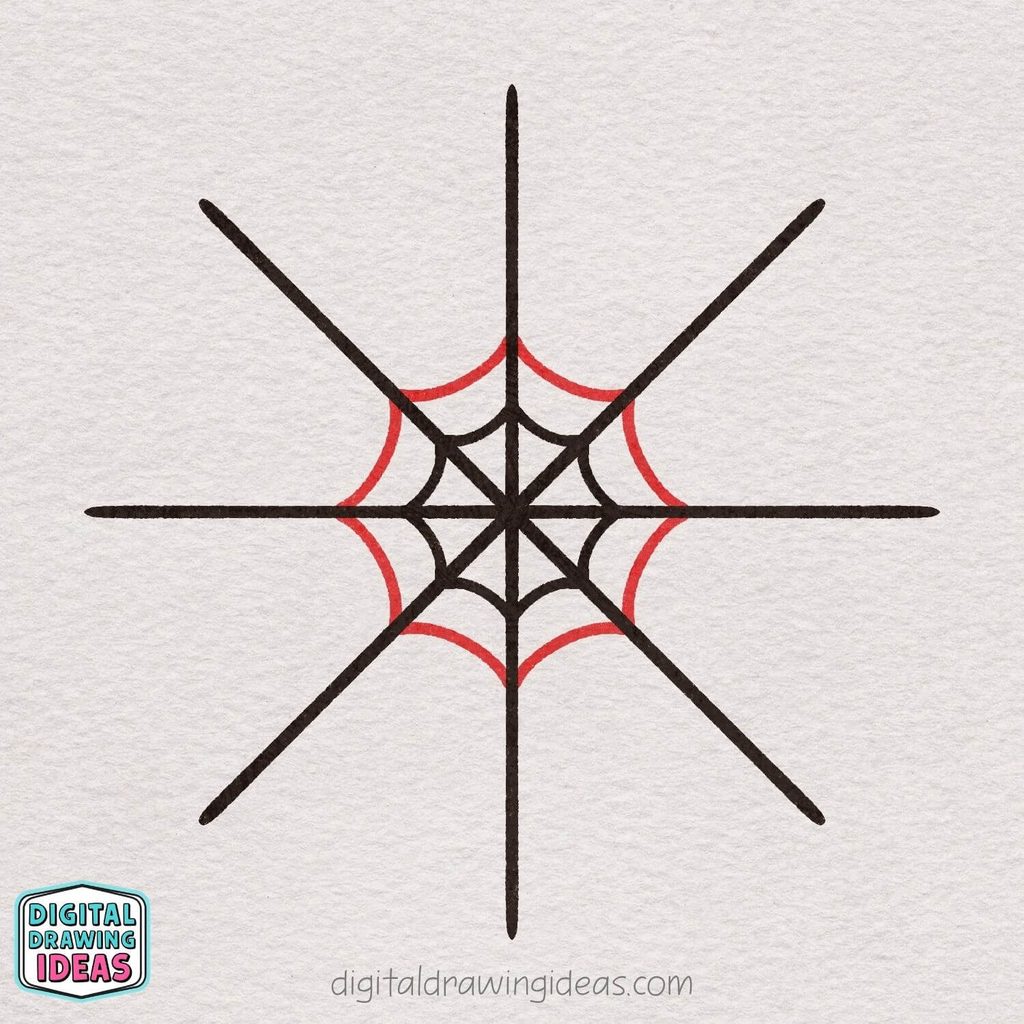
Now draw a second round of curved lines around the first one, making the web expand outward.
Connect each pair of spider web lines with a smooth curve, keeping the spacing as even as you can all the way around.
This new ring should be a little larger than the first, helping your spider web start to take on its full shape.
Step 5: Expand the Spider Web with Another Ring
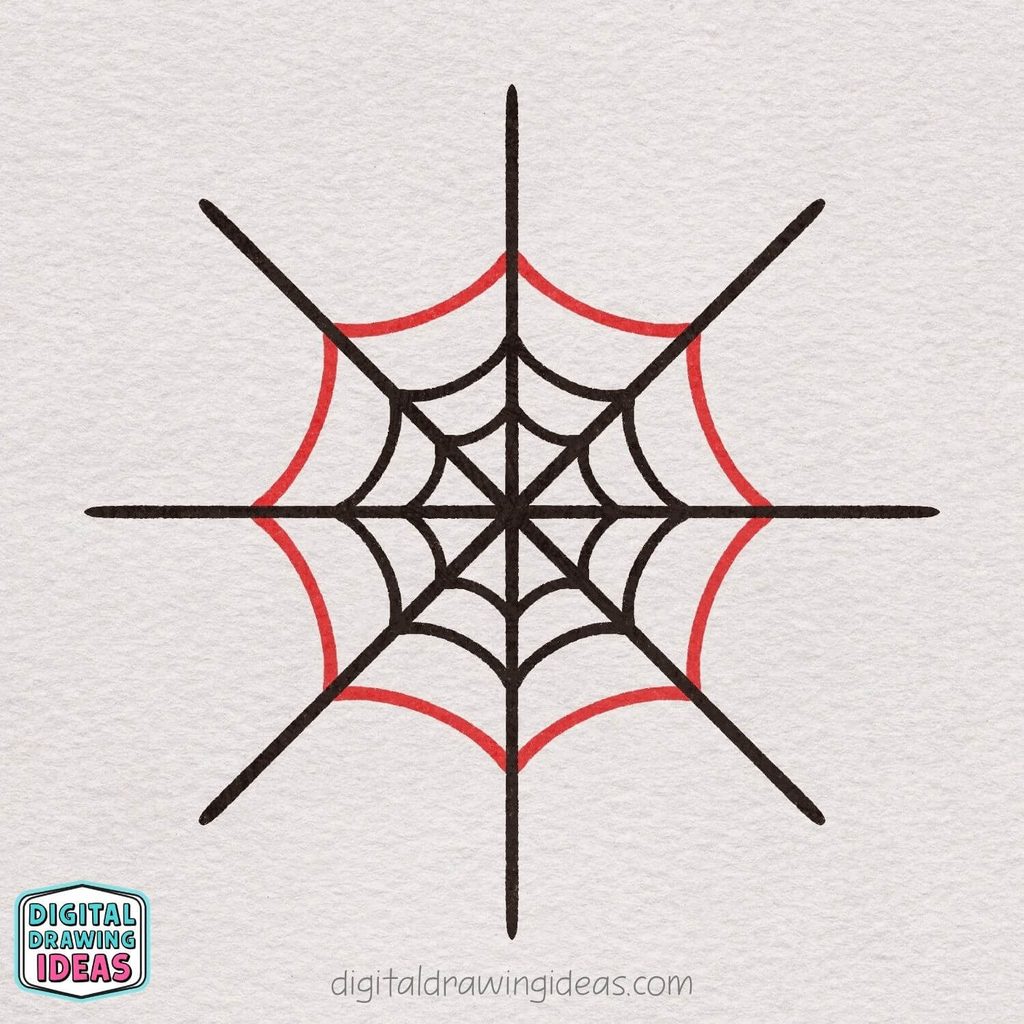
It’s time to make your spider web even bigger!
Draw another set of eight curved lines around the outside of the previous ring, connecting the main support lines as you go.
Make these curves slightly wider and deeper than the ones you drew earlier, leaving a little space between each layer.
Your spider web is really starting to come together now!
Step 6: Draw the Outer Edge of the Spider Web
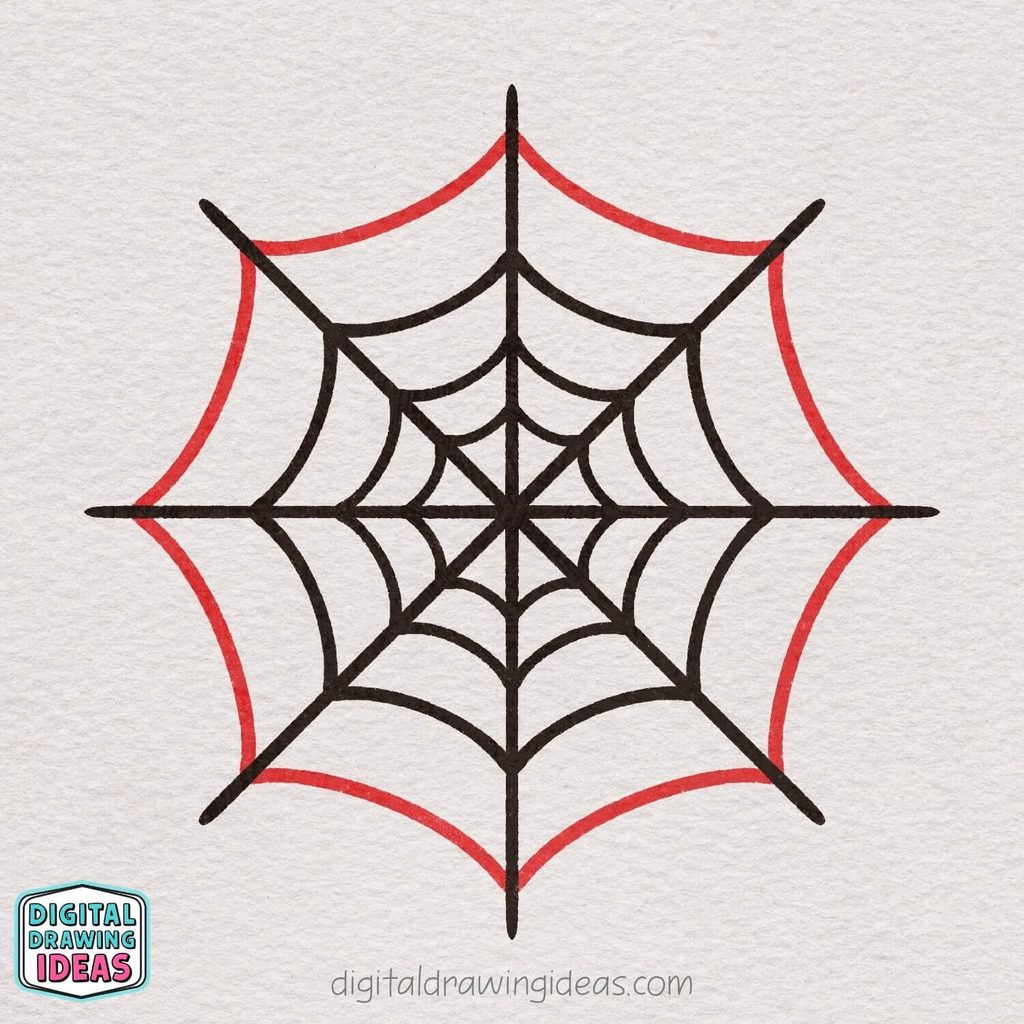
You’re almost finished!
Add one more ring of curved lines around the outside of your spider web, connecting all eight main support lines. Make these curves a little longer and wider than the previous ones, following the same gentle inward shape.
This final layer creates the outer edge of your spider web and gives it a beautiful, complete look.
Step 7: Darken the Lines and Finish Your Spider Web
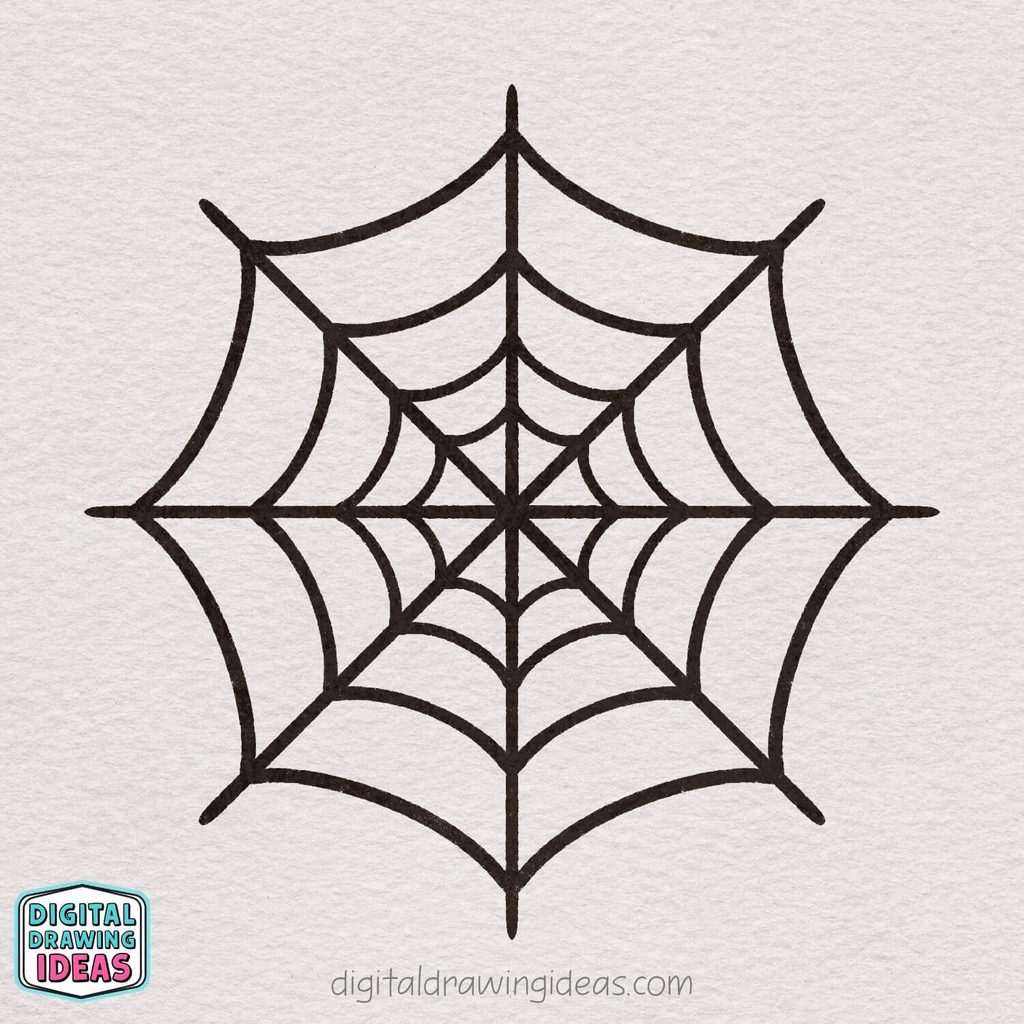
Your spider web drawing is almost complete!
Go over the lines once more with a darker pencil or black pen to make them stand out and give your web a clean, finished look.
There’s no need to color your spider web, as the simple black lines already create a beautiful design.
However, feel free to experiment with different colors or add your own creative details. The only limit is your imagination!
A Few Tips to Make Your Spider Web Look Even Better
If your first spider web looks a little uneven, don’t worry! I’ve found that drawings with repeating patterns can feel tricky in the beginning, especially when you’re trying to keep everything nicely spaced.
Here are a few simple tips that can make the process easier:
- Start with light pencil lines. This makes it much easier to correct the shape before you go over everything with a pen.
- Work from the inside out. Focus on one ring at a time instead of jumping between different sections.
- Don’t rush the curves. Try to make each curved line dip gently toward the center of the web.
- Keep the spacing fairly consistent. Your web doesn’t need to be perfectly symmetrical, but similar spacing helps create a balanced design.
- Experiment with different sizes. Once you’ve finished your first web, try drawing a tiny one in the corner of your notebook or a large one that fills an entire page.
Here’s a little trick I find helpful: if the curved lines feel difficult, lightly mark where you want each one to begin and end before connecting the points.
And remember, real spider webs aren’t always perfectly symmetrical either. A little unevenness can actually give your drawing more character!
Fun Ways to Use Your Spider Web Drawing
Now that you know how to draw a spider web, why stop at just one?
I love finding little ways to use my drawings beyond the sketchbook, especially during the fall and Halloween season. A simple spider web can become part of a much bigger creative project.
Here are a few ideas you might enjoy:
- Halloween greeting cards: Draw a small spider web in the corner and add a handwritten message.
- Bullet journal decorations: Use tiny spider webs to decorate your October journal pages.
- Spooky doodle pages: Combine several spider webs with bats, pumpkins, and little ghosts.
- DIY Halloween decorations: Cut out your finished drawing and use it to decorate a homemade Halloween display.
- Drawing practice: Try creating spider webs with different numbers of curved layers or slightly different shapes.
One of the easiest ways to make your drawing more interesting is to add a little spider hanging from the web.
If you’d like to try that, take a look at my easy spider drawing tutorial. It’s a fun companion to this spider web drawing, and the two look adorable together.
More Easy Drawing Ideas to Try Next
If you’re anything like me, finishing one drawing usually makes you want to start another. That’s probably one of my favorite things about having a sketchbook nearby. There’s always room for one more little doodle!
If you’re in the mood for more creative inspiration, here are a few tutorials I’ve put together that you might enjoy.
How to Draw a Spider – Easy Spider Drawing Tutorial
What could be a better match for your new spider web than a cute little spider? You can draw one sitting in the middle of the web or hanging from a single thread.
How to Draw a Ghost – Cute Halloween Ghost Drawing
If you’re working on a Halloween-themed drawing page, this adorable ghost is another fun addition. I especially love combining simple spooky characters with little decorative details.
How to Draw a Hedgehog – Easy Hedgehog Drawing
Not in the mood for anything spooky? Try this sweet hedgehog instead! It’s a lovely choice when you want a cute animal drawing to practice, and it fits right into a cozy fall sketchbook.
You can also find more drawing ideas and creative inspiration on my Pinterest page. And if you enjoy watching drawing tutorials, make sure to visit my Digital Drawing Ideas YouTube channel for more inspiration.
Final Thoughts: Your Spider Web Is Ready!
And there you have it! You’ve learned how to draw a spider web in seven simple steps, starting with a few straight lines and building them into a detailed web.
What I really enjoy about this particular drawing is how something so simple can look so intricate once it’s finished. Those little curved sections do most of the work, and watching the pattern grow is half the fun.
I hope this easy spider web drawing tutorial encourages you to pick up your pencil and give it a try, even if you haven’t drawn anything in a while. You don’t have to make every line perfect, and you certainly don’t need to color your web unless you want to. Your sketchbook is your own little creative space, so have fun experimenting!
Now I’d love to hear from you! Did you keep your spider web simple and classic, or did you add a spider, some color, or a few extra spooky details?
Come say hello over on Pinterest and tell me how your drawing turned out. You can also share your finished artwork on Instagram and tag @digitaldrawingideas so I can see what you’ve created.
Happy drawing, and don’t forget to save this tutorial for the next time you’re in the mood for a little creative Halloween fun!